> ## Documentation Index
> Fetch the complete documentation index at: https://docs.blinkops.com/llms.txt
> Use this file to discover all available pages before exploring further.
# Case Overview Tools
> Use the case overview toolbar for quick actions like adding notes, running workflows, and managing case data.
## The Tool Bar
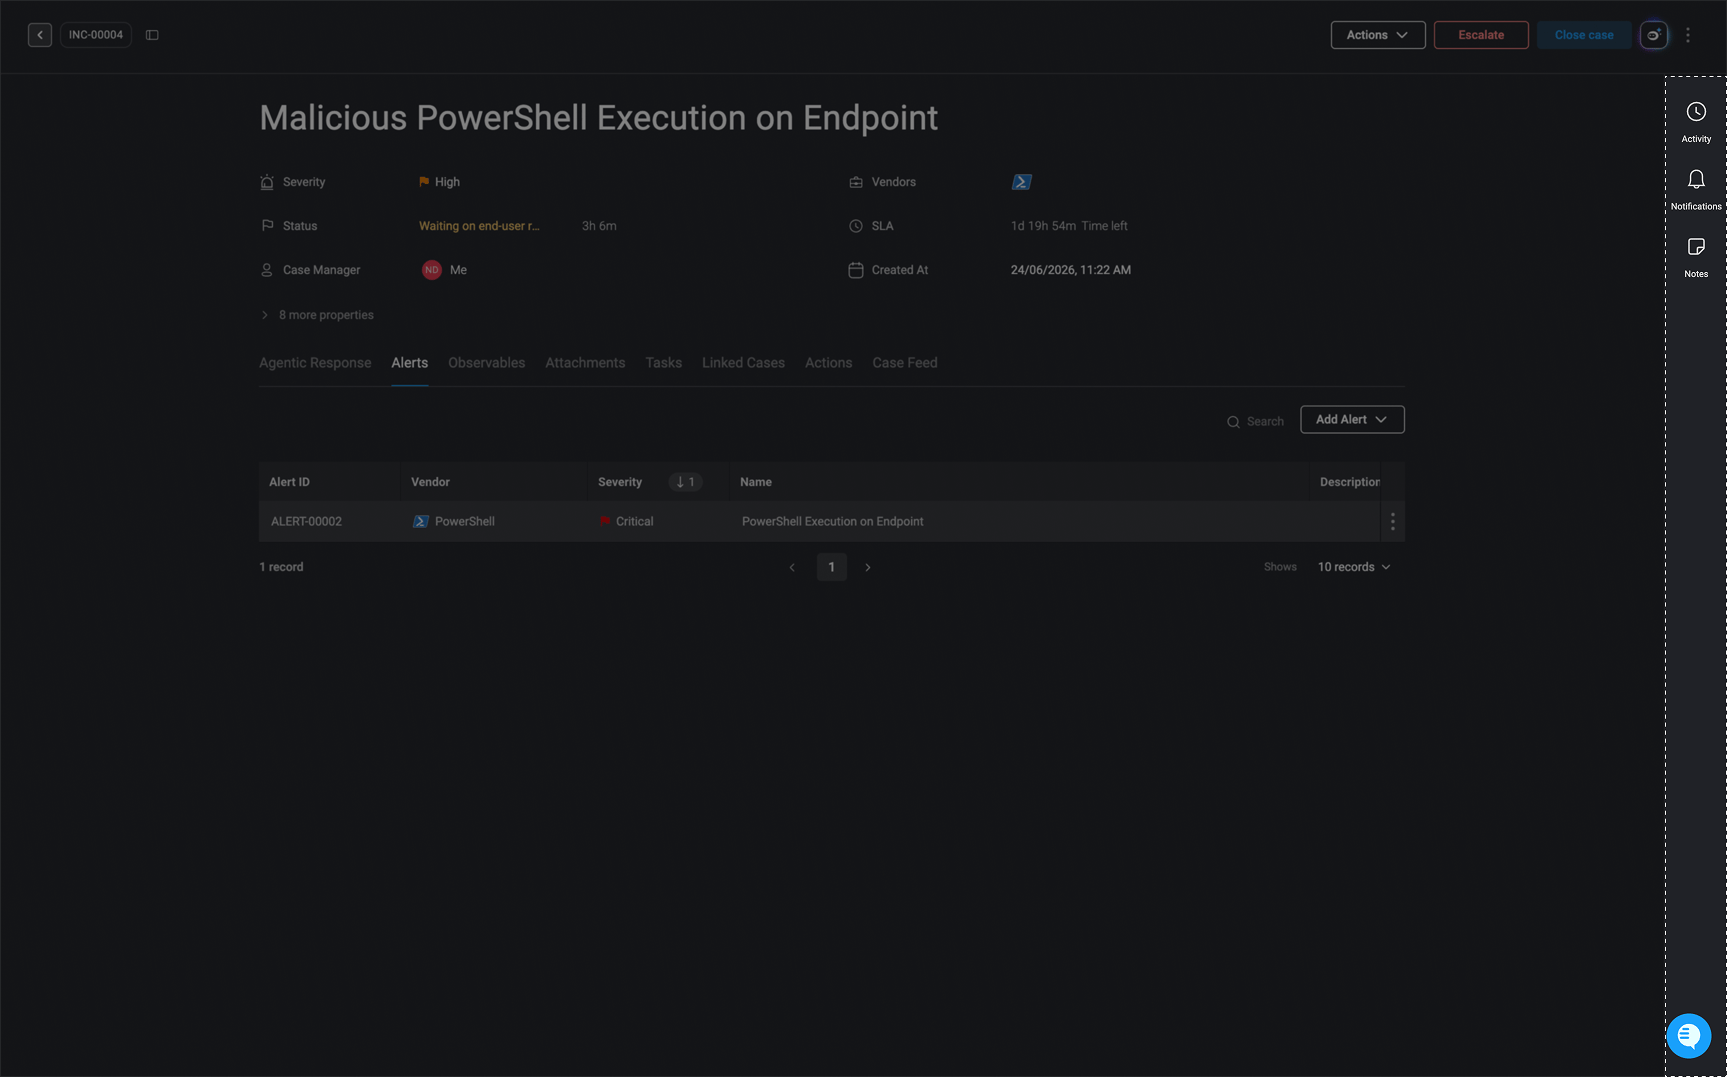
The **Tool Bar Panel** provides analysts with a centralized set of tools designed to maximize efficiency and effectiveness when managing a case. Each tool offers specific functionality to streamline investigation, documentation, and collaboration throughout the incident lifecycle.
**Note**: A blue activity indicator () appears on the tab of any tool that has had any activity- created, modified, or updated- since you last opened that tool.
 ***
### Activity
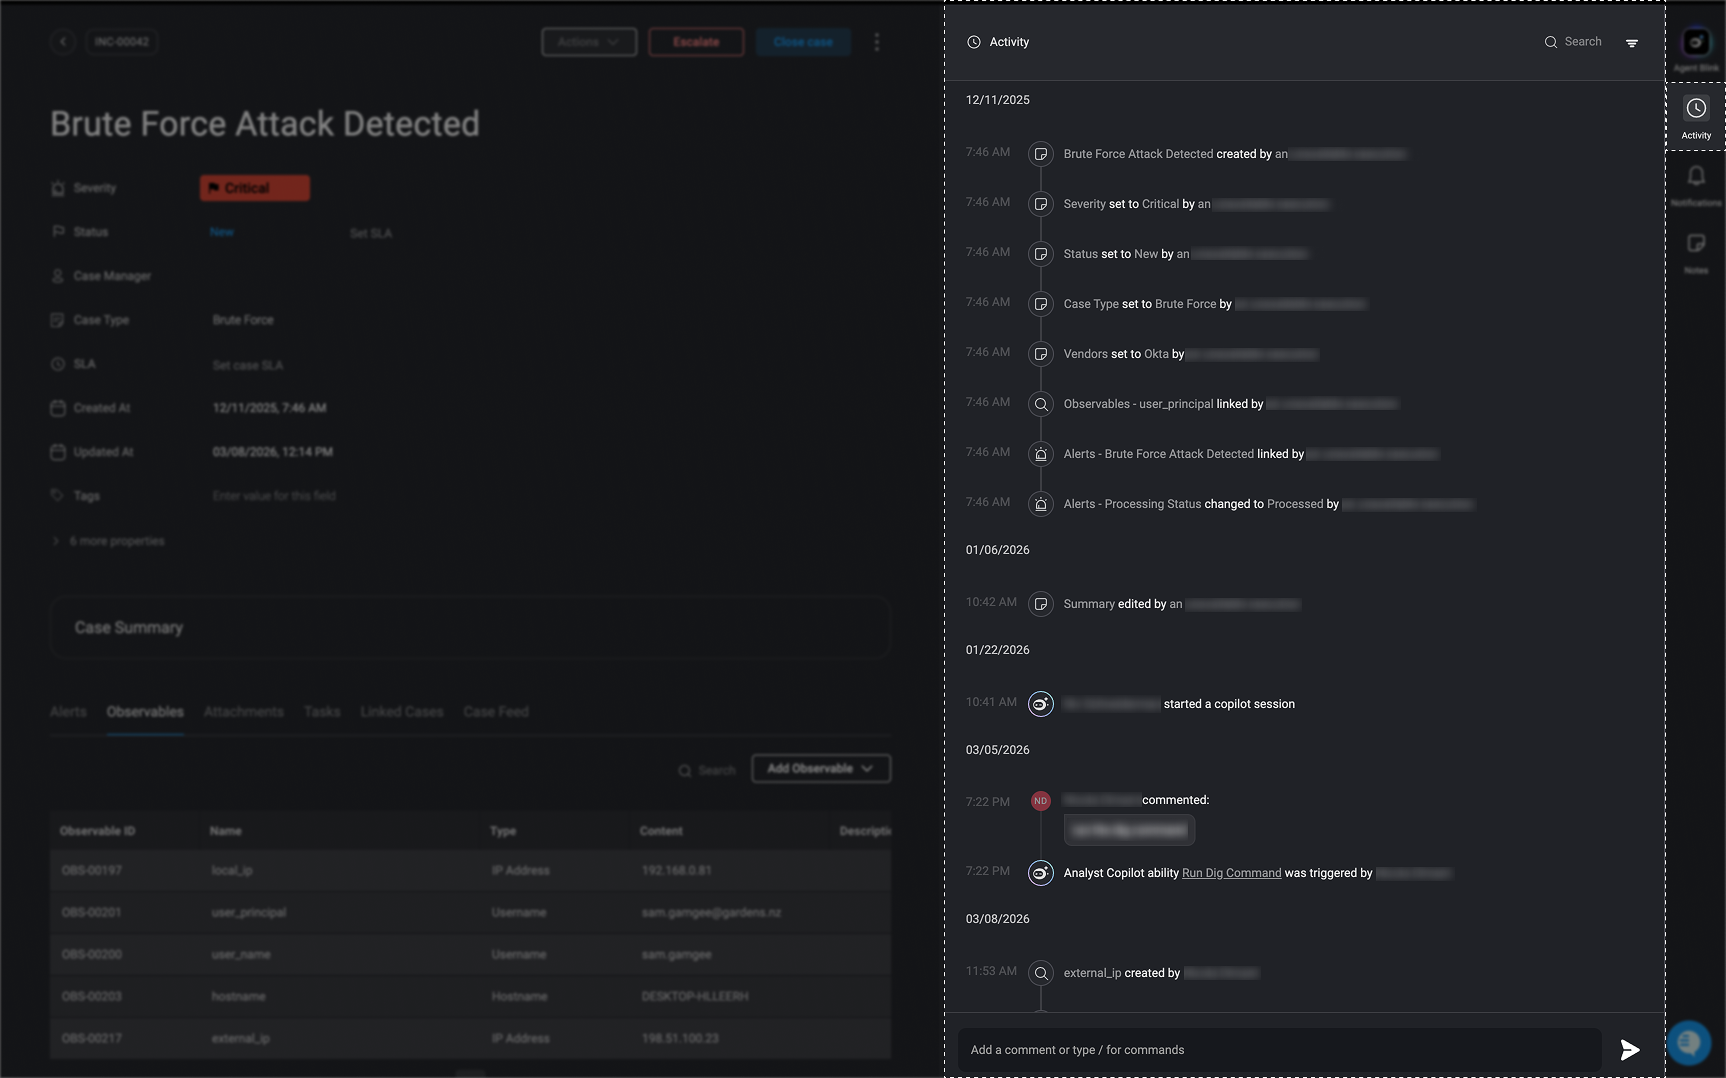
* The **activity** section provides a comprehensive history of the case, including its creation and any subsequent modifications and edits.
* To streamline your search for specific case-related details, use the **search bar** or click the icon to narrow down information based on case Details, case objects, users, or timeframes.
* You can edit any comments already posted in the timeline by hovering over the comment, clicking the icon, making your desired changes, and clicking the button
**Note**: We ensure a secure and forensically reliable case timeline, with all edits comprehensively logged.
***
### Activity
* The **activity** section provides a comprehensive history of the case, including its creation and any subsequent modifications and edits.
* To streamline your search for specific case-related details, use the **search bar** or click the icon to narrow down information based on case Details, case objects, users, or timeframes.
* You can edit any comments already posted in the timeline by hovering over the comment, clicking the icon, making your desired changes, and clicking the button
**Note**: We ensure a secure and forensically reliable case timeline, with all edits comprehensively logged.
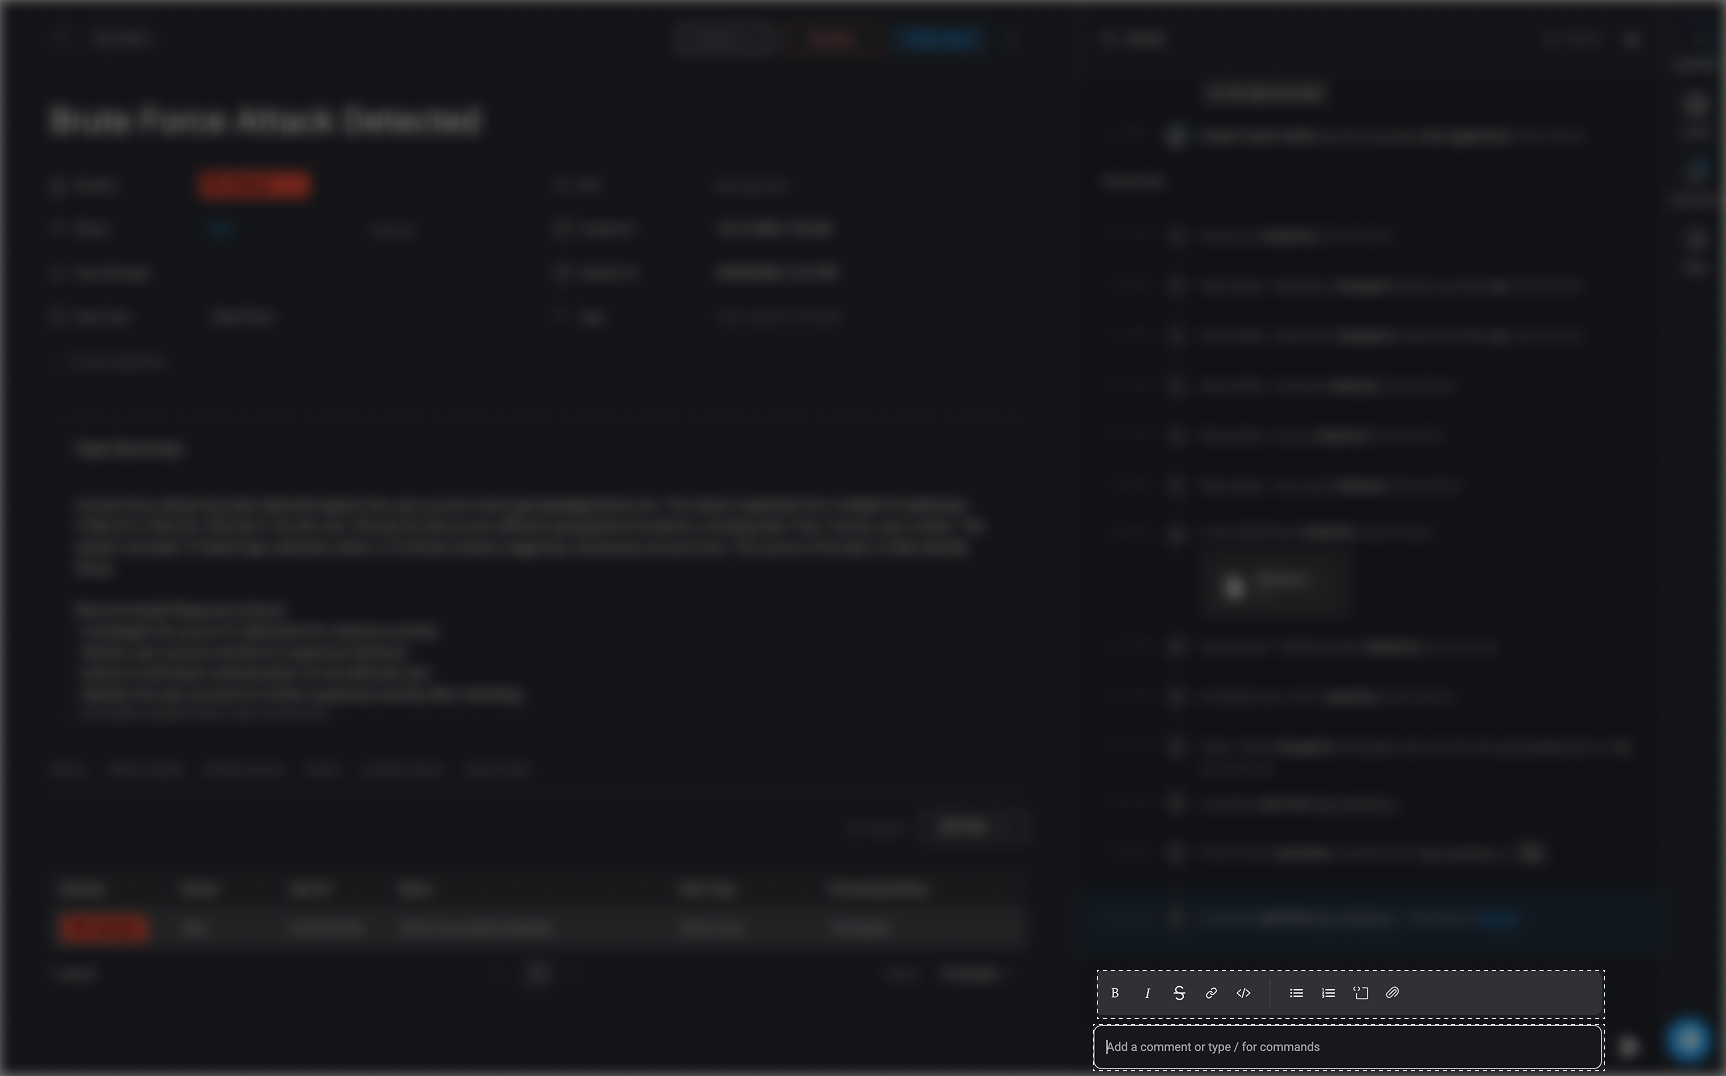
 * You can customize your comments by clicking on the text input field and selecting from various formatting options, including bold, italics, strikethrough, adding links and code formatting.
* Use the @ symbol in the text input field to tag collaborating users. Type the username after the @ symbol to filter the list.
* Use the forward slash () character in the text input field to trigger workflows on the case level or its linked entities (e.g., alerts, observables)
* You can easily attach a file in two ways:
1. **Drag and drop** the file directly into the text input field.
2. **Click on the text input field**, then select the icon to browse and choose a file.
Once attached, the file will be added to the timeline.
* You can customize your comments by clicking on the text input field and selecting from various formatting options, including bold, italics, strikethrough, adding links and code formatting.
* Use the @ symbol in the text input field to tag collaborating users. Type the username after the @ symbol to filter the list.
* Use the forward slash () character in the text input field to trigger workflows on the case level or its linked entities (e.g., alerts, observables)
* You can easily attach a file in two ways:
1. **Drag and drop** the file directly into the text input field.
2. **Click on the text input field**, then select the icon to browse and choose a file.
Once attached, the file will be added to the timeline.
 ***
### Notifications
***
### Notifications
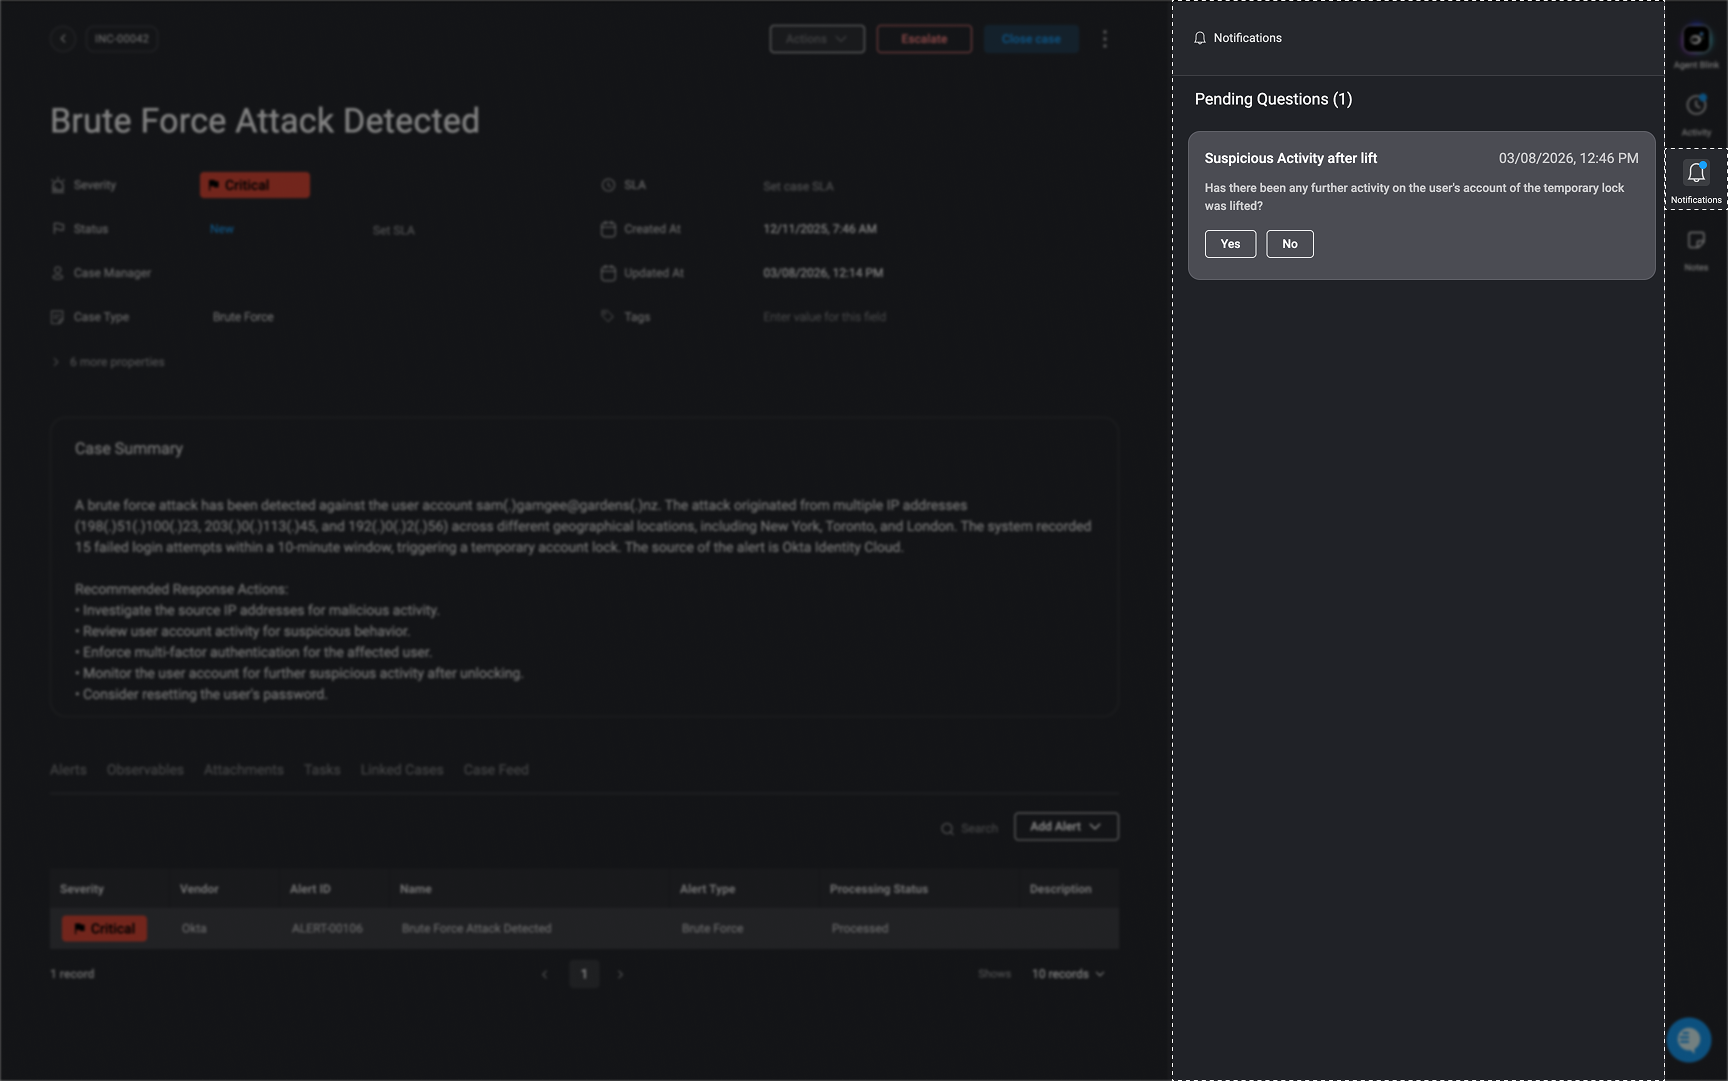
In notification section, you can view all questions asked on the Case through the [Ask a Question on a Case](/docs/case-management/case-management-workflow-actions/case-actions#ask-a-question-on-a-case) action. You will also see a notification in the Case Timeline whenever new questions are available.
Analysts can respond directly from this view. Each answer is automatically added to the Case Timeline, and once submitted, the related [Ask a Question on a Case](/docs/case-management/case-management-workflow-actions/case-actions#ask-a-question-on-a-case) action resumes, allowing the workflow to continue seamlessly.
 ***
### Notes
**Note**: When using `HTML` in the [rich text editor](/docs/blink-platform/interface-components/rich-text-editor), only elements supported by the [rich text editor](/docs/blink-platform/interface-components/rich-text-editor) will be rendered. Any unsupported `HTML` may not be displayed as expected.
As you create or edit any notes, your changes will be saved automatically.
***
### Notes
**Note**: When using `HTML` in the [rich text editor](/docs/blink-platform/interface-components/rich-text-editor), only elements supported by the [rich text editor](/docs/blink-platform/interface-components/rich-text-editor) will be rendered. Any unsupported `HTML` may not be displayed as expected.
As you create or edit any notes, your changes will be saved automatically.
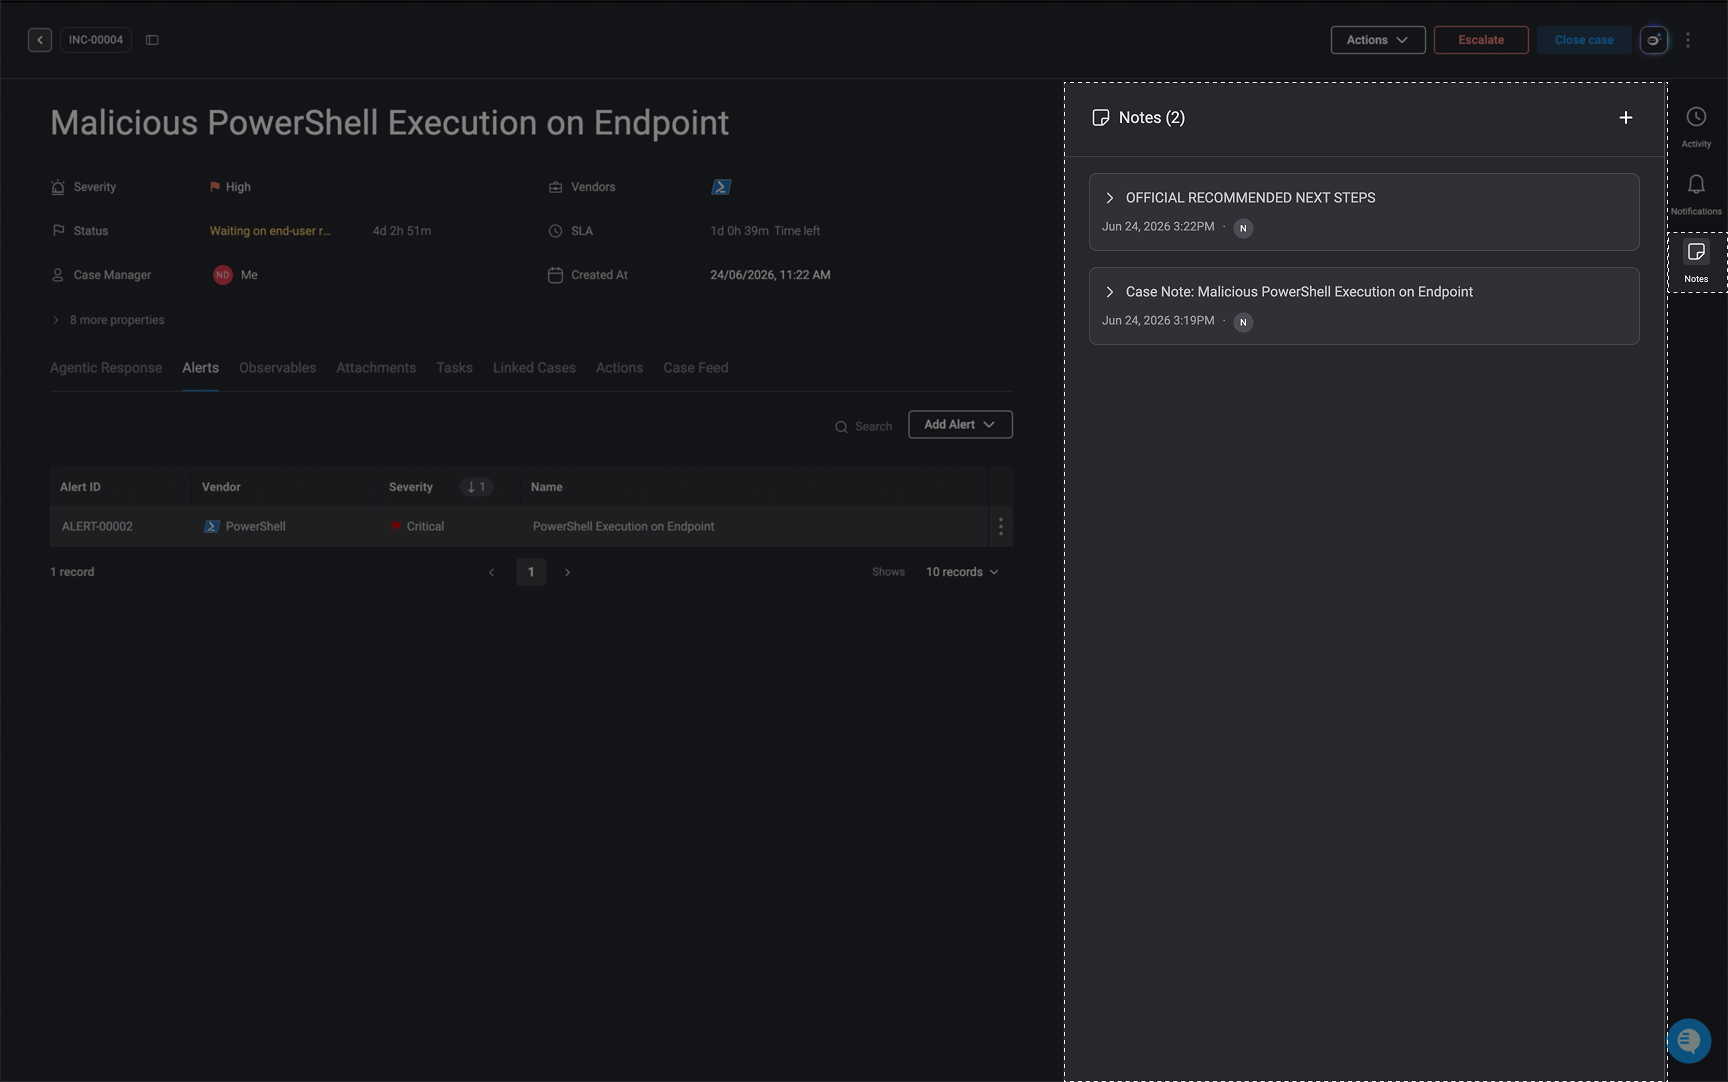
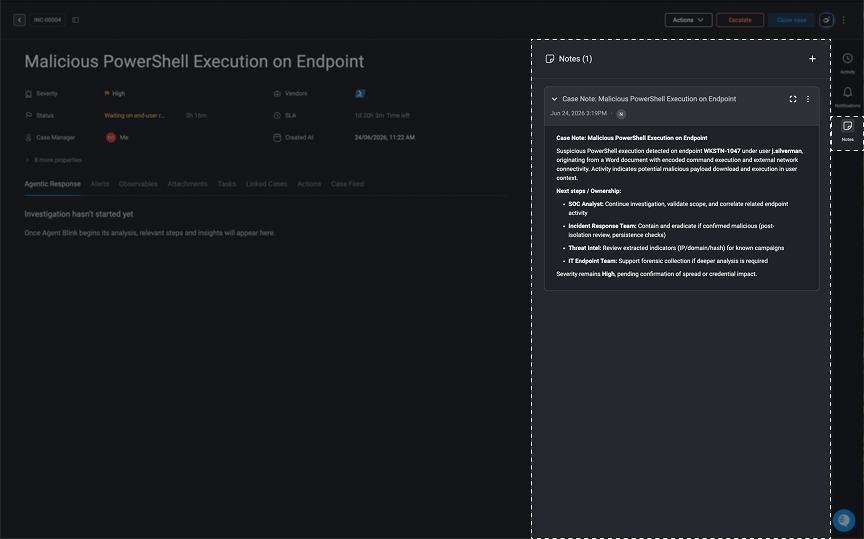 * Create one or multiple notes to document the incident investigation and capture analyst insights related to the case.
* In the top-right corner of the Notes tool:
* Click the in the top-right corner to add a new note. Content can be customized and formatted using the [rich text editor](/docs/blink-platform/interface-components/rich-text-editor) (e.g., **bold**, *italics*, ~~strikethrough~~, underline, etc.).
* Click the to expand or collapse the note
* Click the to expand the Notes tool to full screen for improved visibility.
* Drag and drop or paste images directly into the Notes section for quick uploads. Once added, images can be resized and repositioned as needed.
Any changes or updates made to the selected note is saved automatically
* Create one or multiple notes to document the incident investigation and capture analyst insights related to the case.
* In the top-right corner of the Notes tool:
* Click the in the top-right corner to add a new note. Content can be customized and formatted using the [rich text editor](/docs/blink-platform/interface-components/rich-text-editor) (e.g., **bold**, *italics*, ~~strikethrough~~, underline, etc.).
* Click the to expand or collapse the note
* Click the to expand the Notes tool to full screen for improved visibility.
* Drag and drop or paste images directly into the Notes section for quick uploads. Once added, images can be resized and repositioned as needed.
Any changes or updates made to the selected note is saved automatically
 #### Notes Settings
* Click the menu to access note settings, where you can:
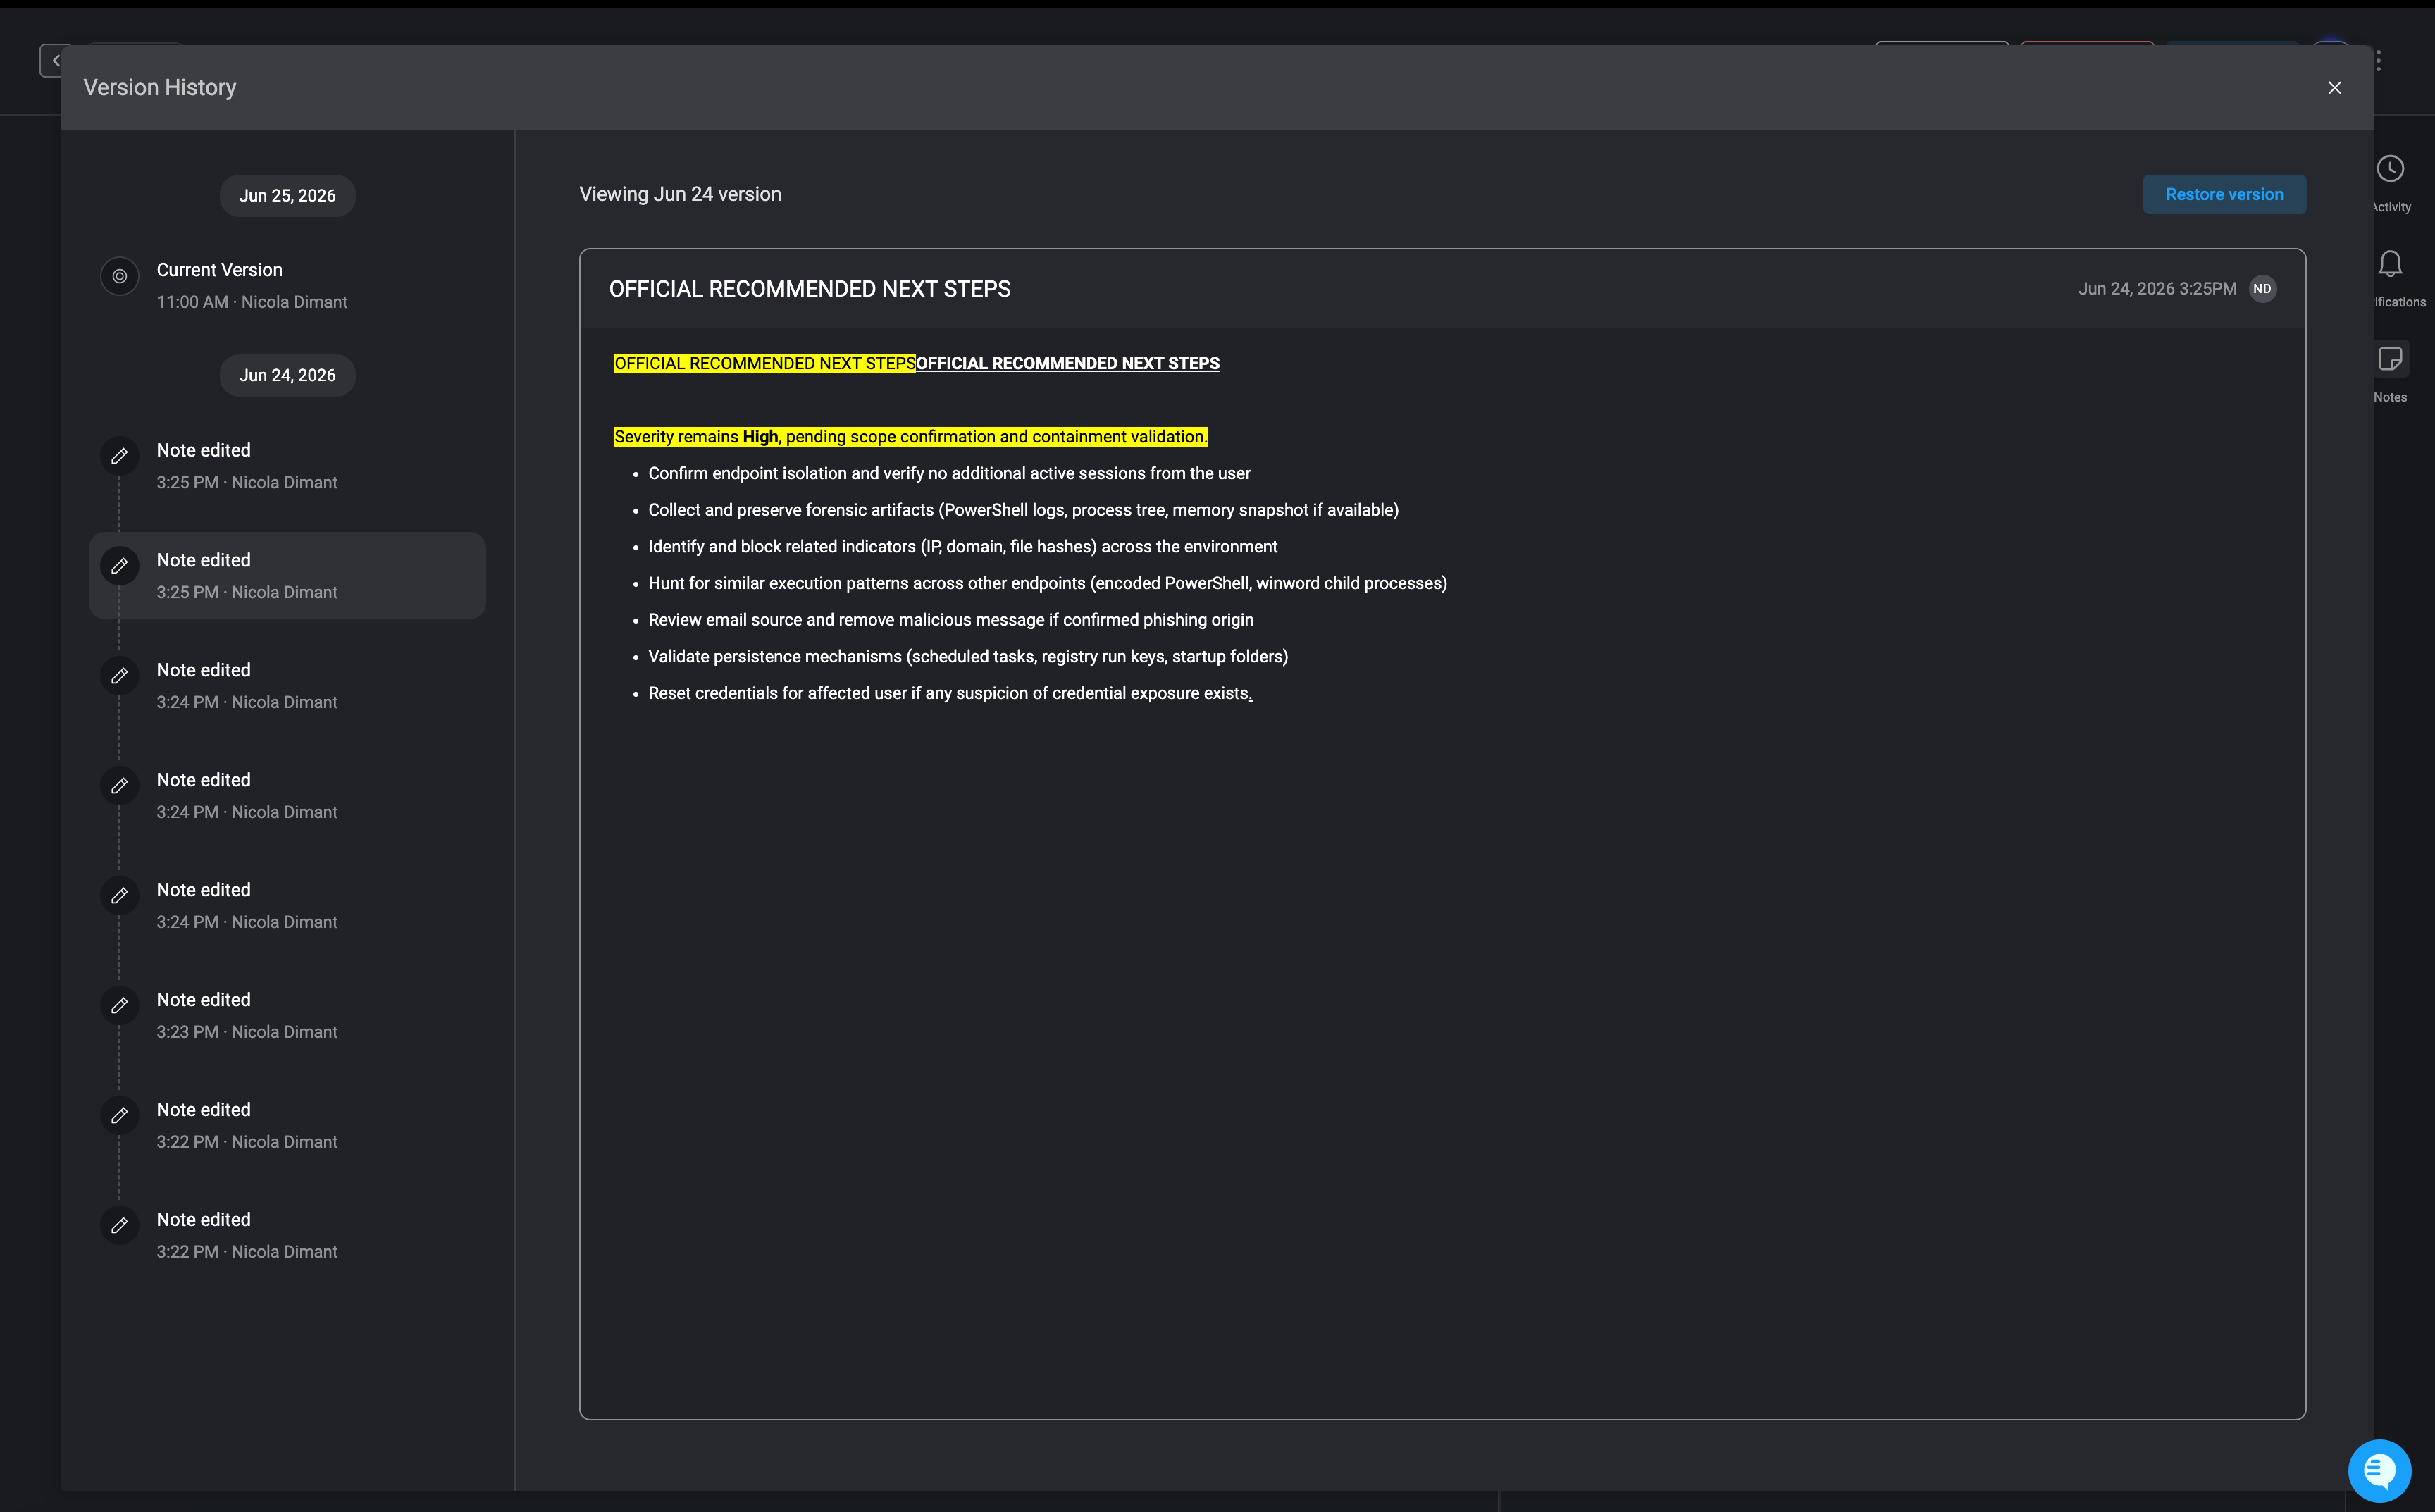
1. **Version History** – View the selected note’s version history and compare changes across versions.
* **Yellow** – Highlights content that was added and changed in the selected version.
* To restore a previous version, click 'Restore Version' in the upper-right corner of the selected notes version history.
#### Notes Settings
* Click the menu to access note settings, where you can:
1. **Version History** – View the selected note’s version history and compare changes across versions.
* **Yellow** – Highlights content that was added and changed in the selected version.
* To restore a previous version, click 'Restore Version' in the upper-right corner of the selected notes version history.
 2. **Delete**- Deletes the note permanently.
***
2. **Delete**- Deletes the note permanently.
***