> ## Documentation Index
> Fetch the complete documentation index at: https://docs.blinkops.com/llms.txt
> Use this file to discover all available pages before exploring further.
# Gmail
> Gmail, developed by Google, is a popular and versatile email service that allows users to send, receive, and manage their emails effortlessly. It provides users with a generous amount of free storage, powerful spam filtering, intuitive organization features, and seamless integration with other Google services.
## Creating a Gmail connection
Create the connection by using one of the following methods:
* [OAuth](#using-oauth)
* [Service Account](#using-service-account)
**Ensure the relevant APIs from the following list are enabled:**
* [Gmail API](https://console.cloud.google.com/apis/api/gmail.googleapis.com)
### Using OAuth
1. In the Blink platform, navigate to the **Connections** page > **Add connection**. A New Connection dialog box opens displaying icons of external service providers available.
2. Select the **Gmail** icon. A dialog box with name of the connection and connection methods appear.
3. (Optional) Edit the name of the connection. At a later stage you cannot edit the name.
4. Click **Gmail** to authenticate using OAuth.
5. Sign in using your credentials.
### Using service account
#### Creating a service account
This step is only necessary if you don't already have a service account.
1. In the Google Cloud console, go to the [Create service account page](https://console.cloud.google.com/iam-admin/serviceaccounts/create).
2. Enter a name in the **Service account name** field.
* (optional) Edit the service account ID.
* (optional) If you want to grant the service account access to the project, or to grant users access to this service account, click on **Create and continue**. This is not required for the integration with Blink.
3. Click **Done** to finish creating the service account.
#### Create a service account key
1. In the Google Cloud console, go to the [service account page](https://console.cloud.google.com/iam-admin/serviceaccounts).
2. Select the service account that you want to create a key for.
3. Click the **Keys** tab.
4. From the dropdown menu, select **Add key** > **Create new key**.
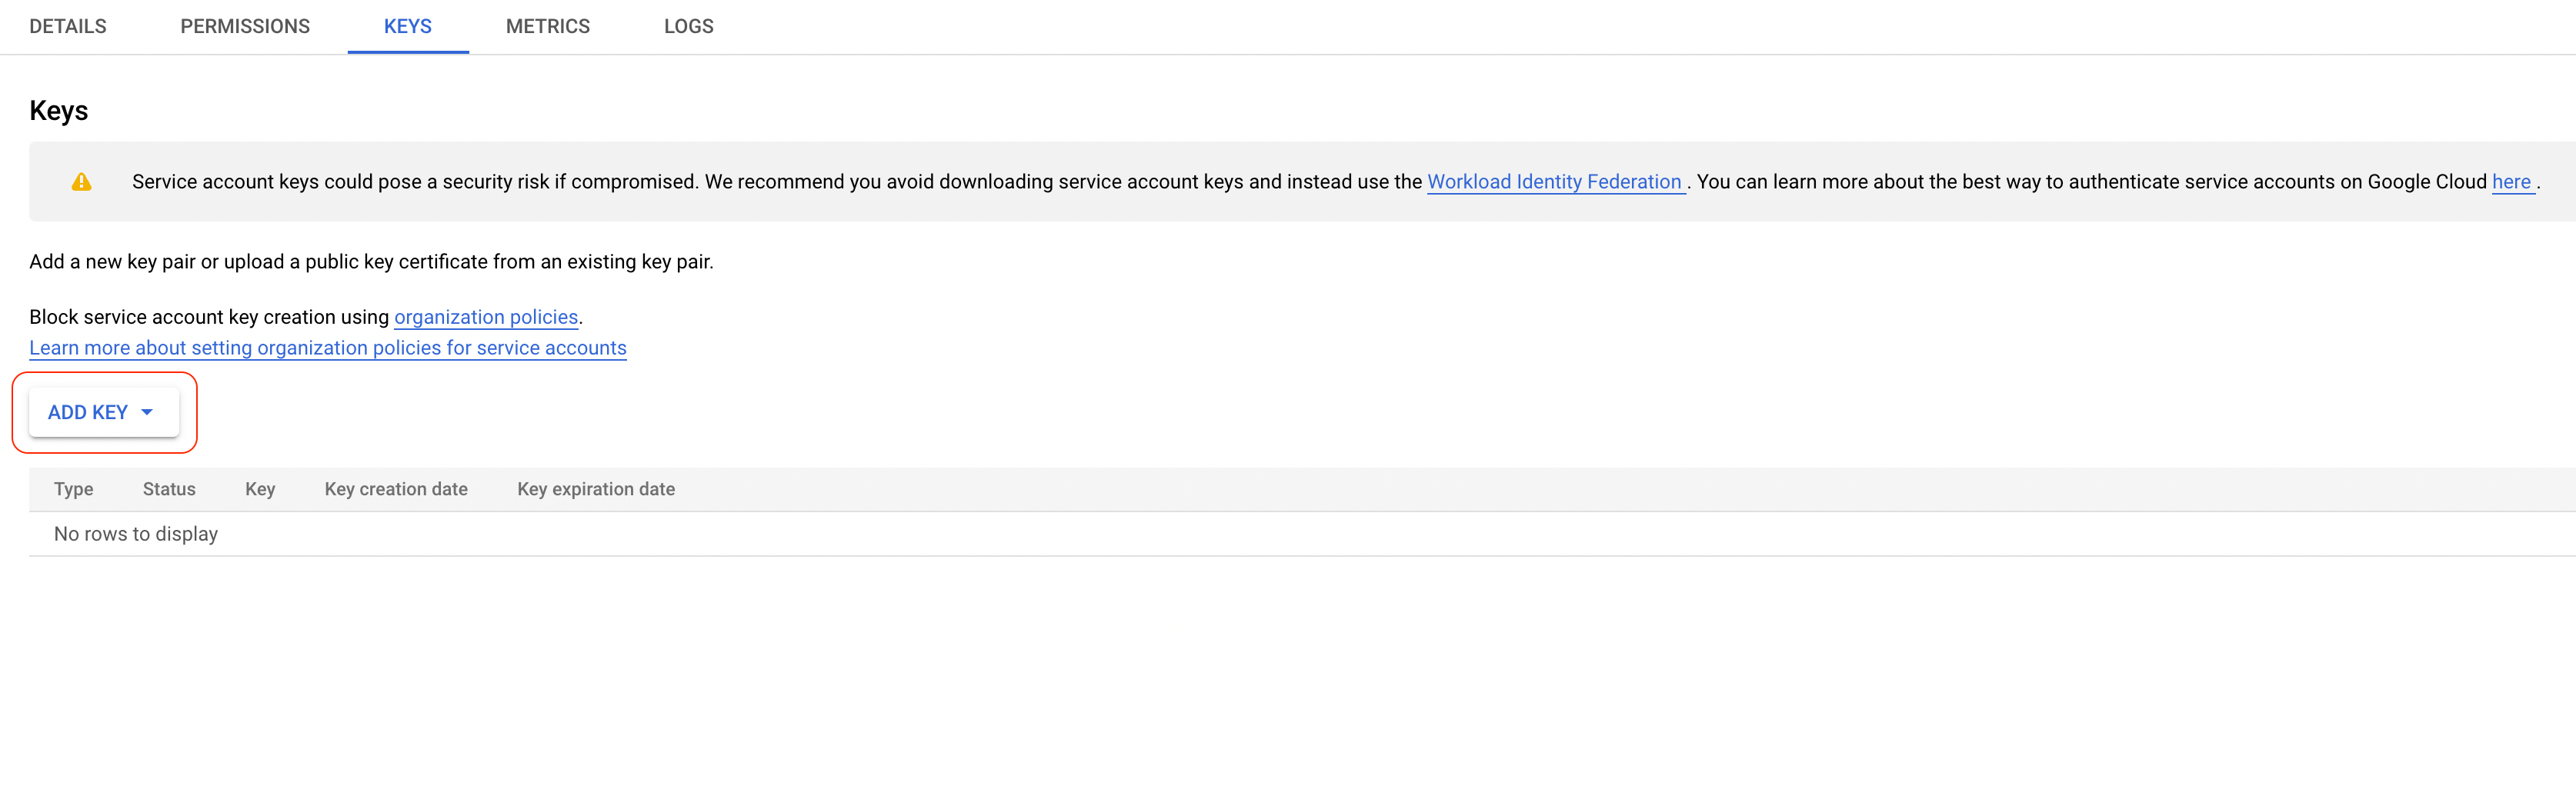 5. Select *JSON* as the key type and click **Create**.
6. Copy the key.
#### Enable service account delegation in your Google Workspace
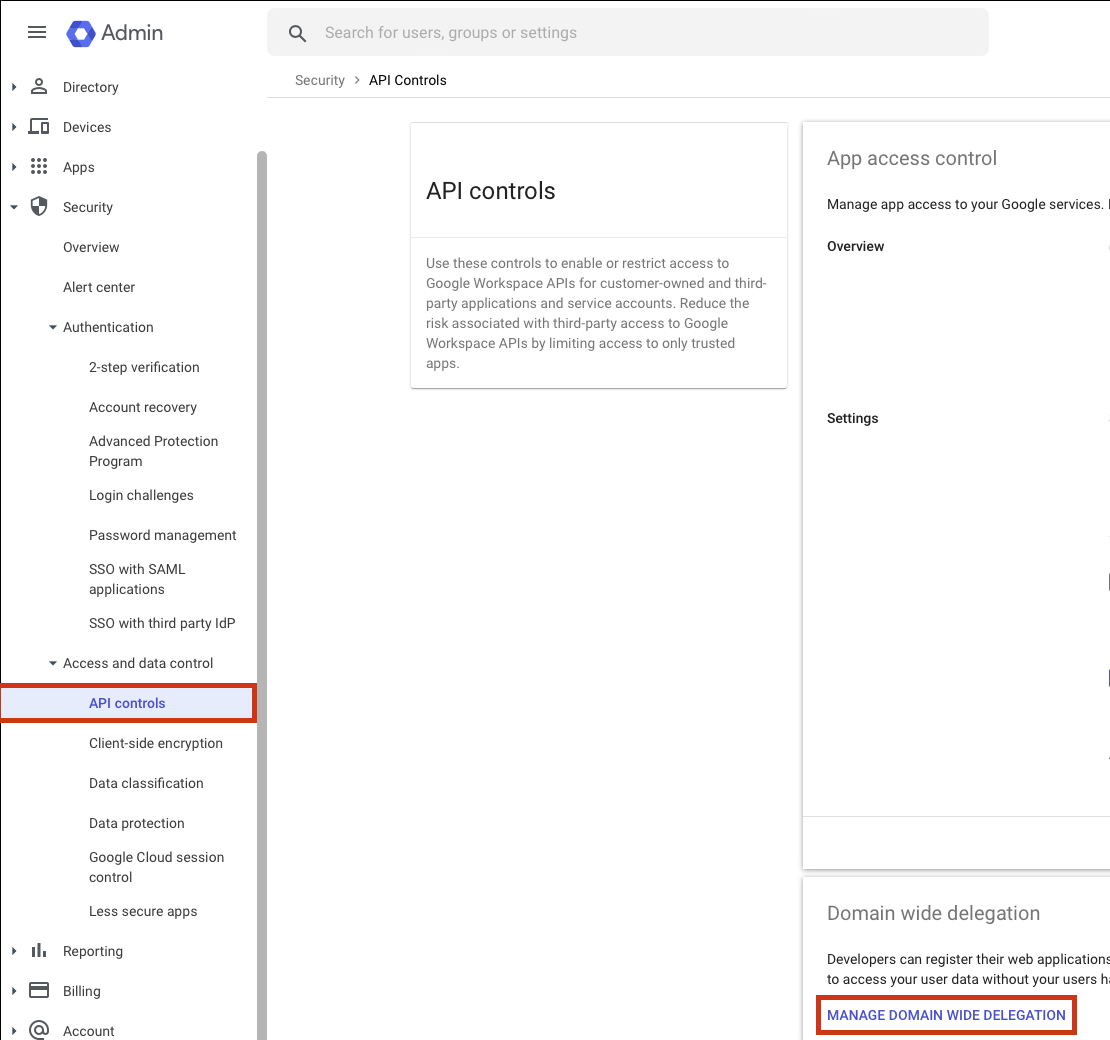
1. In the Google Admin console, go to the [API controls page](https://admin.google.com/u/3/ac/owl) and then click on **Manage domain wide delegation**.
2. Add a new client to your workspace. In **Client ID**, use the client ID from the downloaded JSON service account from the previous step.
5. Select *JSON* as the key type and click **Create**.
6. Copy the key.
#### Enable service account delegation in your Google Workspace
1. In the Google Admin console, go to the [API controls page](https://admin.google.com/u/3/ac/owl) and then click on **Manage domain wide delegation**.
2. Add a new client to your workspace. In **Client ID**, use the client ID from the downloaded JSON service account from the previous step.
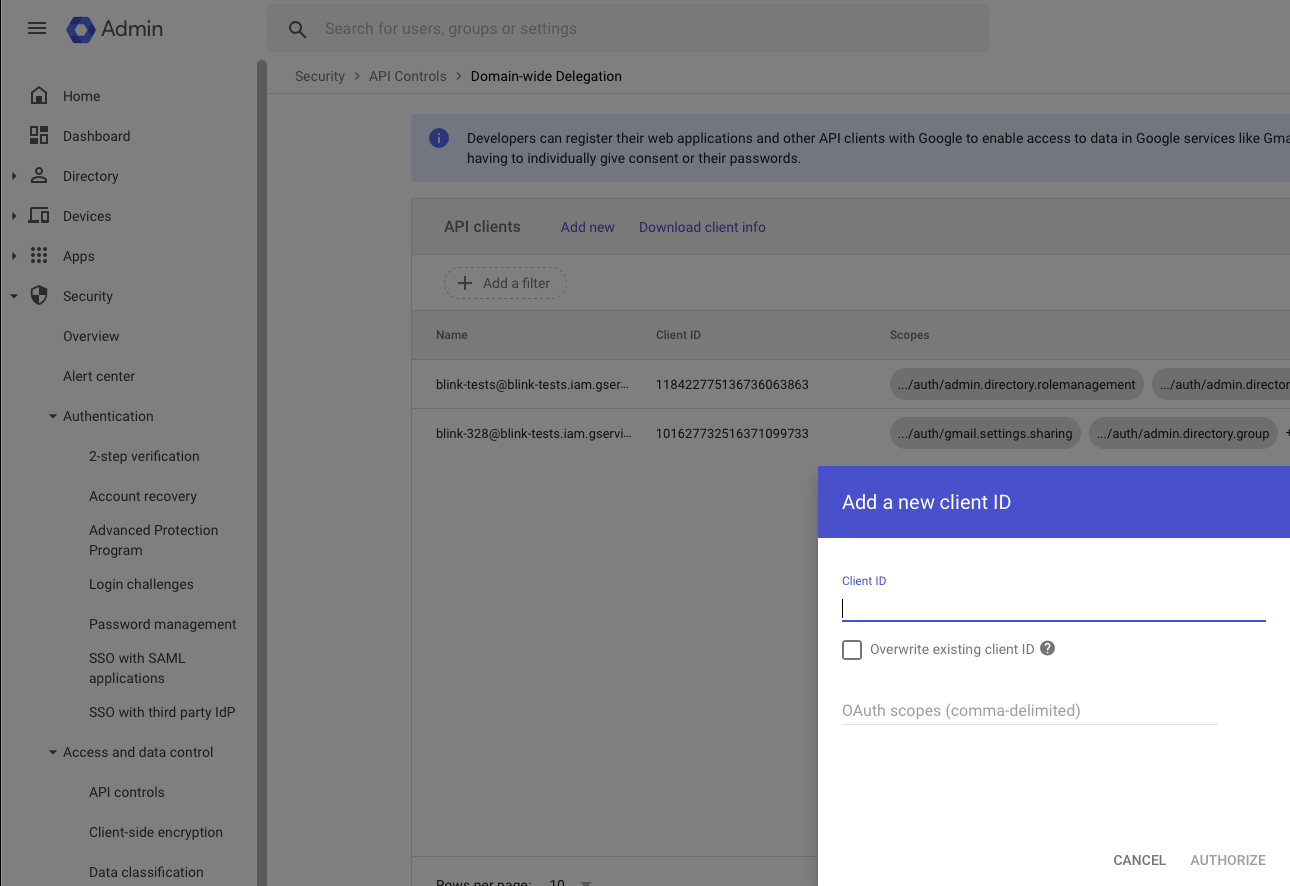 3. Add the following scopes:
```
https://mail.google.com,
https://www.googleapis.com/auth/gmail.settings.basic
```
**Note #1**
You can adjust the scopes according to your requirements.
**Note #2**
It usually takes a few minutes for impersonation access to be granted after the client ID was added.
3. Add the following scopes:
```
https://mail.google.com,
https://www.googleapis.com/auth/gmail.settings.basic
```
**Note #1**
You can adjust the scopes according to your requirements.
**Note #2**
It usually takes a few minutes for impersonation access to be granted after the client ID was added.
 ### Interactive Tutorial Guides
You can also refer to the following tutorial guides for a more in-depth understanding of how to create a Gmail connection.
[Creating a Gmail Connection](https://demo.arcade.software/wonbnWVjGuvSmDAAw9W7?embed\&show_copy_link=true)
[Creating a Gmail Connection in Blink Ops](https://demo.arcade.software/9RhI5jieOQlq6pP1cIk9?embed\&show_copy_link=true)
### Interactive Tutorial Guides
You can also refer to the following tutorial guides for a more in-depth understanding of how to create a Gmail connection.
[Creating a Gmail Connection](https://demo.arcade.software/wonbnWVjGuvSmDAAw9W7?embed\&show_copy_link=true)
[Creating a Gmail Connection in Blink Ops](https://demo.arcade.software/9RhI5jieOQlq6pP1cIk9?embed\&show_copy_link=true)