> ## Documentation Index
> Fetch the complete documentation index at: https://docs.blinkops.com/llms.txt
> Use this file to discover all available pages before exploring further.
# About Actions
> Overview of action types available in Blink workflows, including basic, advanced, and utility actions.
An Action is a built-in feature on the Blink platform. It is the functional element of a step. Actions enable you to perform operations on remote systems. To execute an action successfully, you need to provide the required input parameters for the chosen action. A connection needs to be selected or created to enable communication with the external system. For some actions a connection is not necessary. After an action is executed, the step's output will be presented in the most suitable format. (Raw text, JSON, or in a table.) A Step's output can be used as input in following steps using the [variable picker](/docs/workflows/building-workflows/dynamic-variables/variable-picker) or Blink's [expression language](/docs/workflows/building-workflows/dynamic-variables/expression-language/workflow-engine-variables).
***
## Action Types
Send HTTP requests and interact with thousands of APIs using prebuilt HTTP Actions.
Manage the execution flow of your Workflows with conditions, loops, waits, and more.
A SQL layer for running queries to get visibility into your cloud infrastructure and SaaS applications.
Connection:
Custom Actions allow you to create reusable actions tailored to your specific needs by combining existing actions into a single unit.
Send questions, approvals, custom messages or notifications via Slack, Email, Google Chat, Microsoft Teams and Zoom.
Handle files, manage data structures like tables and JSON, and perform supporting actions.
***
## Custom Actions
Custom Actions are reusable, user-defined actions that you can create from any existing action or subflow in a workflow. They allow you to package commonly used logic into a single, configurable unit that behaves just like a built-in action. Once saved, a custom action can be easily reused across multiple workflows, helping teams standardize processes, reduce duplication, and accelerate automation development.
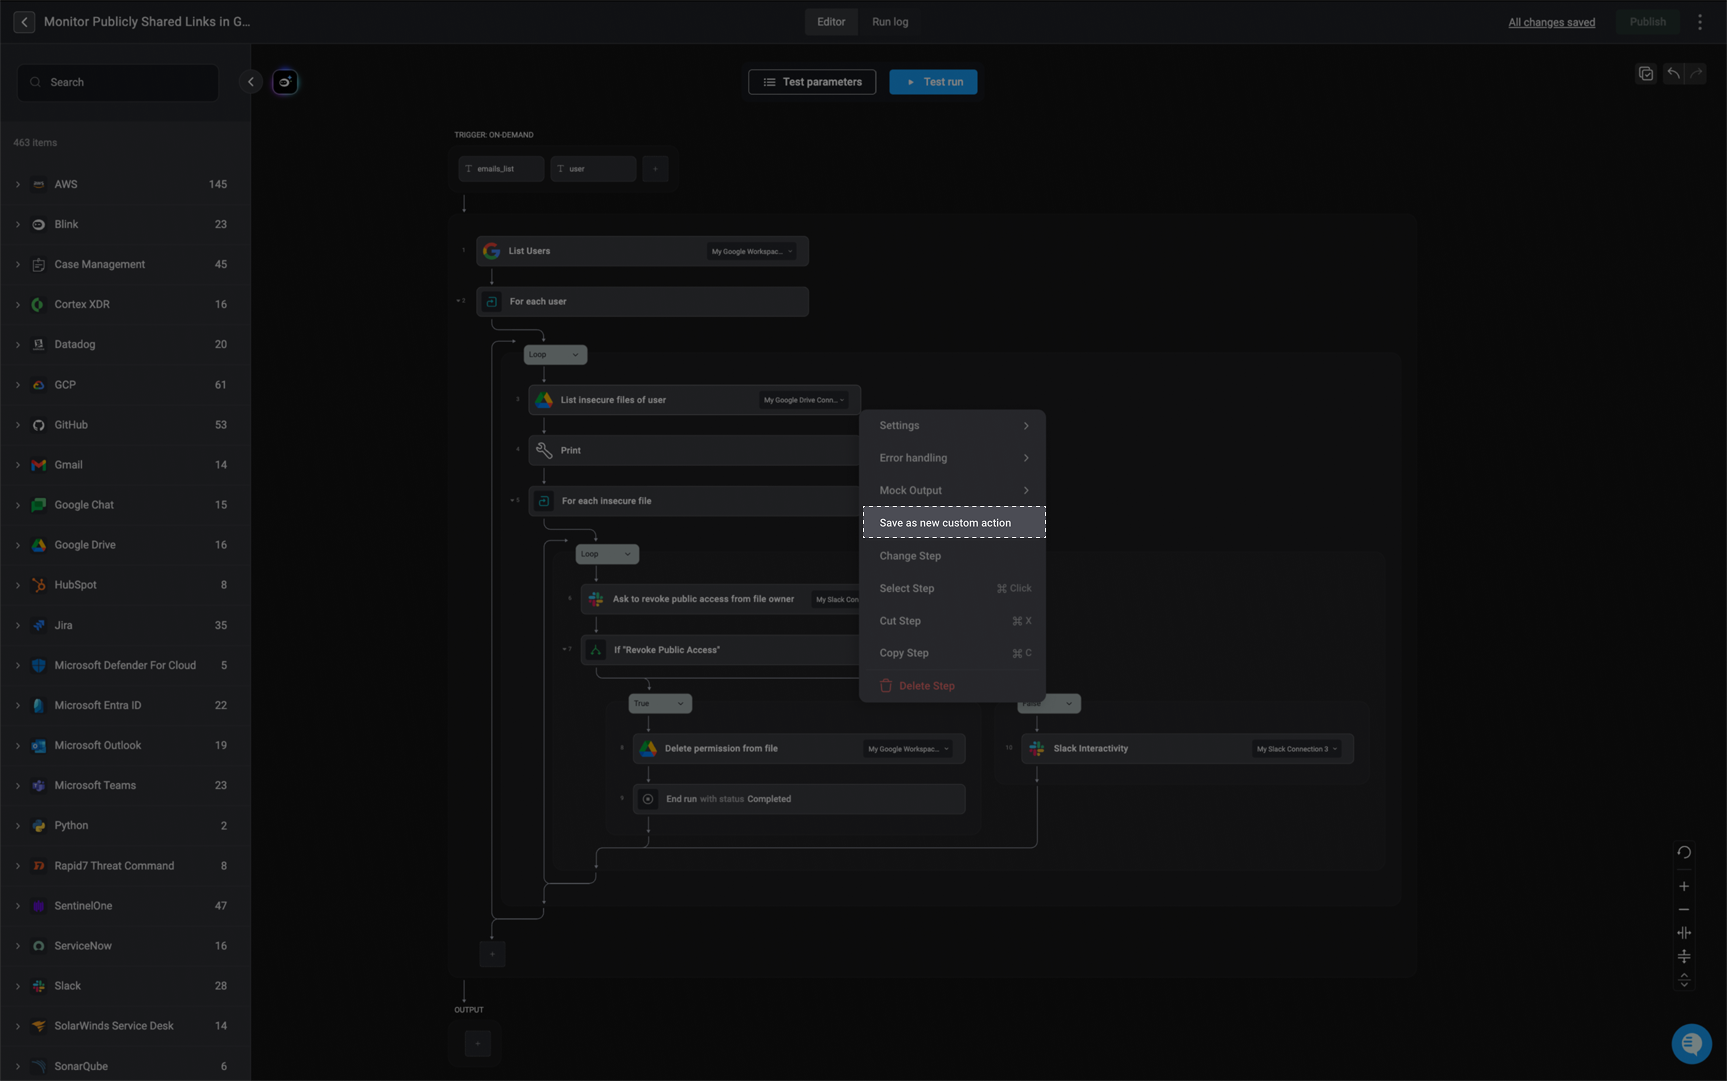
[Flow Control](/docs/workflows/building-workflows/actions/flow-control-actions) actions cannot be made into a custom action
On the right-hand side of the action or subflow you want to make a custom action, click and select 'Save as new custom action'.
To view all the available action's settings, navigate to the documentation [here](/docs/workflows/building-workflows/steps#step-settings)
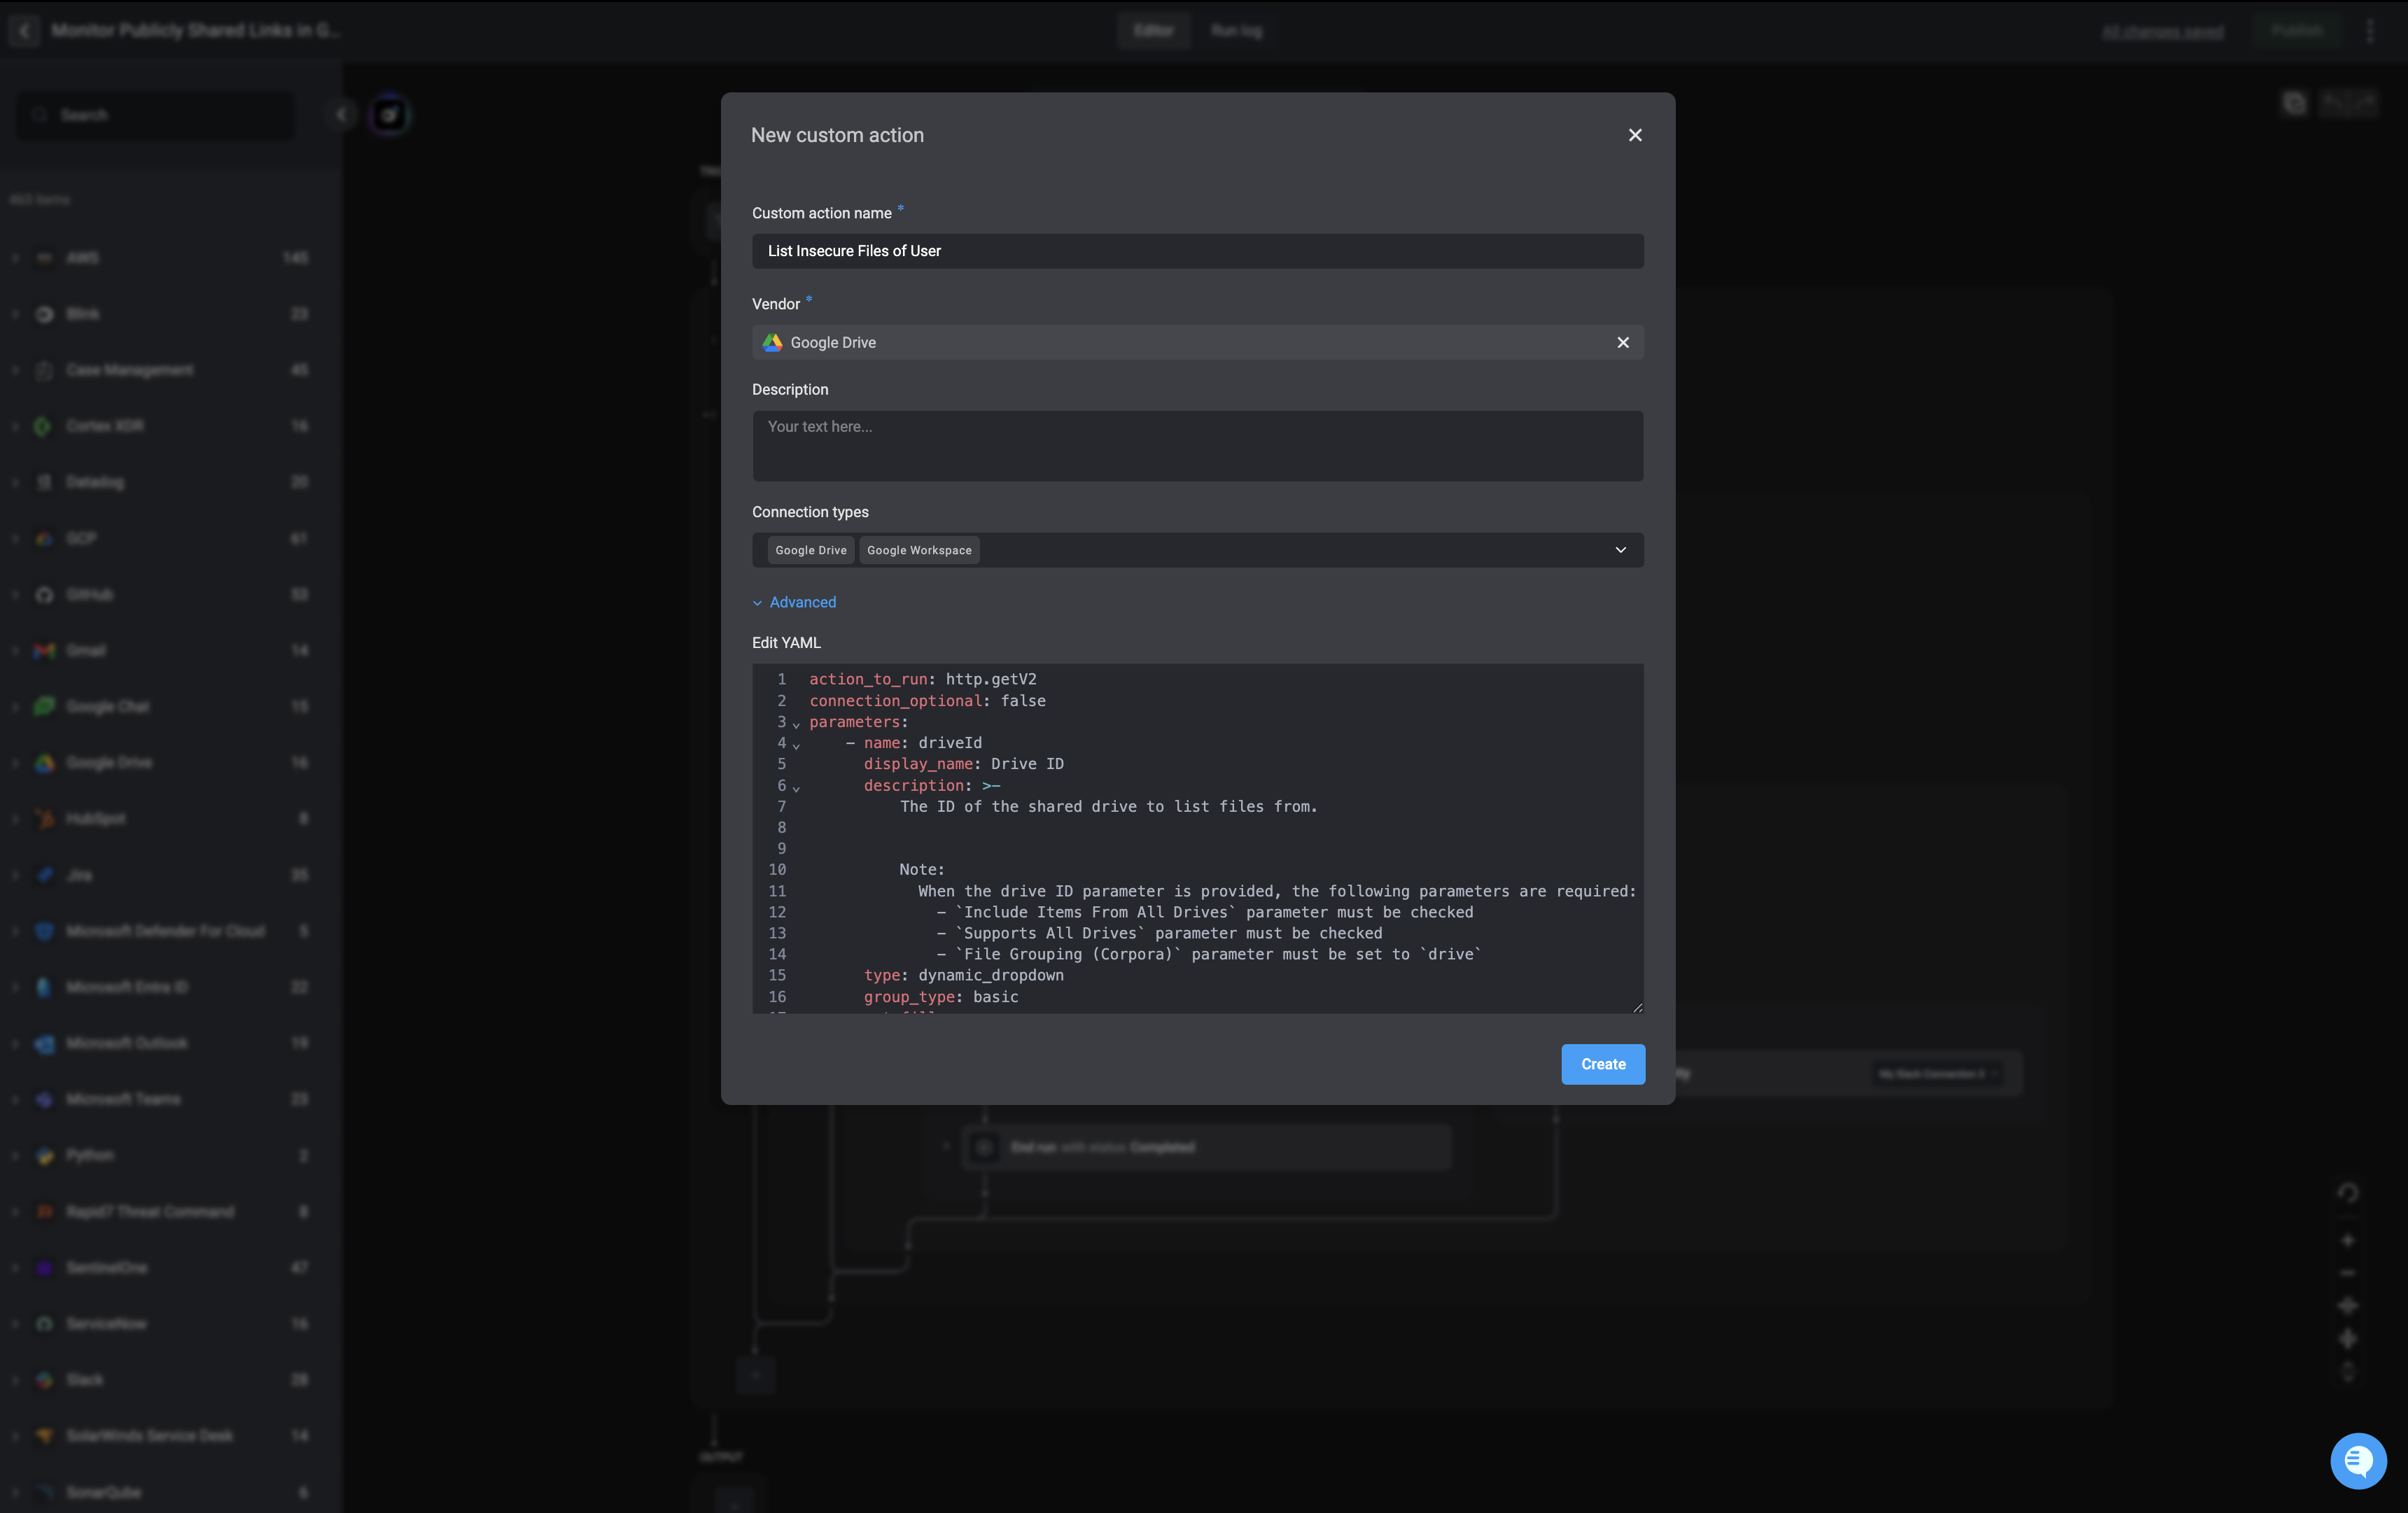
 In the dialog, fill out the required fields:
* Name: A unique name for your custom action.
* Vendor: Choose an existing vendor or create a new one.
* Description: Optionally add a short description to help other users (in the same workspace) understand its purpose.
* **Advanced** - Edit the 'YAML' as desired.
In the dialog, fill out the required fields:
* Name: A unique name for your custom action.
* Vendor: Choose an existing vendor or create a new one.
* Description: Optionally add a short description to help other users (in the same workspace) understand its purpose.
* **Advanced** - Edit the 'YAML' as desired.
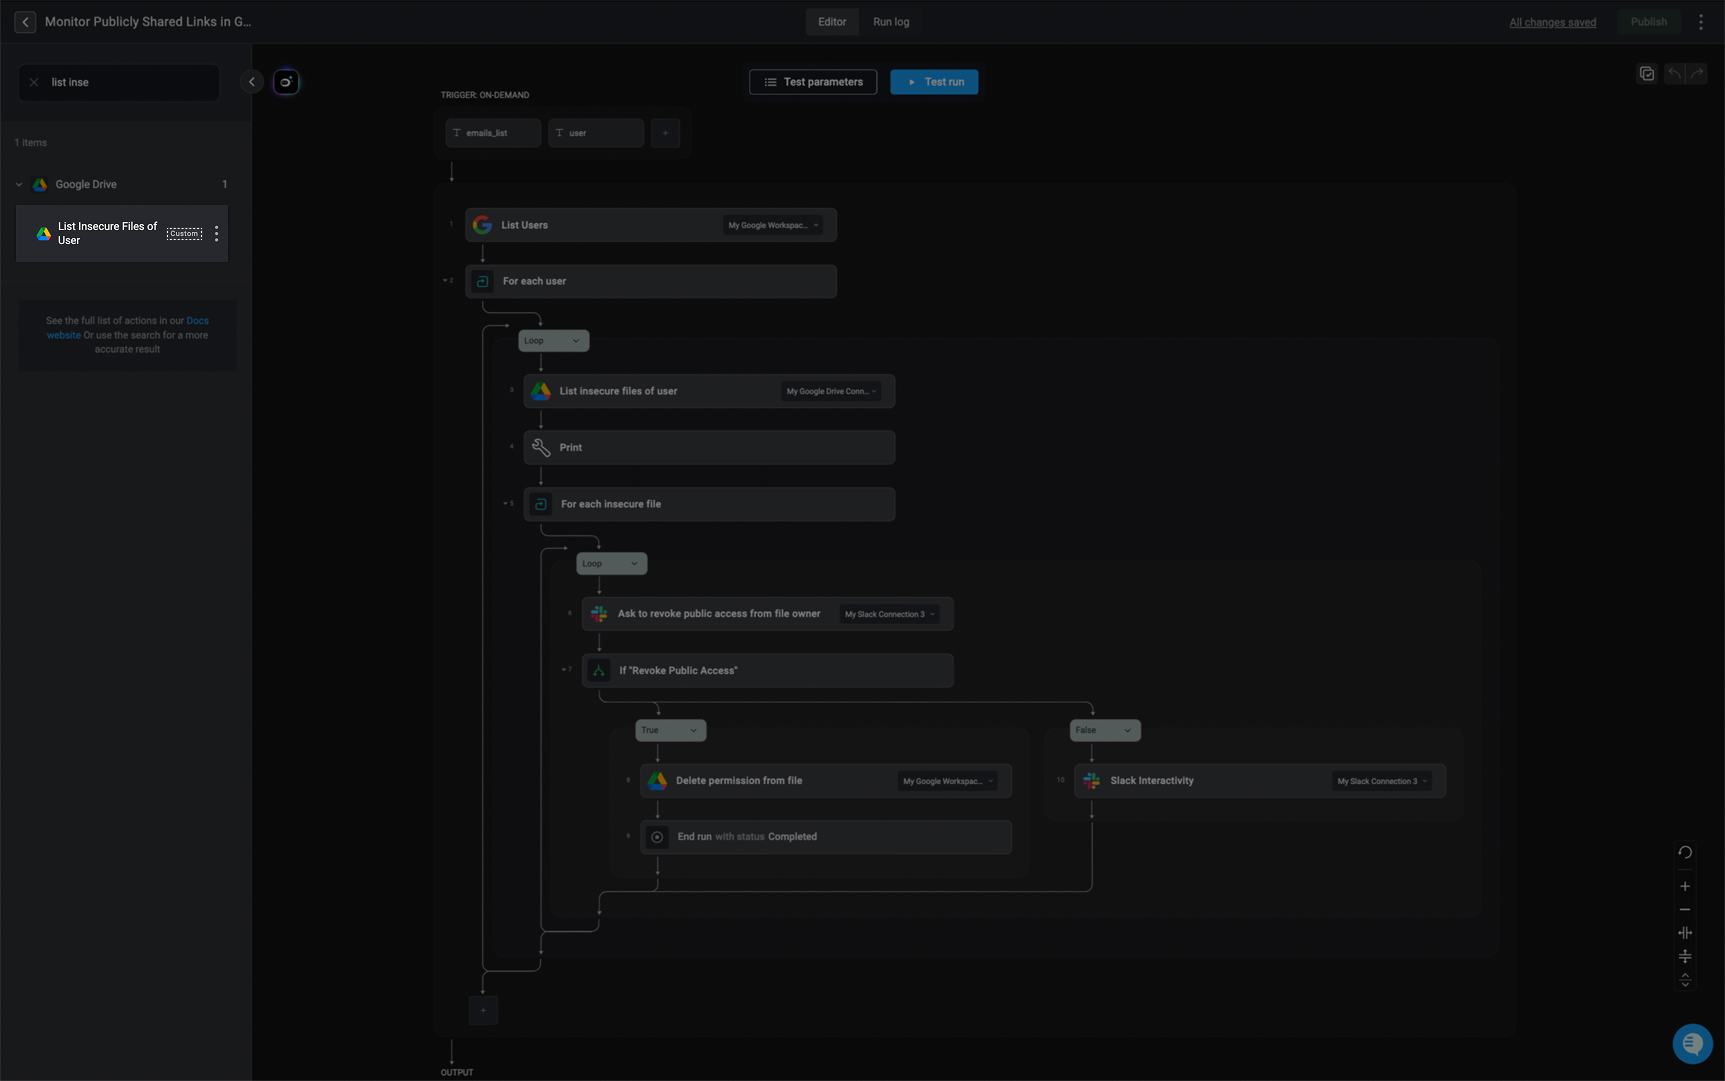
 **Note:** A `custom action` label will appear next to it, indicating that it is a custom action.
Click 'Create' to save your custom action. It will now appear under the selected vendor in the action library and will be available to all users in your workspace.
**Note:** A `custom action` label will appear next to it, indicating that it is a custom action.
Click 'Create' to save your custom action. It will now appear under the selected vendor in the action library and will be available to all users in your workspace.
 ***
## Defining Action Inputs
Each Step in a Workflow may require specific inputs, which can be either mandatory or optional.
**Mandatory inputs** are displayed at the top of the Parameters section within the Step. These have to be filled out for the Step to run successfully.
***
## Defining Action Inputs
Each Step in a Workflow may require specific inputs, which can be either mandatory or optional.
**Mandatory inputs** are displayed at the top of the Parameters section within the Step. These have to be filled out for the Step to run successfully.
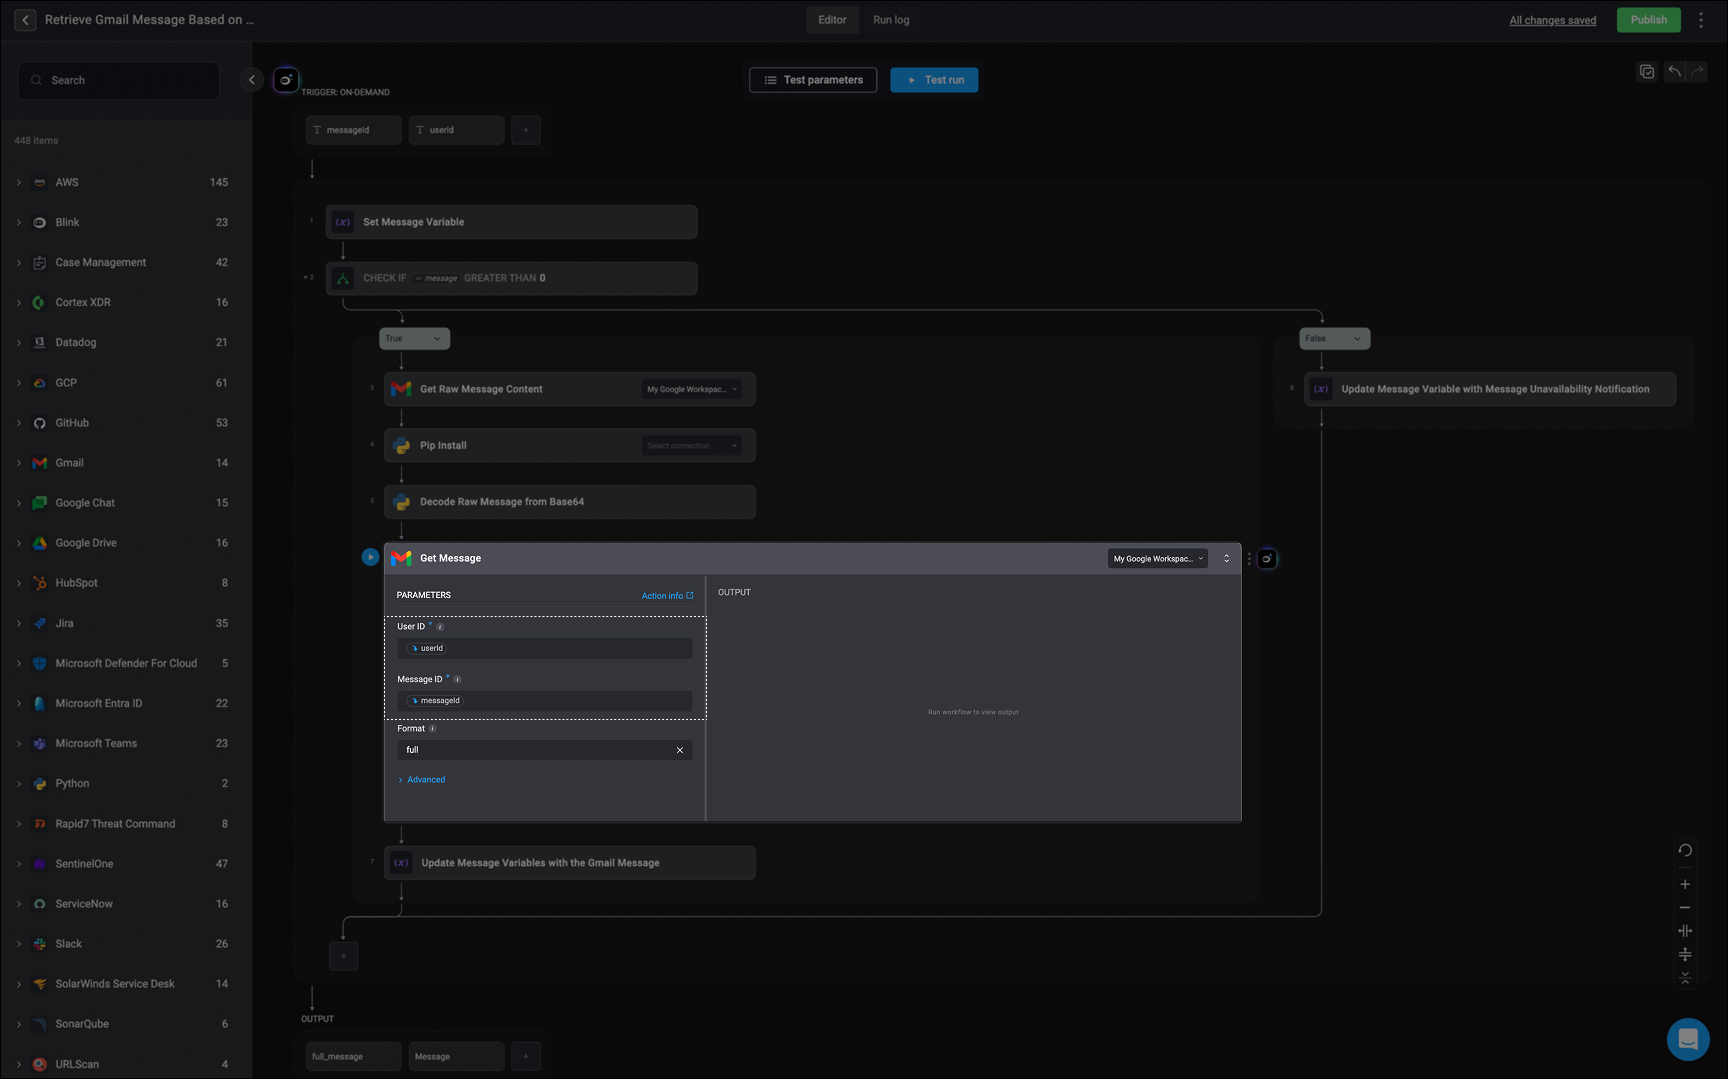 **Optional Inputs** are hidden and can be accessed by clicking the Advanced section at the bottom of the Parameters panel. These allow for additional customization but are not required.
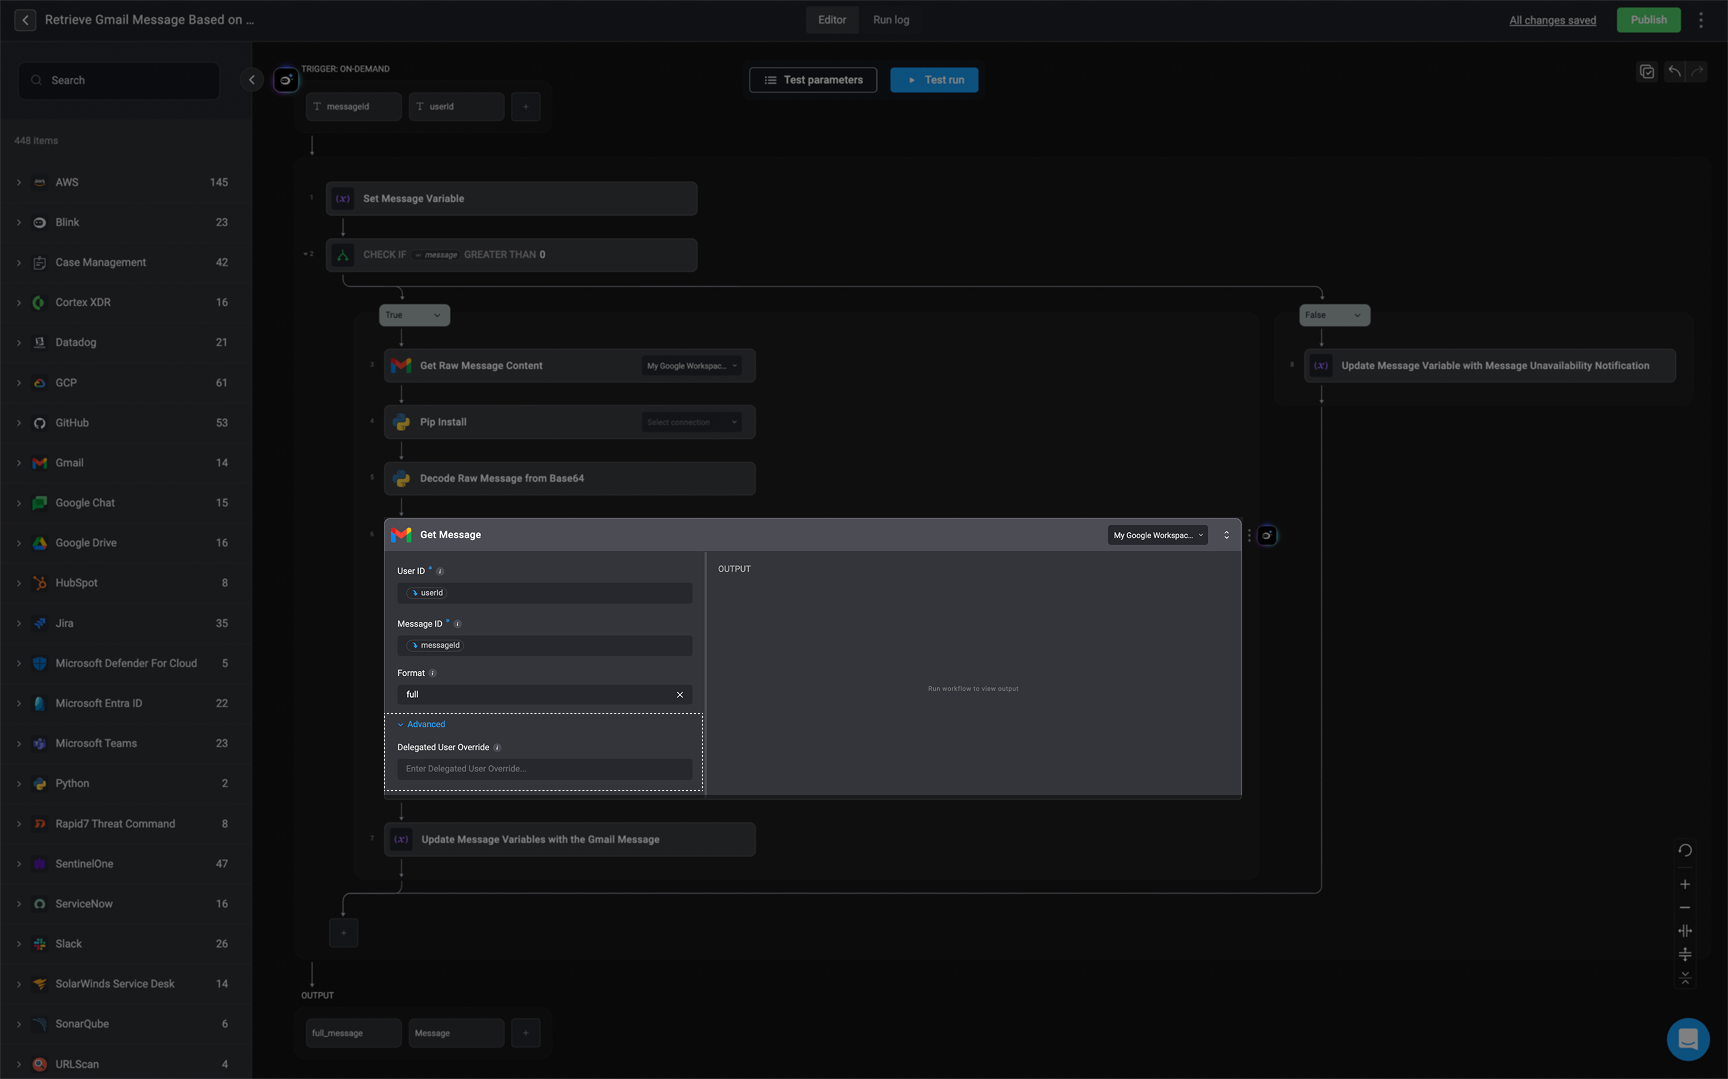 ***
## Understanding the Action Panels
### The Inline Action Panel
***
## Understanding the Action Panels
### The Inline Action Panel

Click the button, to view all available options in the Action Panel.
When you click the icon in the center of the canvas, the **Action Panel** opens. This panel lets you add new steps to your workflow and is divided into the following sections:
1. **Search Bar** – Quickly locate a specific action by typing its name into the search bar.
2. **[The Builder Copilot](/docs/builder-copilot/builder-copilot)** - Your AI assistant for building step logic. Use Builder Copilot to describe what you want to achieve in the step, and it will suggest the right action for you. You can add a single step or multiple steps.
In the Blink Builder, while you can use the Copilot at the workflow level, we recommend adding dedicated step(s) instead. Using Copilot at the workflow level applies changes globally, which can override downstream behavior and lead to unintended results—especially in complex workflows. For a more modular and iterative approach, use Copilot to add logic at the step level, where changes are more targeted and controlled.
3. **[Actions](/docs/workflows/building-workflows/actions/actions)**: A categorized list of all available actions you can use in your workflow:
* **All Actions**: Browse the complete library of Blink’s built-in actions.
* **[Utility Actions](/docs/workflows/building-workflows/actions/utility-actions/utility-actions)**: General-purpose actions like formatting text, transforming data, or waiting for a specified duration.
* **[Subflows](/docs/workflows/building-workflows/actions/basic-actions/subflow-actions)**: are reusable [on-demand workflows](/docs/workflows/building-workflows/triggers/on-demand-triggers/on-demand-triggers) that can be called as a step from other workflows. They help modularize your automation logic, reduce duplication, and simplify maintenance.
4. **[Agents](/docs/agent-builder/agent-builder)**- All your custom built [Agents](/docs/agent-builder/building-the-agent)
Agent features are available in the action panel only if they have been enabled for your workspace. This configuration can be performed by users with the [Tenant Admin](/docs/blink-platform/account-management/roles#1-admin) user role.
5. **[Flow Control Actions](/docs/workflows/building-workflows/actions/basic-actions/flow-control-actions)**: These actions help define the logic and structure of your workflow.
* Use them to add conditions, loops, parallel branches, or control how and when different parts of your workflow are executed.
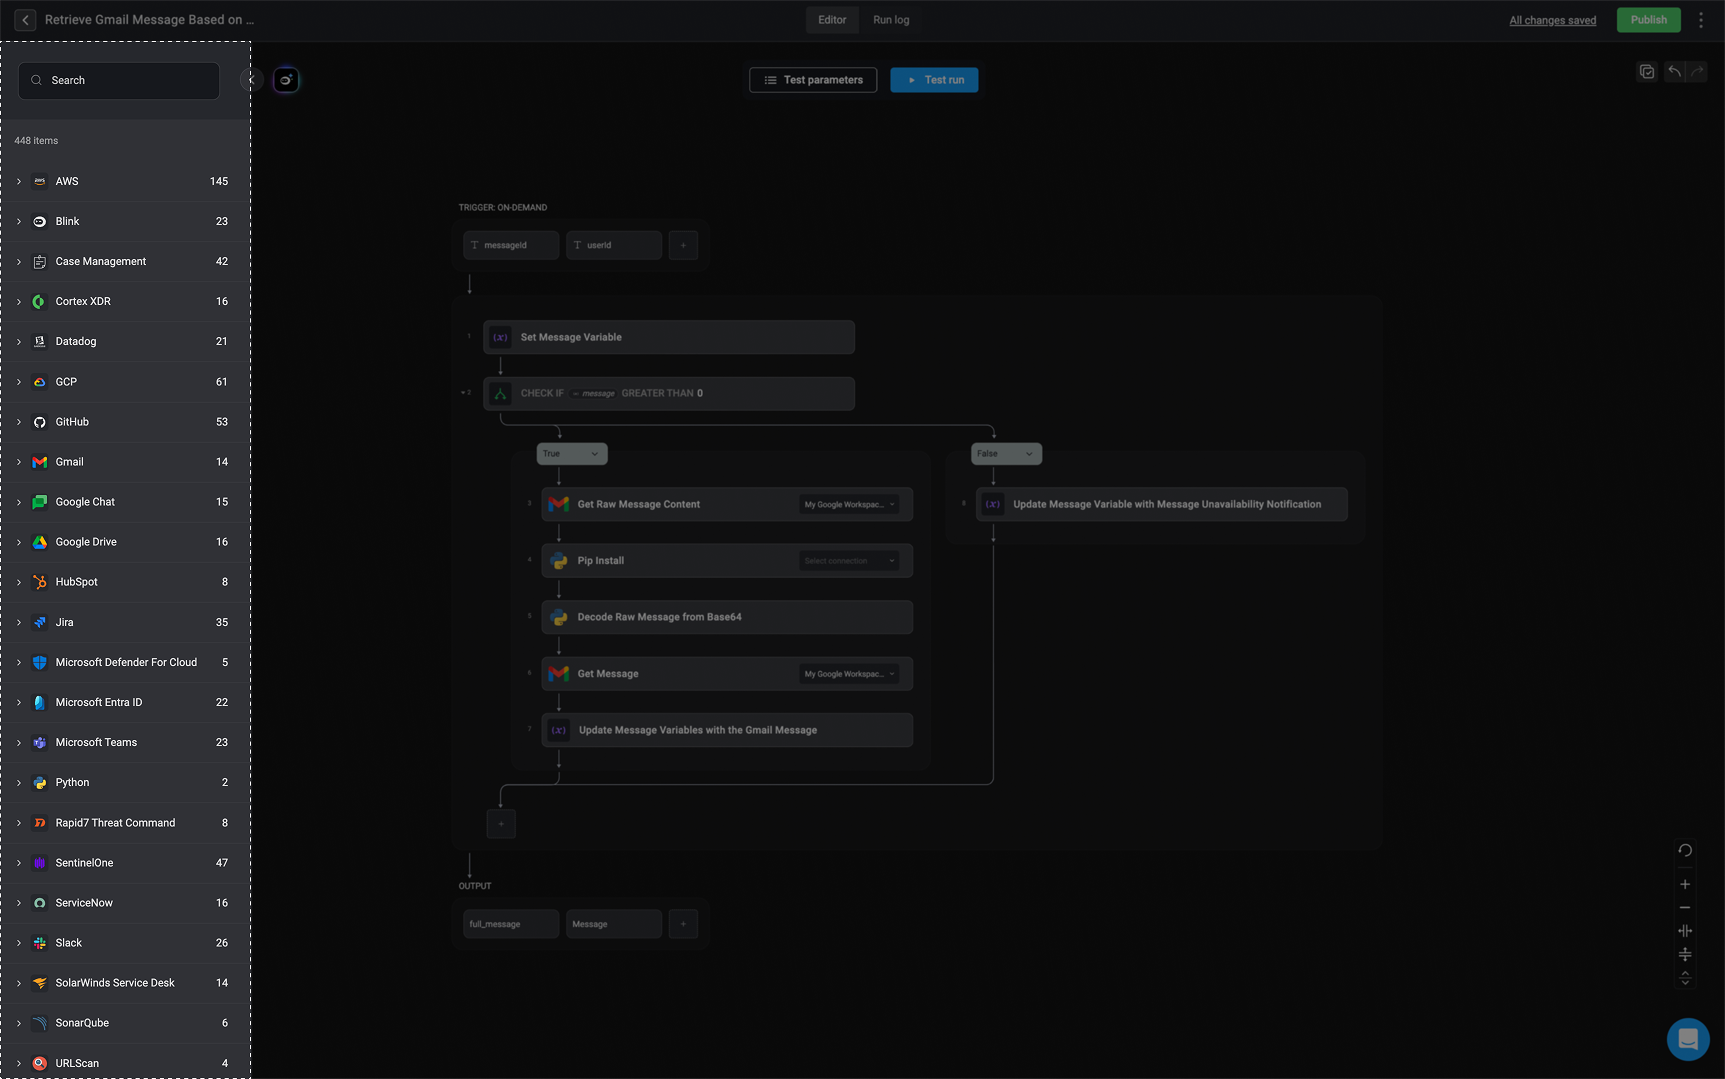
### Exploring the Left-Hand Action Panel
The Left-Hand Action Panel in your [Workflow Editor](/docs/workflows/building-workflows/workflow-editor) provides a comprehensive view of all available actions. It is organized into two main sections: Internal Flow Actions, which are native to the platform, and External Service Actions, which integrate with third-party tools.
This action panel allows you to quickly search for any action and drag and drop it directly into your workflow on the editor canvas, making it easy to build and customize workflows efficiently.
 ***
## Related Articles
Define and organize actions within a workflow.
Configure triggers to start workflows based on events.
Add logic to control workflow execution paths.
Build a new workflow from scratch in Blink.
***
## Related Articles
Define and organize actions within a workflow.
Configure triggers to start workflows based on events.
Add logic to control workflow execution paths.
Build a new workflow from scratch in Blink.