> ## Documentation Index
> Fetch the complete documentation index at: https://docs.blinkops.com/llms.txt
> Use this file to discover all available pages before exploring further.
# Code Actions
> Run Python, Bash, PowerShell, and Node.js scripts as code actions within your Blink workflows.
The Blink platform enables running Python, Bash, PowerShell and Node.js scripts using the following actions:
> These Actions are preserved between the different steps of the Workflow execution.
> For example: if you create a file using Python, you can use it in a later Step using any programming language or CLI.
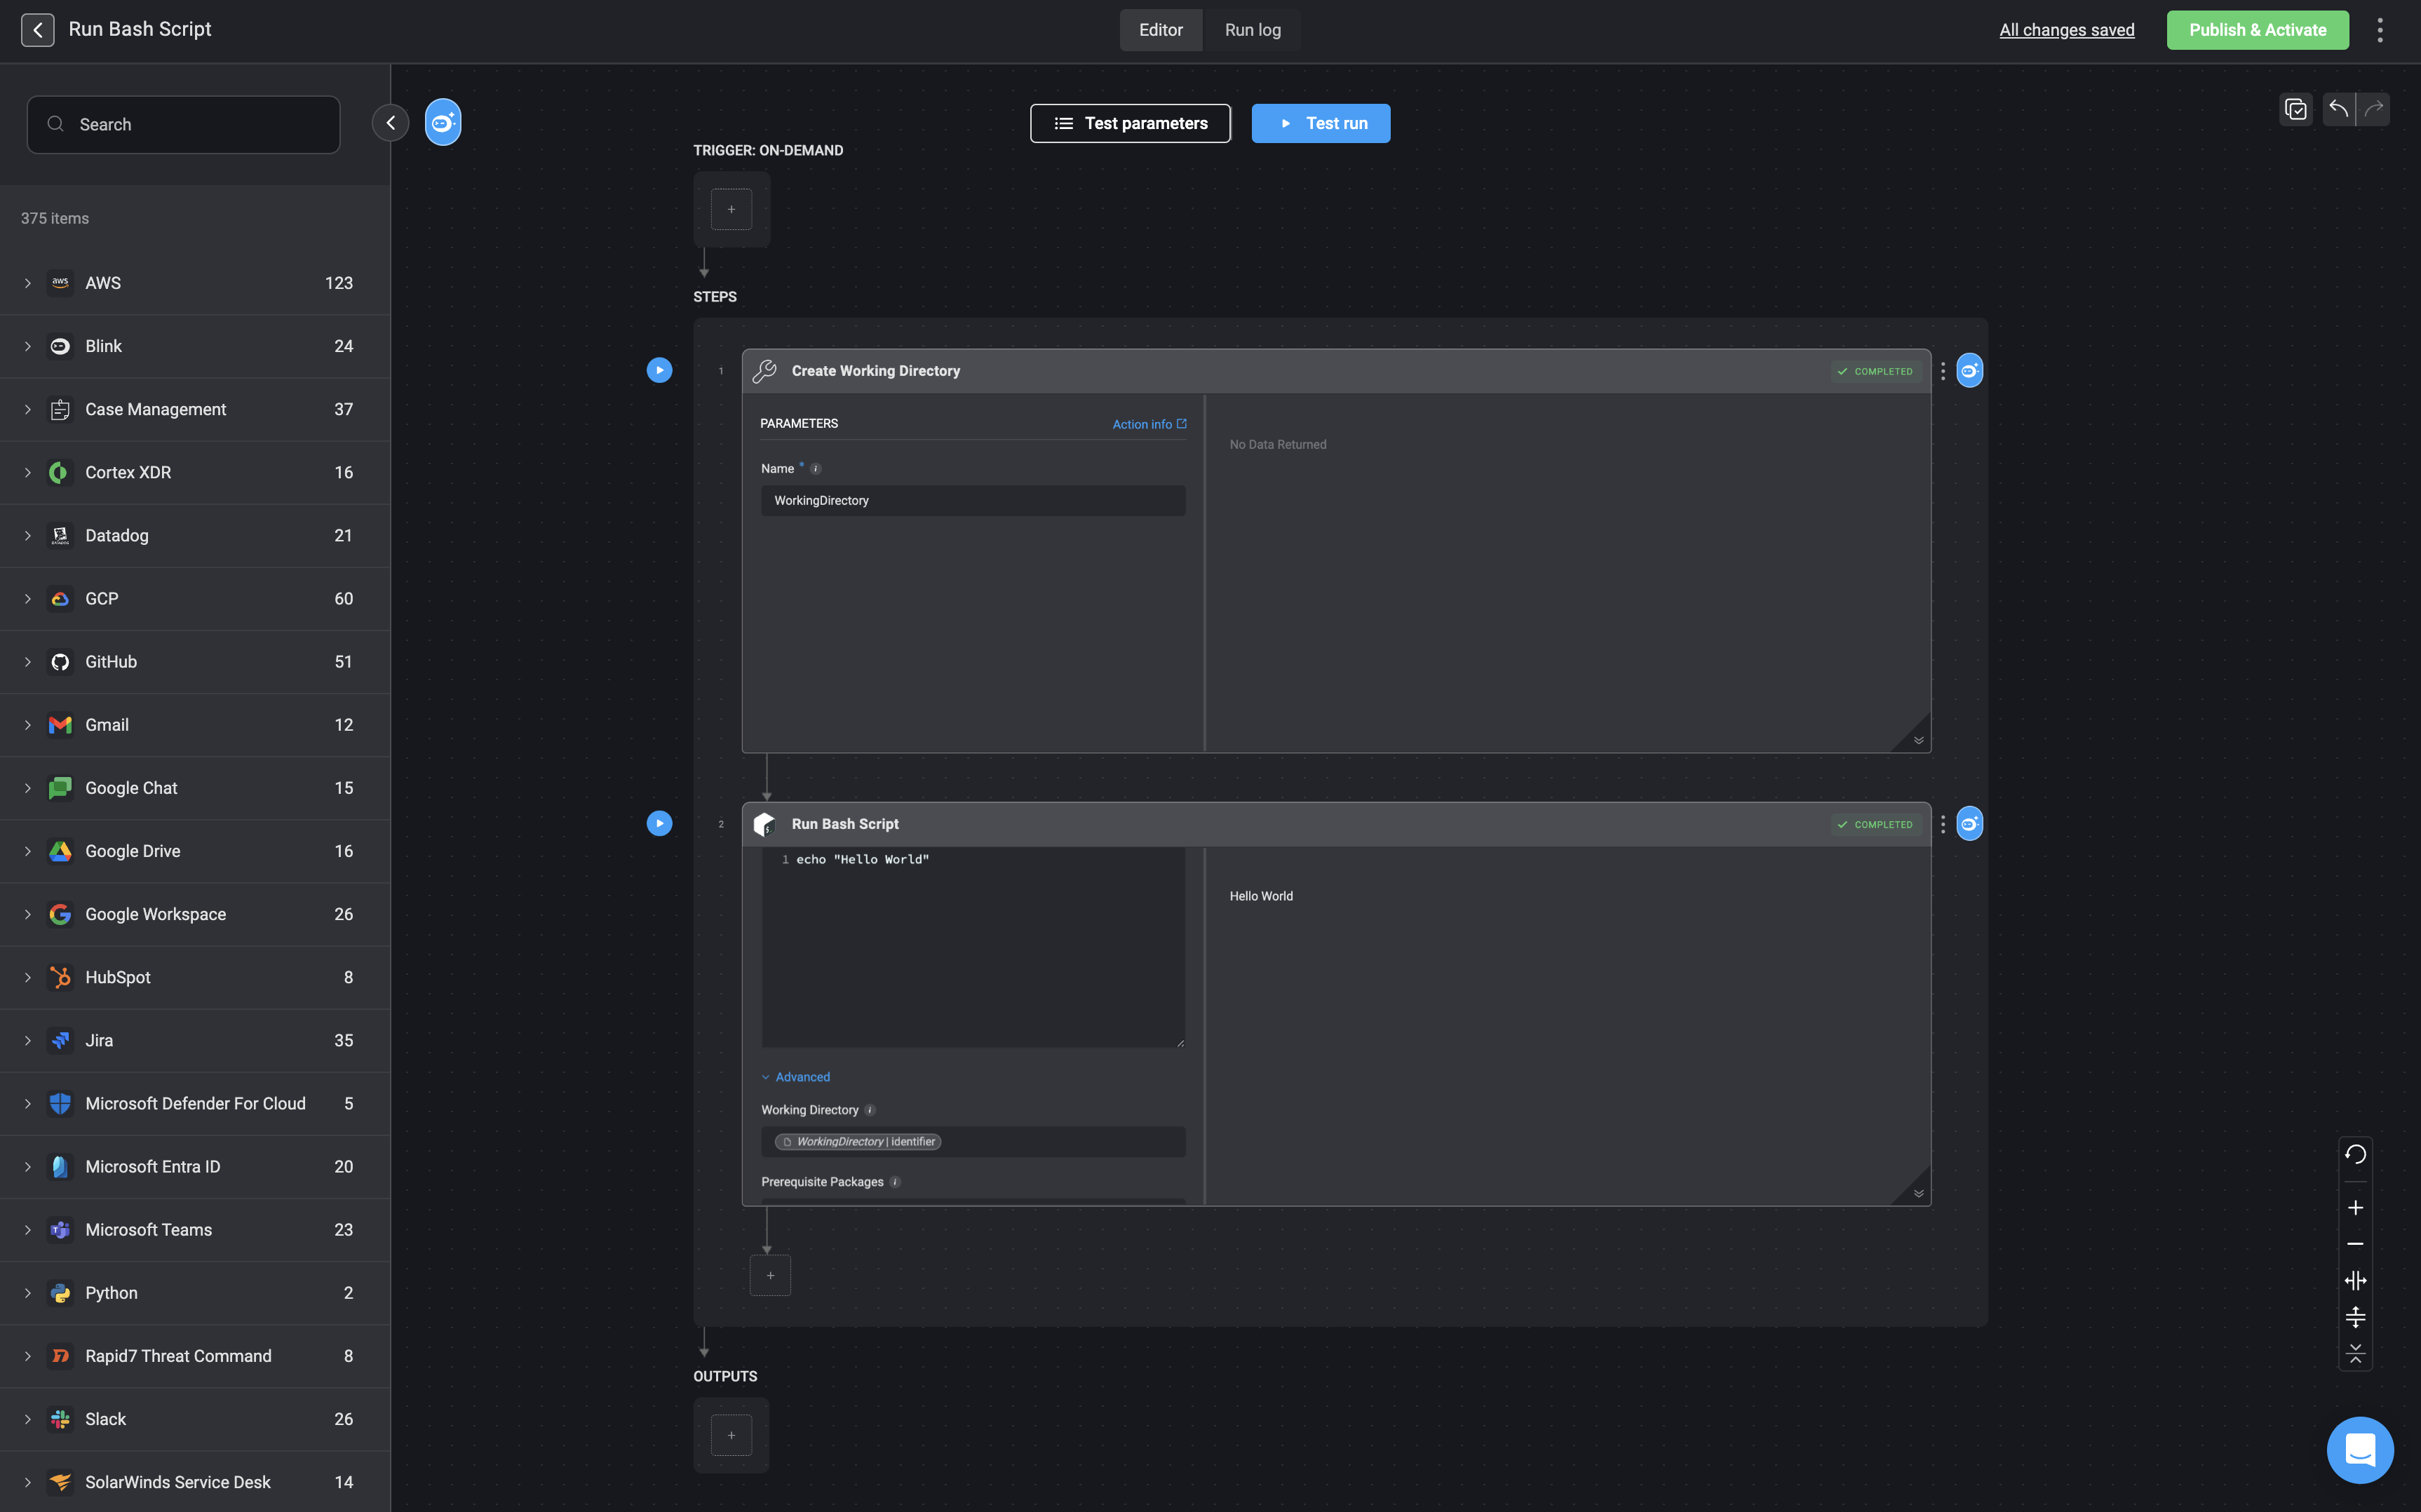
## Run Bash Script
Execute a provided bash script.
If an error occurs in a command mid-script but the final command succeeds, the action will report success, potentially masking failed commands.
1. Start by setting up a `Working Directory` using the [Create Working Directory](/docs/workflows/building-workflows/actions/utility-actions/file_system-utilities#create-working-directory) action.
2. Next, write your `bash` script in the code block provided within the 'Run Bash Script' action.
3. Finally, in the `Working Directory` parameter of the 'Run Bash Script' action, enter the name of the `Working Directory` you created in step one.
**Note**
If there's an error in a command in the middle of the script and the last command succeeds, the entire action will succeed, not revealing that some command may have failed.
| Parameter | Description |
| --------------------- | ------------------------------------------------------------------------------------------------------------------------------------------------------------------------------------------------------------------------------------------------------------------------------------------------------------------------------------------------------------------------------------------------------------------------------------------------------------------------- |
| Code | The bash script to execute. |
| Working Directory | When a working directory is selected, the filesystem state is preserved across steps that use this directory. Files and changes in the chosen directory persist across steps, ensuring continuity.
For more information, refer to the [Create Working Directory](/docs/workflows/building-workflows/actions/utility-actions/file_system-utilities#create-working-directory) action documentation for guidance on setting up and selecting working directories. |
| Prerequisite Packages | A space-separated list of packages to install before executing the script.
**For example**:
curl jq tree
|
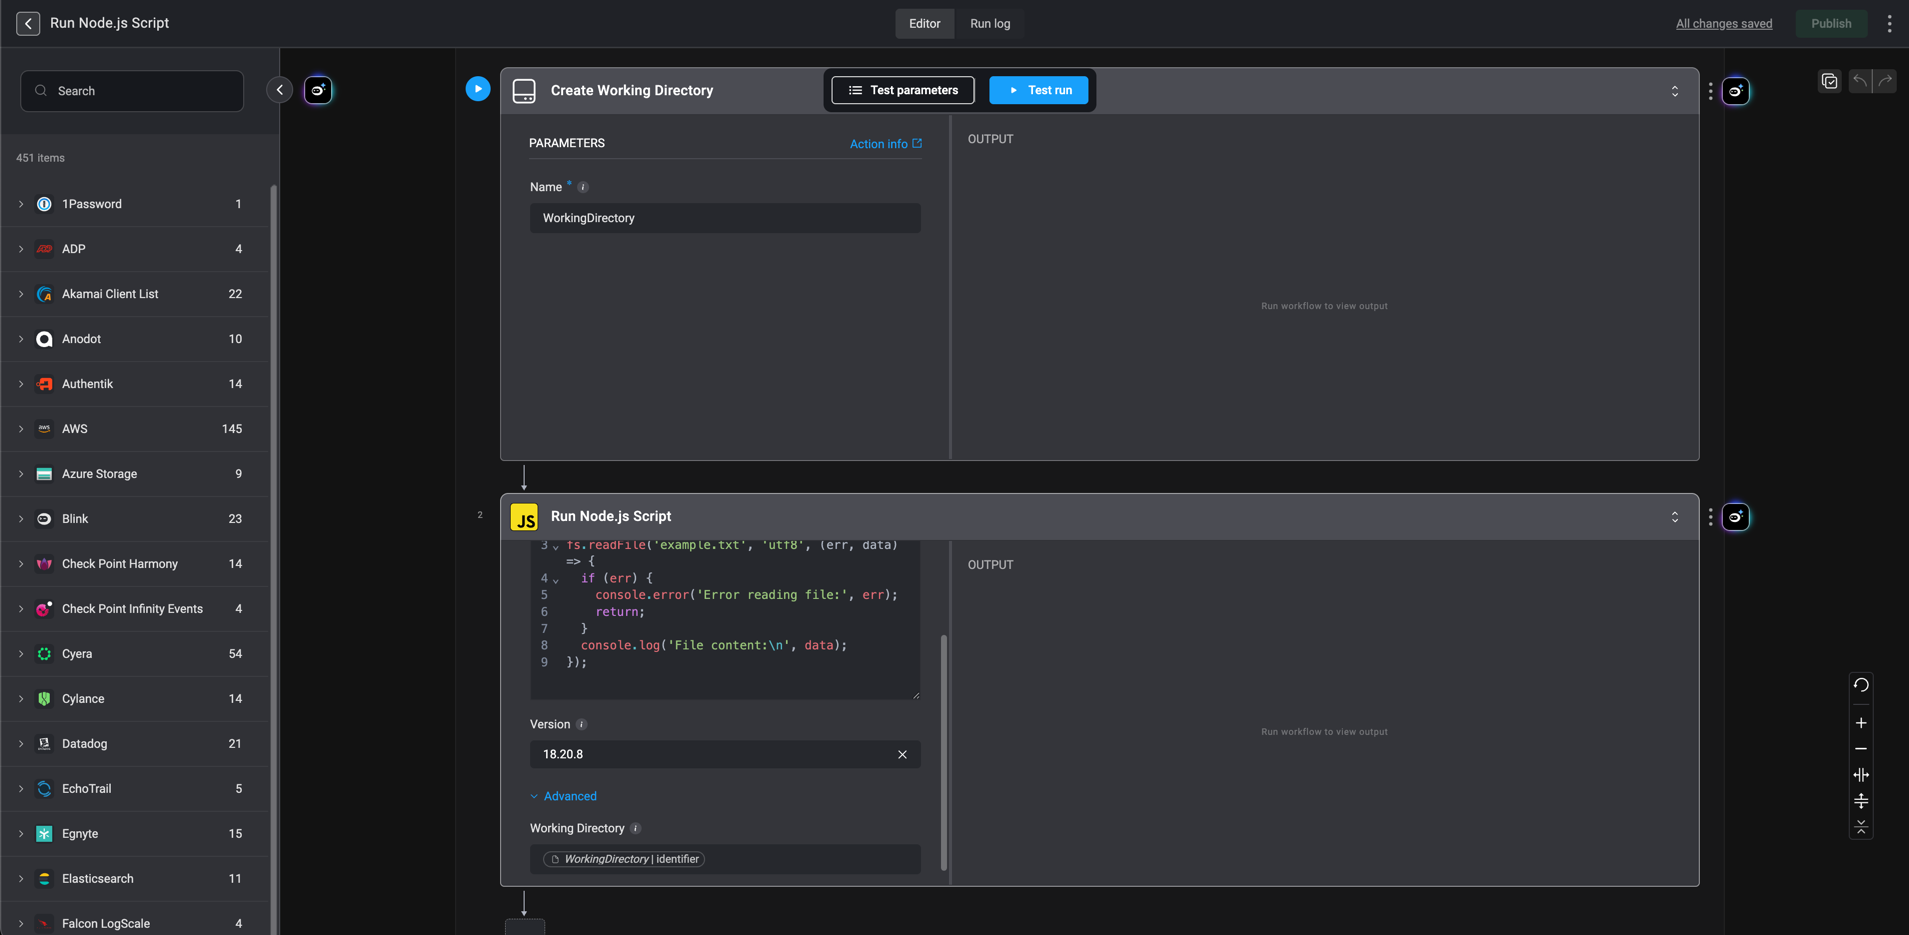
 ## Run Node.js Script
Executes user provided JS code.
1. Start by setting up a `Working Directory` using the [Create Working Directory](/docs/workflows/building-workflows/actions/utility-actions/file_system-utilities#create-working-directory) action.
2. Next, write your `Node.js` script in the code block provided within the 'Run Node.js Script' action.
3. Then, specify the version of Node.js to use.
4. Finally, in the `Working Directory` parameter of the 'Run Node.js Script' action, enter the name of the `Working Directory` you created in step one.
## Run Node.js Script
Executes user provided JS code.
1. Start by setting up a `Working Directory` using the [Create Working Directory](/docs/workflows/building-workflows/actions/utility-actions/file_system-utilities#create-working-directory) action.
2. Next, write your `Node.js` script in the code block provided within the 'Run Node.js Script' action.
3. Then, specify the version of Node.js to use.
4. Finally, in the `Working Directory` parameter of the 'Run Node.js Script' action, enter the name of the `Working Directory` you created in step one.
| Parameter | Description |
| ------------------------------- | -------------------------------------------------------------------------------------------------------------------------------------------------------------------------------------------- |
| Code | JS code to execute in the script. |
| Version | The NodeJS version to use for executing the code. |
| **Advanced**- Working Directory | The name given to the working directory in the [Create Working Directory](/docs/workflows/building-workflows/actions/utility-actions/file_system-utilities#create-working-directory) action. |
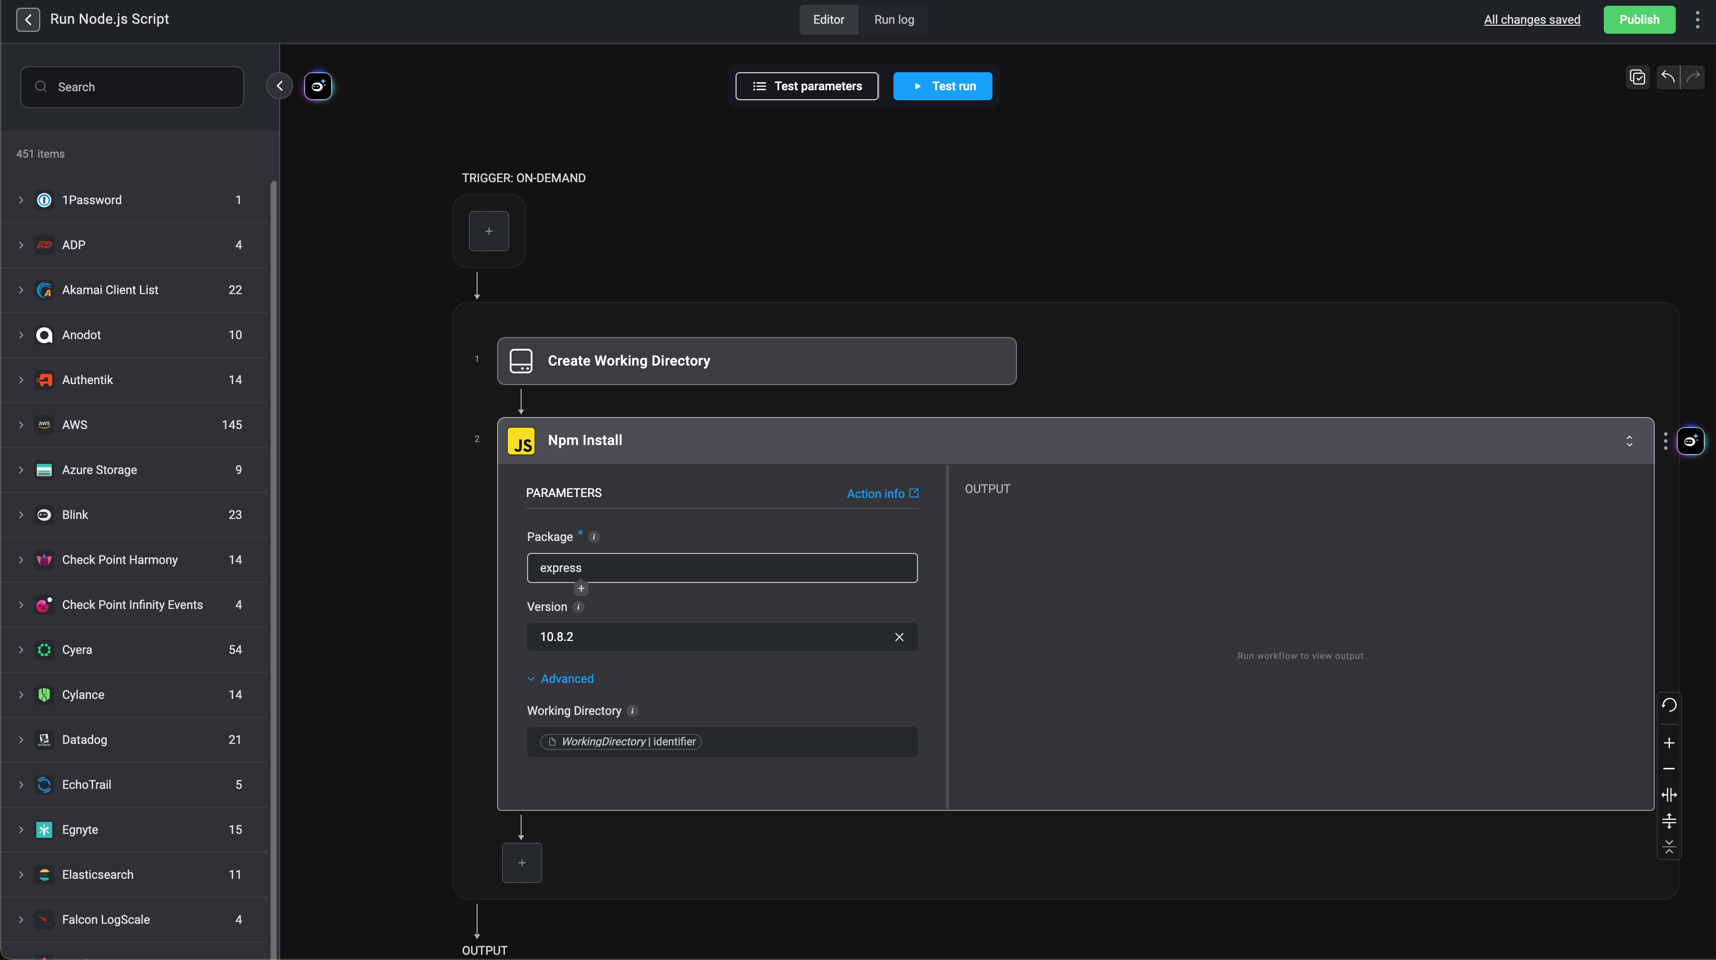
 ## Installing npm Packages
This is the Npm Install action, which allows you to install Node.js packages and use them with the [Run Node.js Script](/docs/workflows/building-workflows/actions/basic-actions/code-actions#run-node-js-script) action.
1. Start by setting up a `Working Directory` using the [Create Working Directory](/docs/workflows/building-workflows/actions/utility-actions/file_system-utilities#create-working-directory) action.
2. Next, specify the Node package you wish to install.
3. Then, specify the version for npm to use.
4. Finally, in the `Working Directory` parameter of the `Npm Install` action, enter the name of the `Working Directory` you created in step one.
## Installing npm Packages
This is the Npm Install action, which allows you to install Node.js packages and use them with the [Run Node.js Script](/docs/workflows/building-workflows/actions/basic-actions/code-actions#run-node-js-script) action.
1. Start by setting up a `Working Directory` using the [Create Working Directory](/docs/workflows/building-workflows/actions/utility-actions/file_system-utilities#create-working-directory) action.
2. Next, specify the Node package you wish to install.
3. Then, specify the version for npm to use.
4. Finally, in the `Working Directory` parameter of the `Npm Install` action, enter the name of the `Working Directory` you created in step one.
| Parameter | Description |
| ----------------- | -------------------------------------------------------------------------------------------------------------------------------------------------------------------------------------------- |
| Package | Name of the Node.js package to install. |
| Version | The npm version to use for executing the code. |
| Working Directory | The name given to the working directory in the [Create Working Directory](/docs/workflows/building-workflows/actions/utility-actions/file_system-utilities#create-working-directory) action. |
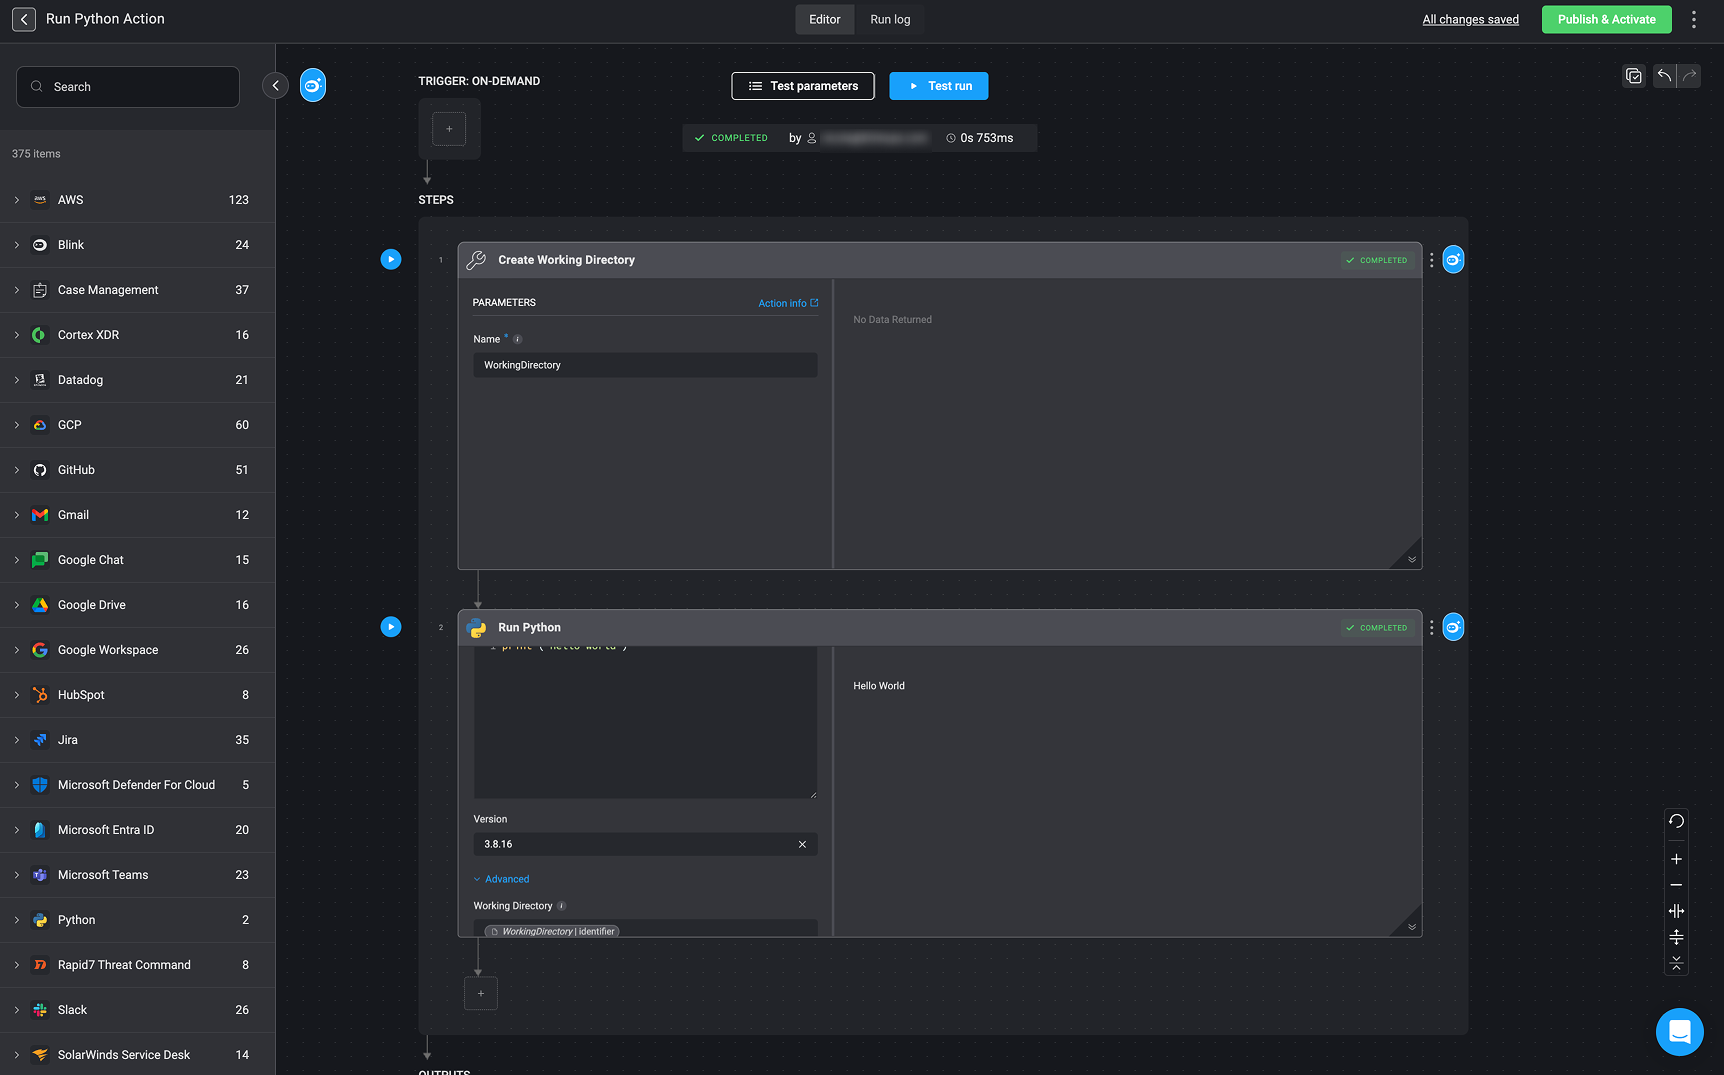
 ## Run Python
Execute Python code using a specified Python version. Useful for running complex logic, updating variable values, and modifying files in a specified `Working Directory`.
The following packages come pre-installed for immediate use:
## Run Python
Execute Python code using a specified Python version. Useful for running complex logic, updating variable values, and modifying files in a specified `Working Directory`.
The following packages come pre-installed for immediate use:
| Package | Python 3.8.16 | Python 3.10.9 | Python 3.13.9 |
| ------------------- | ------------- | ------------- | ------------- |
| certifi | 2022.12.7 | 2022.12.7 | 2025.10.5 |
| chardet | 4.0.0 | 4.0.0 | 5.2.0 |
| idna | 2.10 | 2.10 | 3.11 |
| protobuf | 3.18.3 | 3.18.3 | 6.33.0 |
| requests | 2.25.1 | 2.25.1 | 2.32.5 |
| six | 1.15.0 | 1.15.0 | 1.17.0 |
| urllib3 | 1.26.5 | 1.26.5 | 2.5.0 |
| dotmap | 1.3.25 | 1.3.25 | 1.3.30 |
| pandas | 2.0.3 | 2.2.3 | 2.3.3 |
| tabulate | 0.9.0 | 0.9.0 | 0.9.0 |
| openpyxl | 3.1.4 | 3.1.4 | 3.1.5 |
| markdownify | 0.14.1 | 0.14.1 | 1.2.0 |
| mistletoe | 1.4.0 | 1.4.0 | 1.5.0 |
| pillow | 10.4.0 | 10.4.0 | 12.0.0 |
| redshift\_connector | 2.1.5 | 2.1.5 | 2.1.9 |
| pyyaml | 6.0.3 | 6.0.3 | - |
| pypdf2 | 3.0.1 | 3.0.1 | 3.0.1 |
| psutil | 6.1.1 | 6.1.1 | 6.1.1 |
| pytesseract | 0.3.13 | 0.3.13 | 0.3.13 |
1. Start by setting up a `Working Directory` using the [Create Working Directory](/docs/workflows/building-workflows/actions/utility-actions/file_system-utilities#create-working-directory) action.
2. Next, write your `Python` script in the code block provided within the 'Run Python' action.
3. Finally, in the `Working Directory` parameter of the 'Run Python' action, enter the name of the `Working Directory` you created in step one.
| Parameter | Description |
| ----------------- | -------------------------------------------------------------------------------------------------------------------------------------------------------------------------------------------- |
| Code | The python code to execute.
- Use Python's `print()` function to display output.
- Use the variable picker to reference predefined workflow variables and files to modify. |
| Version | The version of the Package. |
| Working Directory | The name given to the working directory in the [Create Working Directory](/docs/workflows/building-workflows/actions/utility-actions/file_system-utilities#create-working-directory) action. |
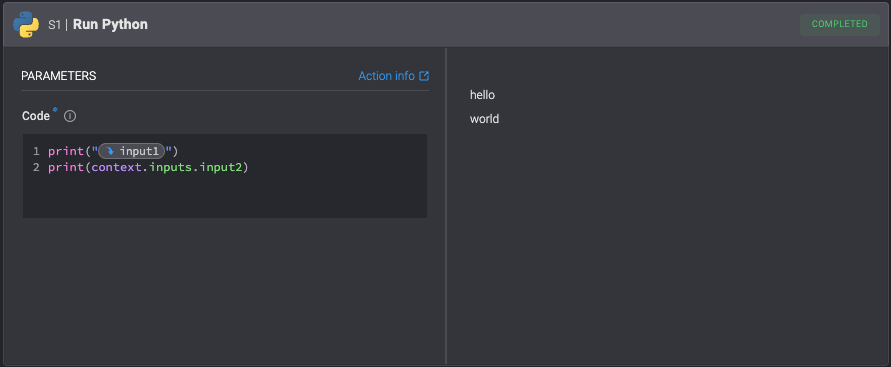
 ### Referencing inputs and step outputs in Python Actions
* **Option 1 - Variable picker:** Use the [variable picker](/docs/workflows/building-workflows/dynamic-variables/variable-picker#using-the-variable-picker) to select the wanted information.
* **Option 2 – Use the “context” object:** In Python steps, you can reference workflow variables using the automatically generated [context object](/docs/workflows/building-workflows/dynamic-variables/expression-language/workflow-engine-variables#python-actions) syntax. The `context object` syntax allows you to access values from previous steps, input parameters, or other variables, and to set new variables within your Python Action.
### Referencing inputs and step outputs in Python Actions
* **Option 1 - Variable picker:** Use the [variable picker](/docs/workflows/building-workflows/dynamic-variables/variable-picker#using-the-variable-picker) to select the wanted information.
* **Option 2 – Use the “context” object:** In Python steps, you can reference workflow variables using the automatically generated [context object](/docs/workflows/building-workflows/dynamic-variables/expression-language/workflow-engine-variables#python-actions) syntax. The `context object` syntax allows you to access values from previous steps, input parameters, or other variables, and to set new variables within your Python Action.
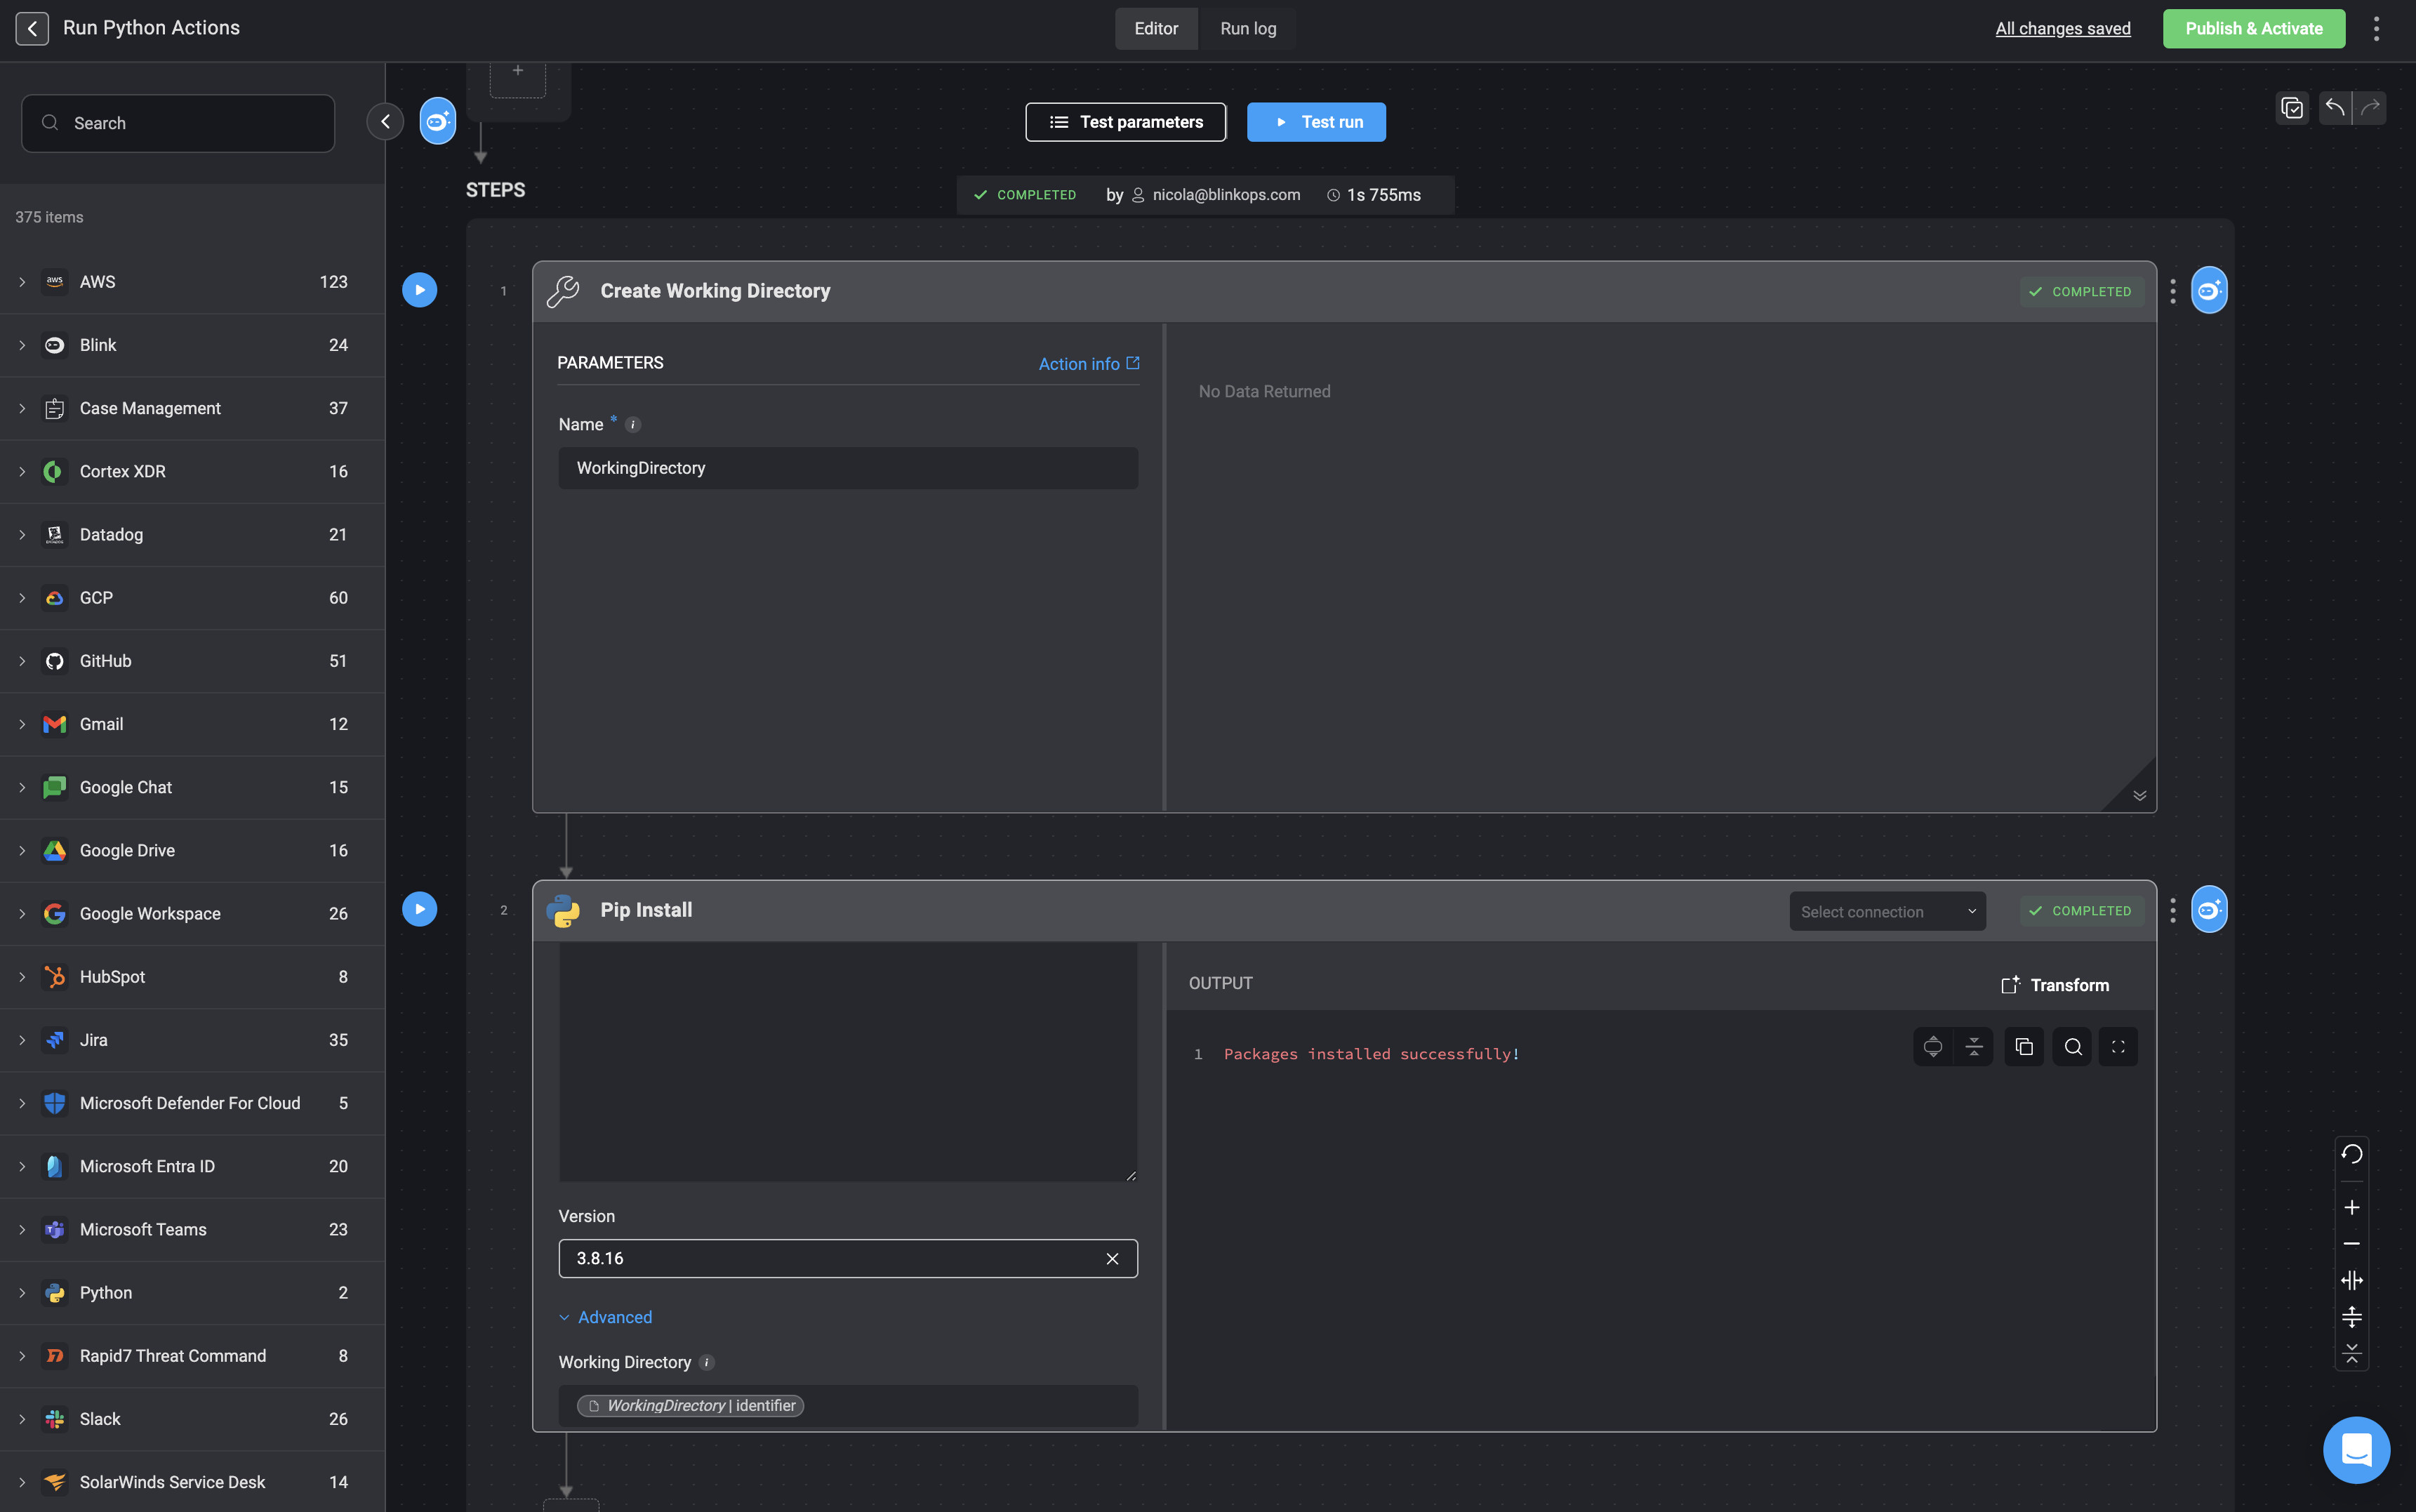
 ## Installing pip Package
This is the Pip Install action, which allows you to install Python packages and use them with the [Run Python](/docs/workflows/building-workflows/actions/basic-actions/code-actions#run-python) action.
1. To use this action, create a `Working Directory` using the [Create Working Directory](/docs/workflows/building-workflows/actions/utility-actions/file_system-utilities#create-working-directory) action.
2. Specify which python packages you wish to install, by writing a new line separated list of packages, and run the step.
* For git based packages use the following package name structure:
`git+:////.git`
**For Example:**
```jsx theme={"dark"}
git+https://github.com/psf/requests.git
git+ssh://git@github.com/psf/requests.git
```
* To use the `Require Hashes` parameter use the following package name structure:
`== \`
`--hash=sha256: \`
**For Example:**
```jsx theme={"dark"}
requests==2.28.2 \
--hash=sha256: \
--hash=sha256:
certifi==2022.12.7 \
--hash=sha256:
```
3. In the `Working Directory` parameter of the [Run Python](/docs/workflows/building-workflows/actions/basic-actions/code-actions#run-python) action, enter the name of the `Working Directory` you created in step one.
4. Finally, if you want to enforce hash verification select `Require Hashes`.
Use a connection when installing from a private repository, there is no need for a connection when installing from public repositories.
## Installing pip Package
This is the Pip Install action, which allows you to install Python packages and use them with the [Run Python](/docs/workflows/building-workflows/actions/basic-actions/code-actions#run-python) action.
1. To use this action, create a `Working Directory` using the [Create Working Directory](/docs/workflows/building-workflows/actions/utility-actions/file_system-utilities#create-working-directory) action.
2. Specify which python packages you wish to install, by writing a new line separated list of packages, and run the step.
* For git based packages use the following package name structure:
`git+:////.git`
**For Example:**
```jsx theme={"dark"}
git+https://github.com/psf/requests.git
git+ssh://git@github.com/psf/requests.git
```
* To use the `Require Hashes` parameter use the following package name structure:
`== \`
`--hash=sha256: \`
**For Example:**
```jsx theme={"dark"}
requests==2.28.2 \
--hash=sha256: \
--hash=sha256:
certifi==2022.12.7 \
--hash=sha256:
```
3. In the `Working Directory` parameter of the [Run Python](/docs/workflows/building-workflows/actions/basic-actions/code-actions#run-python) action, enter the name of the `Working Directory` you created in step one.
4. Finally, if you want to enforce hash verification select `Require Hashes`.
Use a connection when installing from a private repository, there is no need for a connection when installing from public repositories.
| Parameter | Description |
| ----------------- | -------------------------------------------------------------------------------------------------------------------------------------------------------------------------------------------- |
| Package List | New line separated packages to install. |
| Version | - |
| Working Directory | The name given to the working directory in the [Create Working Directory](/docs/workflows/building-workflows/actions/utility-actions/file_system-utilities#create-working-directory) action. |
| Require Hashes | Select to enforce package hash verification. |