> ## Documentation Index
> Fetch the complete documentation index at: https://docs.blinkops.com/llms.txt
> Use this file to discover all available pages before exploring further.
# Using Scheduled Triggers
> Set up scheduled triggers to run Blink workflows automatically at specified times or intervals.
By selecting a scheduled trigger, users ensure that workflows execute automatically at the desired frequency without requiring manual intervention.
A **scheduled trigger** initiates a workflow at a time and recurrence based on your configurations. Workflows can run at fixed intervals (**hourly, daily, weekly, or monthly**) or on a **custom schedule** using [Cron Expressions](https://en.wikipedia.org/wiki/Cron) for advanced flexibility. Scheduled triggers are essential for automating routine tasks, such as generating reports, performing system checks, or executing recurring processes.
Scheduling triggers are great for managing tasks during business hours or off-peak times.
Need help finding the right trigger type for your use case? See [About Triggers](/docs/workflows/building-workflows/triggers/triggers).
Users can configure schedules using:
| Scheduling Method | Description |
| -------------------- | --------------------------------------------------------------- |
| **Fixed Intervals** | Run workflows hourly, daily, weekly, or at custom time frames. |
| **Cron Expressions** | Specify complex scheduling patterns using standard cron syntax. |
## How Scheduled Triggers Work
Scheduled triggers allow workflows to start automatically at predefined times or intervals, executing based on a fixed schedule. Scheduled triggers are ideal for routine automation tasks.
For example, IT admins can use scheduled triggers to automate daily system health checks, ensuring potential issues are identified and addressed promptly—without requiring manual intervention.
The following diagram illustrates how these triggers work:
```mermaid theme={"dark"}
graph TD;
A[Scheduled Time Arrives] -->|Trigger Activation| B[Trigger Evaluates Conditions]
B -- Yes --> C[Trigger Fires & Passes Data]
C --> D[Workflow Execution Starts]
B -- No --> E[Trigger Does Not Fire]
```
The trigger activates at the predefined time or interval, such as daily at 8 AM or every 15 minutes.
If conditions are configured, Blink evaluates whether the conditions are met.
If the conditions are met, the trigger activates and passes relevant execution details, such as timestamps and scheduling metadata.
The associated workflow starts and runs the predefined automation tasks.
## Configuring a Scheduled Trigger
[Create a new workflow](/docs/workflows/creating-a-workflow) and choose the **Scheduled** trigger. You will be directed to the [workflow editor](/docs/workflows/building-workflows/workflow-editor-new).
In the **Trigger** section, click **Click to schedule a run**. This opens the trigger configuration settings. Select "Every time period"
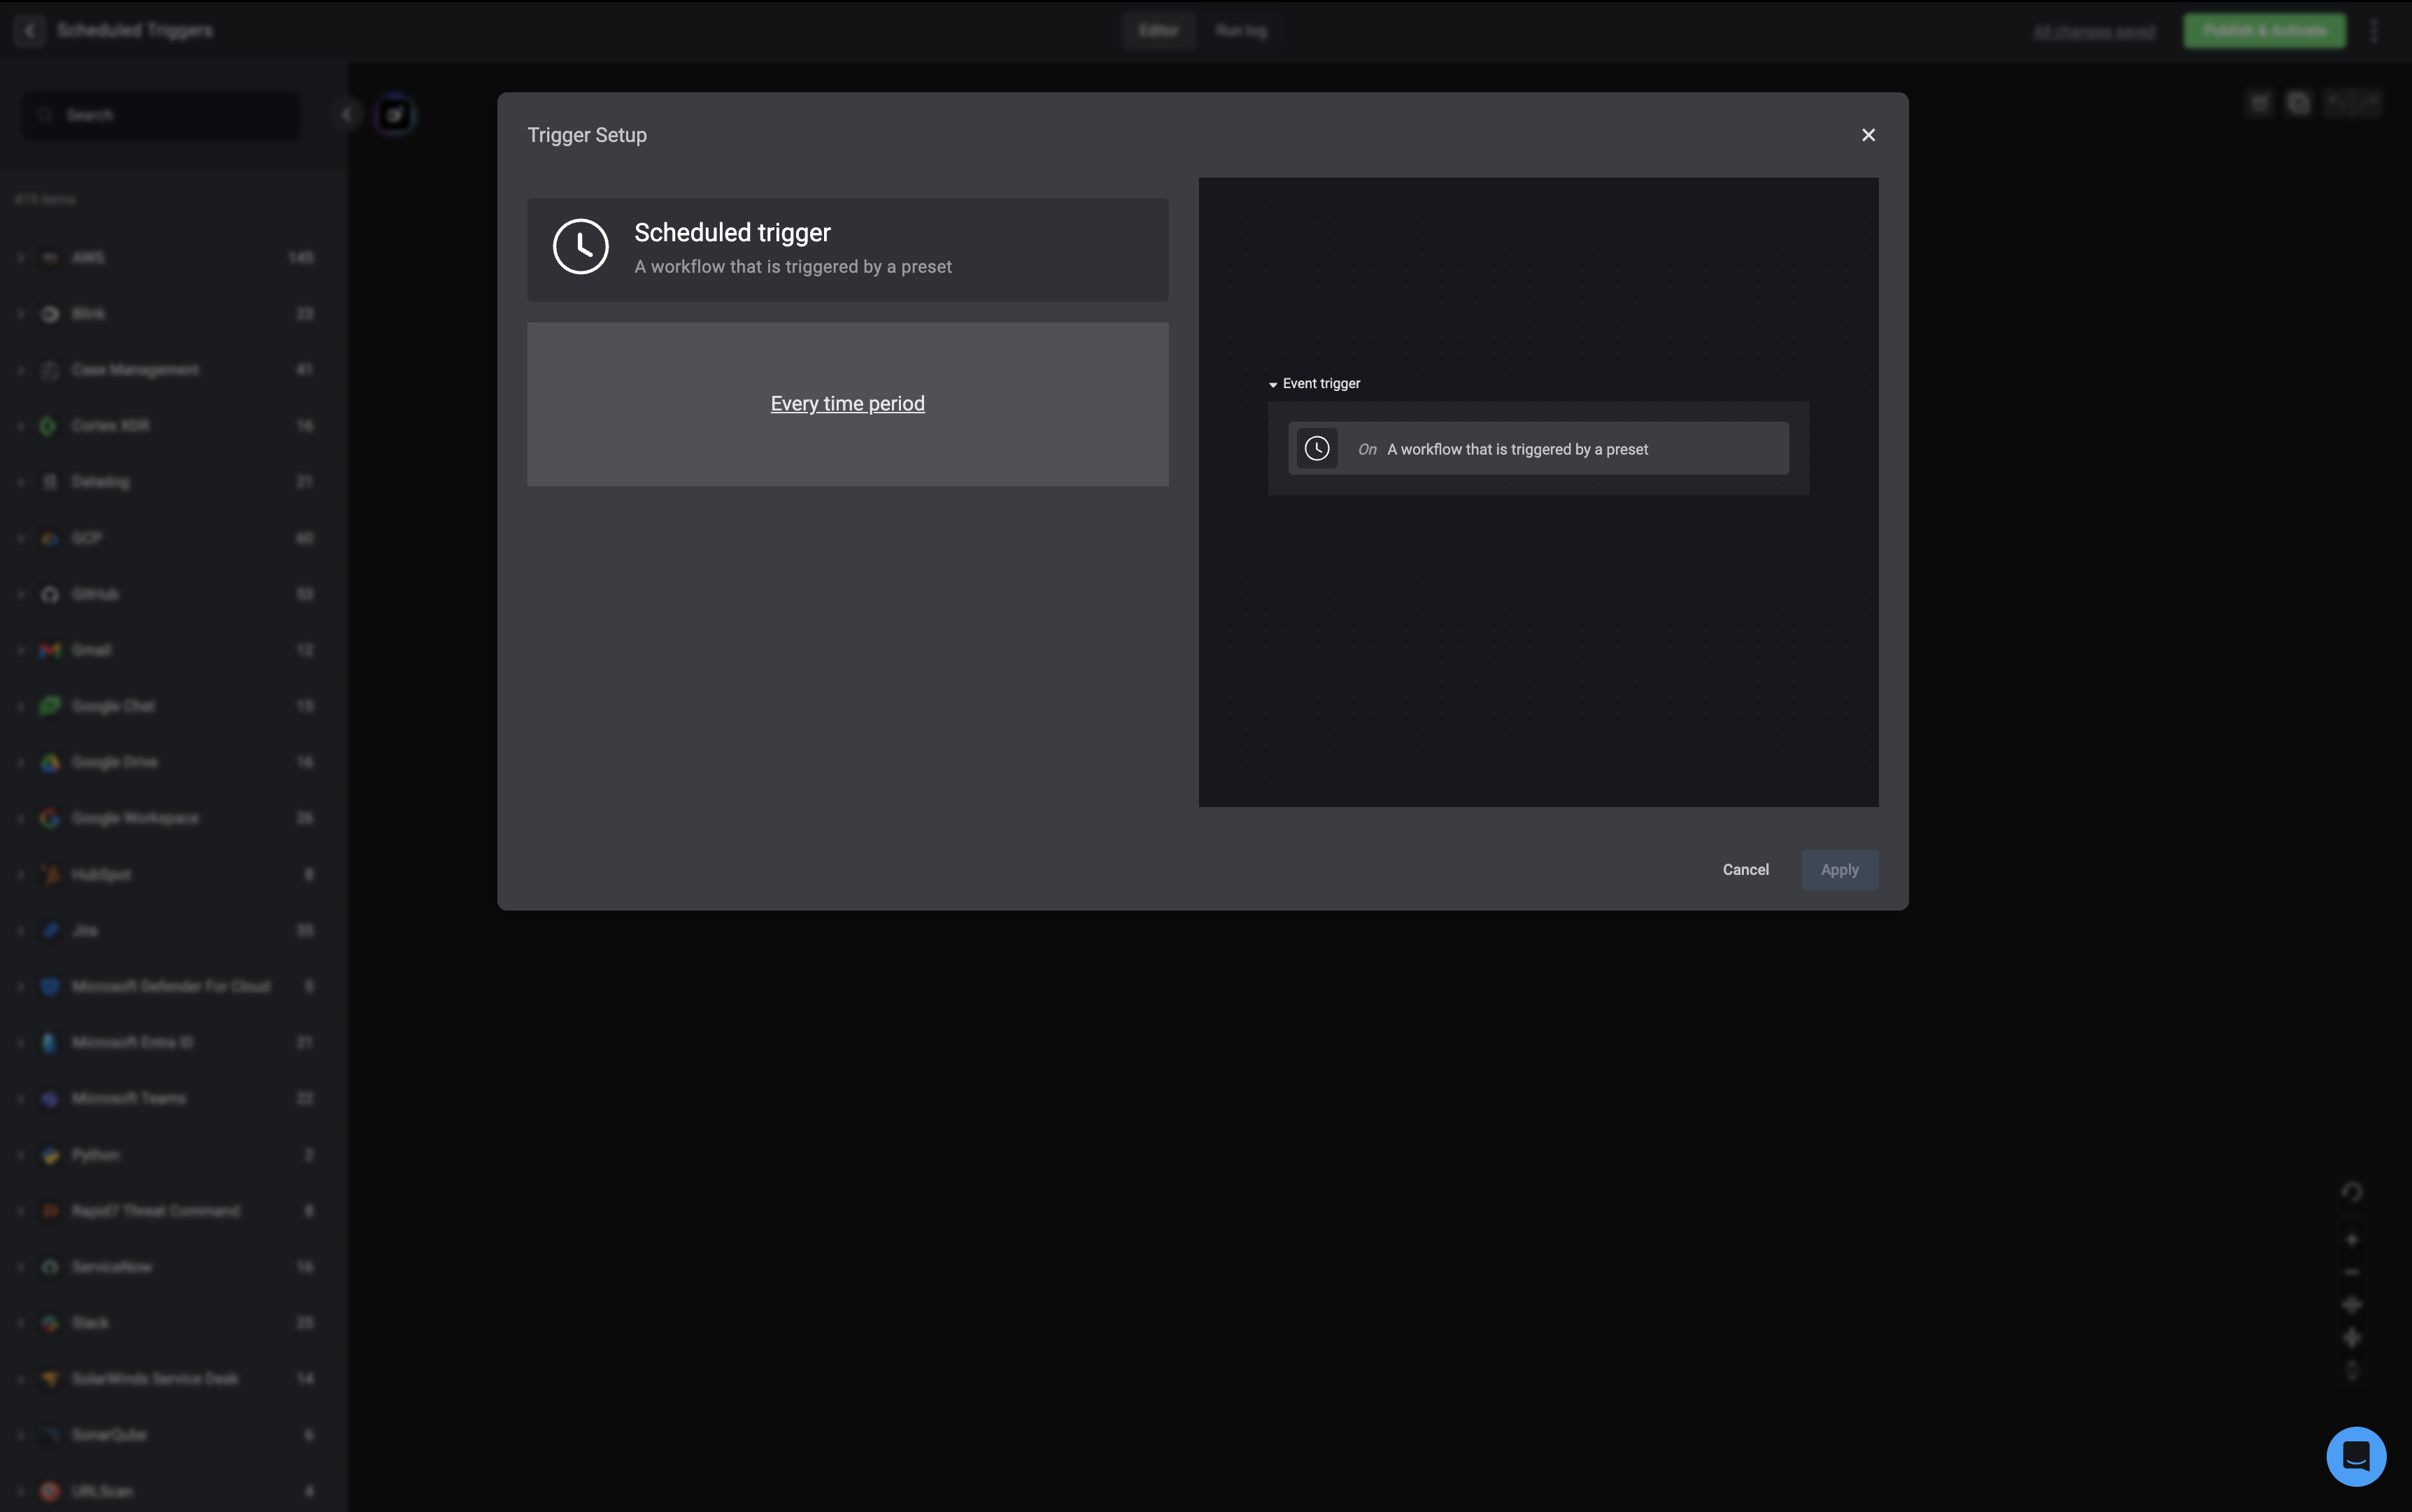 Define how often your workflow should run, and select the appropriate **time zone** for the schedule.
Your current time zone is selected by default.
You can choose from:
* **Hourly**
* **Daily**
* **Weekly**
* **Monthly**
* **Custom** (advanced option using a Cron expression)
If you select **Custom**, you can use the built-in **Cron Expression Picker** to create a precise schedule. It follows standard Cron syntax:
Define how often your workflow should run, and select the appropriate **time zone** for the schedule.
Your current time zone is selected by default.
You can choose from:
* **Hourly**
* **Daily**
* **Weekly**
* **Monthly**
* **Custom** (advanced option using a Cron expression)
If you select **Custom**, you can use the built-in **Cron Expression Picker** to create a precise schedule. It follows standard Cron syntax:
| Symbol | Description |
| ------ | -------------------- |
| **\*** | any value |
| **,** | value list separator |
| **-** | range of values |
| **/** | step values |
**Important Scheduling Notes:**
* **Default Interval:** Workflows run every **5 minutes** by default.
* **Minimum Interval:** The shortest allowed schedule is **every 1 minute**.
* **Performance Consideration:** Running workflows too frequently (e.g., every minute) can create unnecessary system load. Optimize these workflows for efficiency.
* **Validation:** If the Cron expression is invalid, it will be highlighted in **red**.
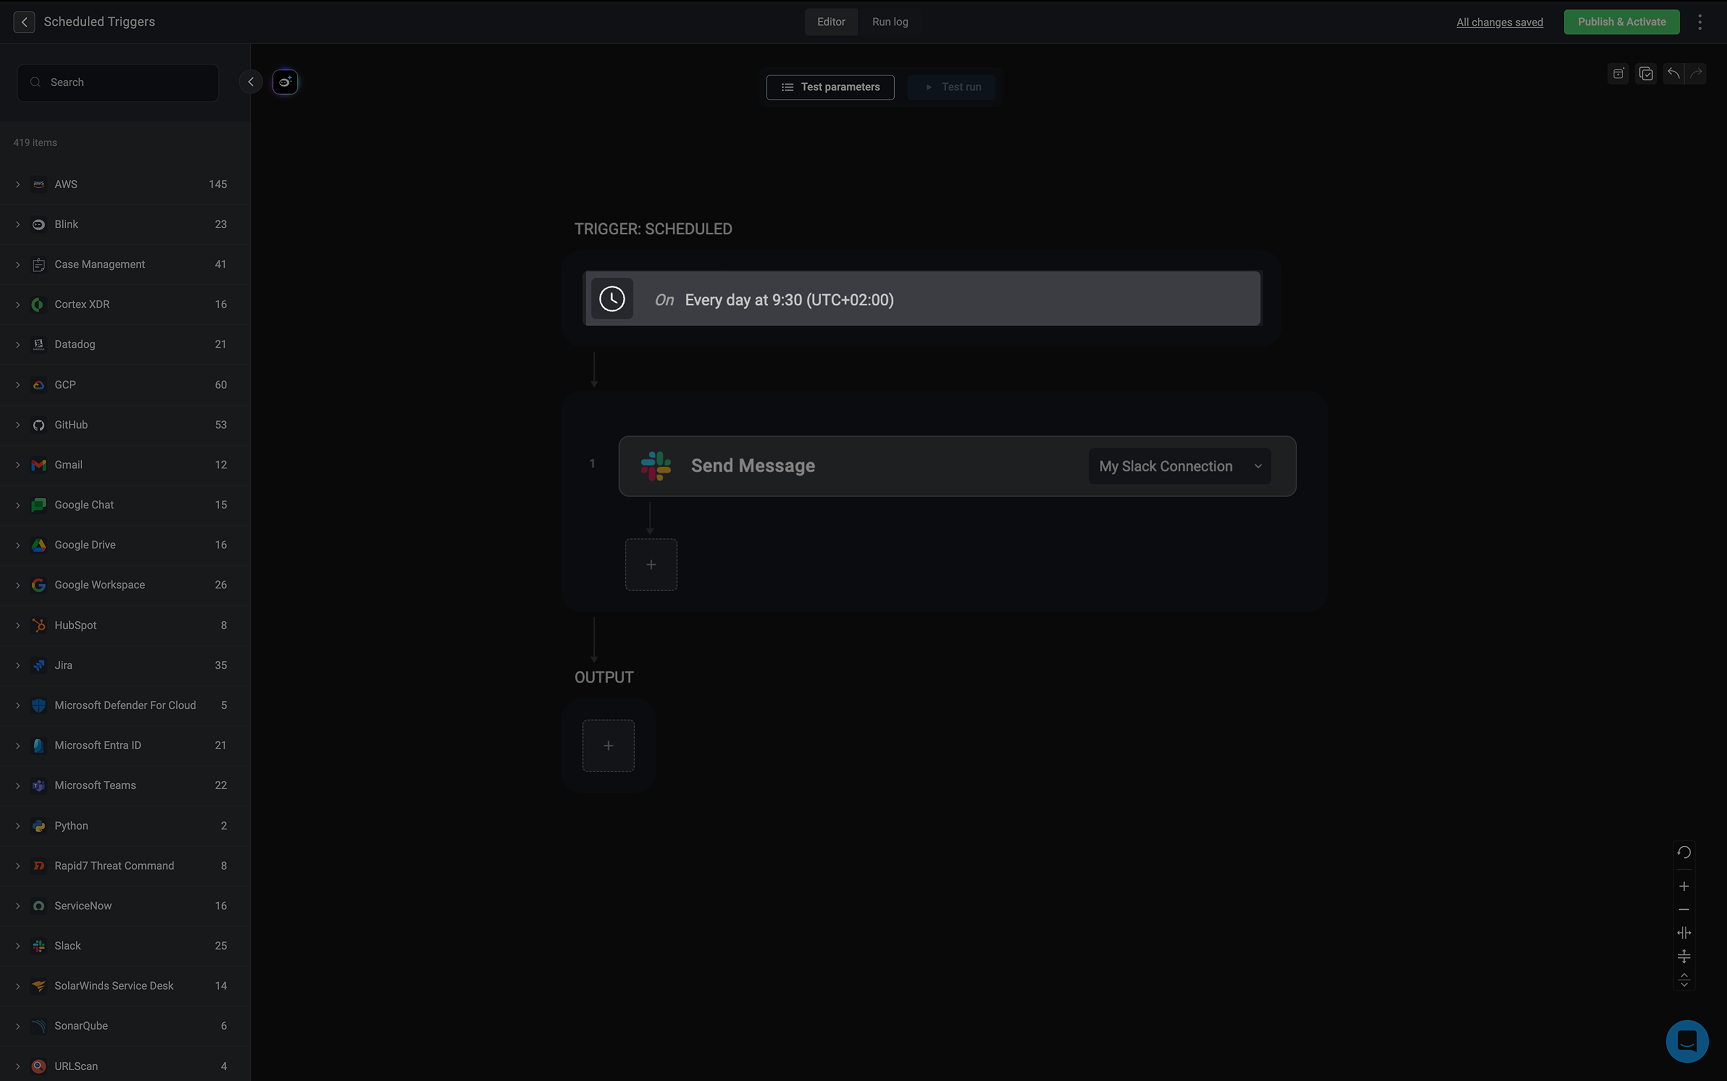
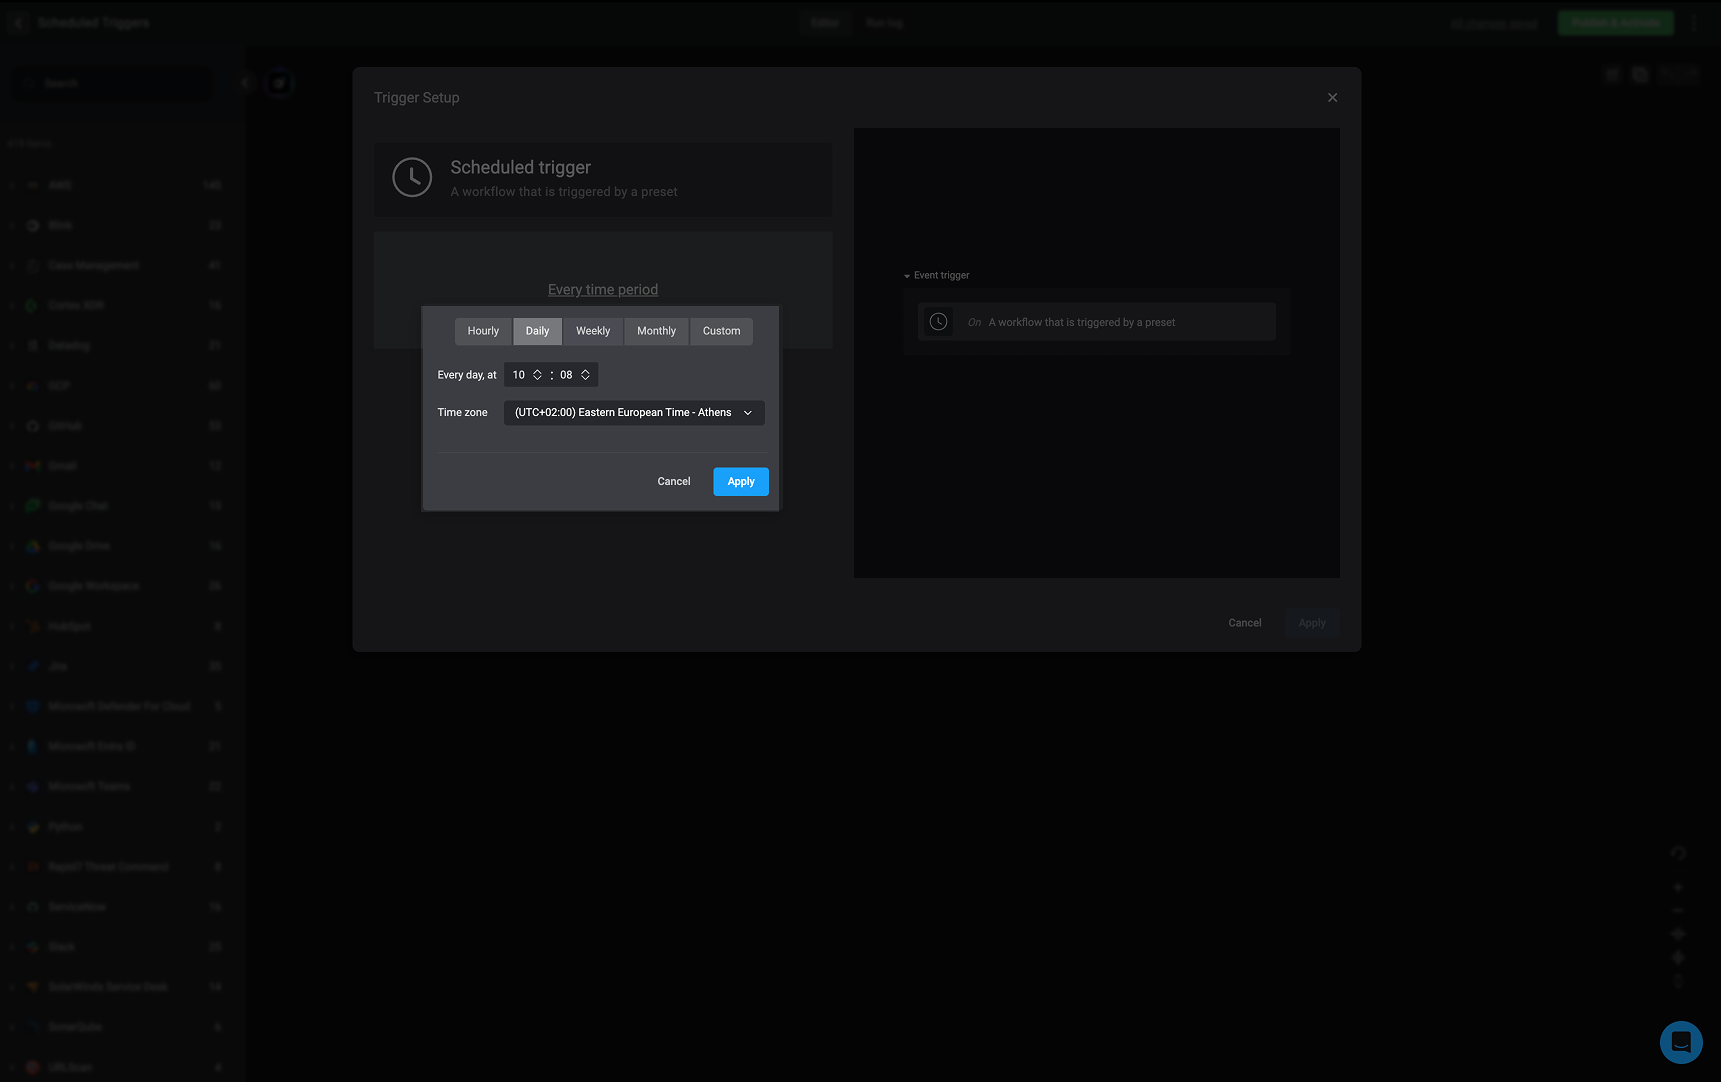 Click **Apply** to save your scheduled time
 ***
## See It In Action
## Related Articles
Learn how triggers automate workflow execution.
Build and configure workflows from scratch.
Set up triggers that start workflows based on events.
Manually start workflows whenever needed.
***
## See It In Action
## Related Articles
Learn how triggers automate workflow execution.
Build and configure workflows from scratch.
Set up triggers that start workflows based on events.
Manually start workflows whenever needed.