> ## Documentation Index
> Fetch the complete documentation index at: https://docs.blinkops.com/llms.txt
> Use this file to discover all available pages before exploring further.
# Workflow Version History
> Track and manage workflow version history to review changes and restore previous versions in Blink.
The Workflow Version History feature provides a complete record of every change made to a workflow from the moment it’s created. It lets you review past changes, compare any two versions side by side, and, when necessary, restore a previous version to revert unwanted changes or recover a stable state.
 ***
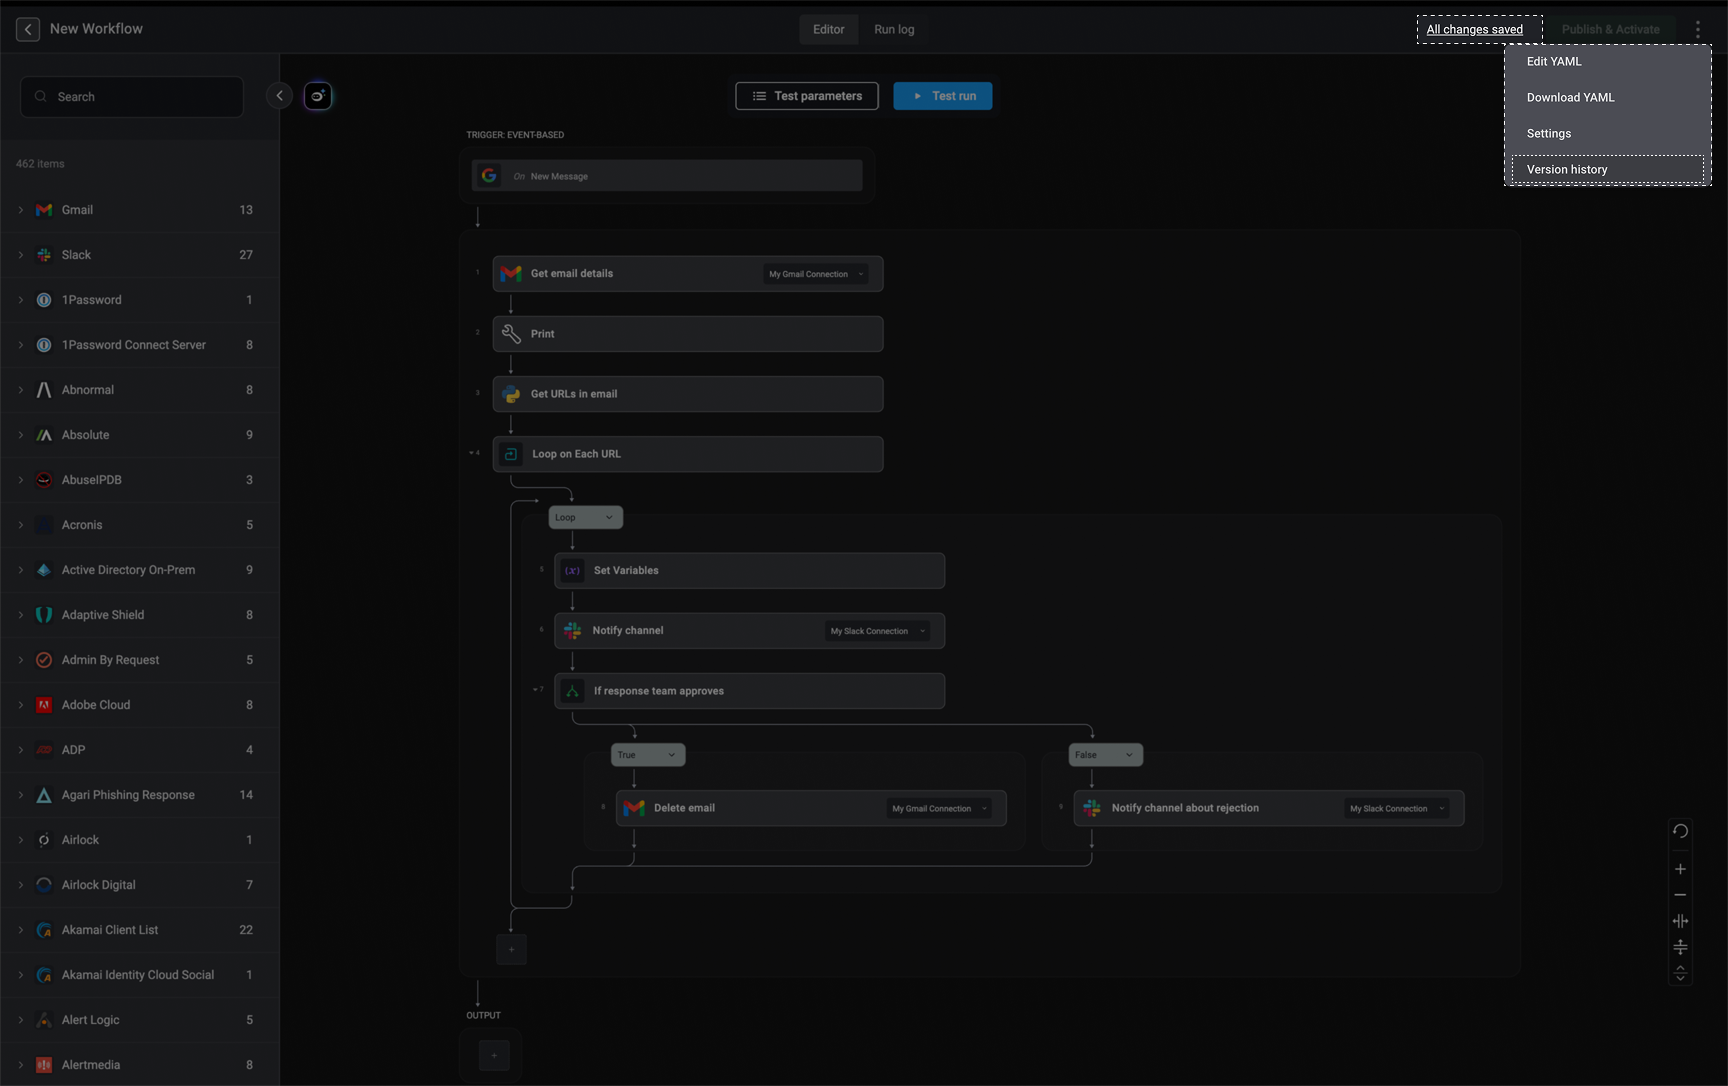
To access the **Version History** feature, click the menu icon in the top-right corner of the workflow editor and select the "Version History" option or you can click the "All changes saved" link, and you will be redirected to the version history interface.
***
To access the **Version History** feature, click the menu icon in the top-right corner of the workflow editor and select the "Version History" option or you can click the "All changes saved" link, and you will be redirected to the version history interface.
 ***
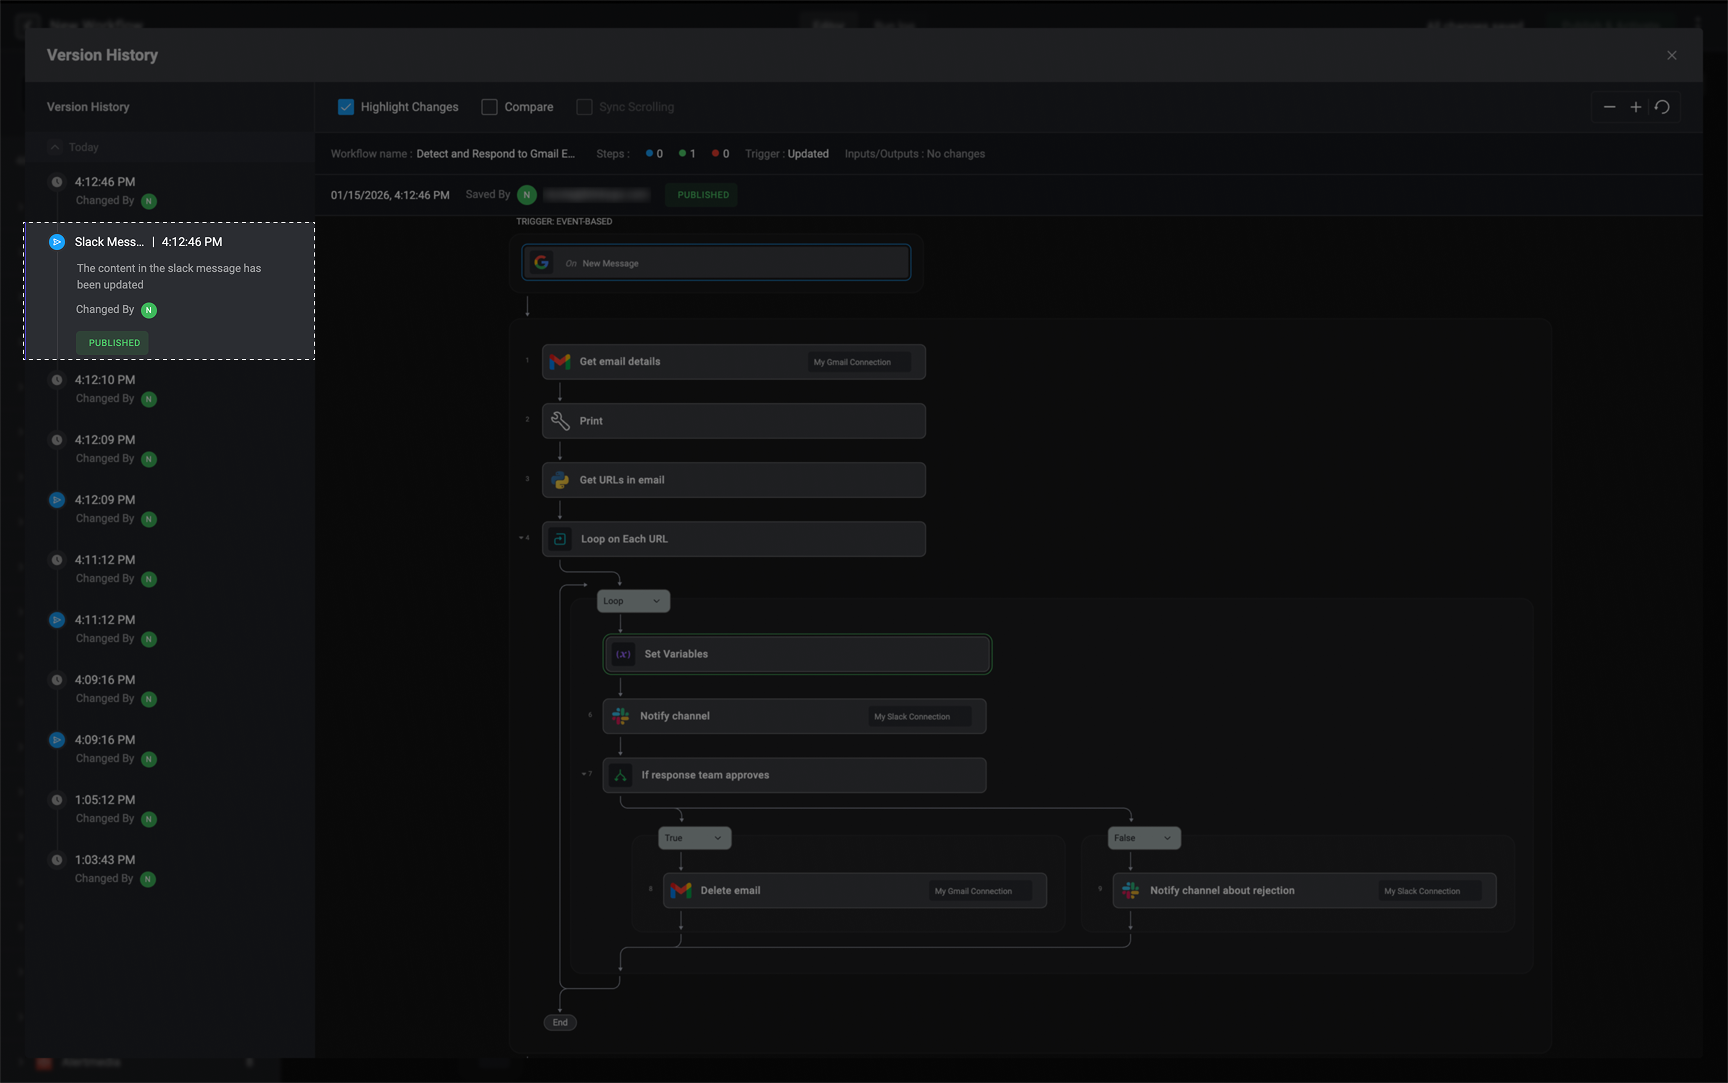
## Workflow Version History Timeline
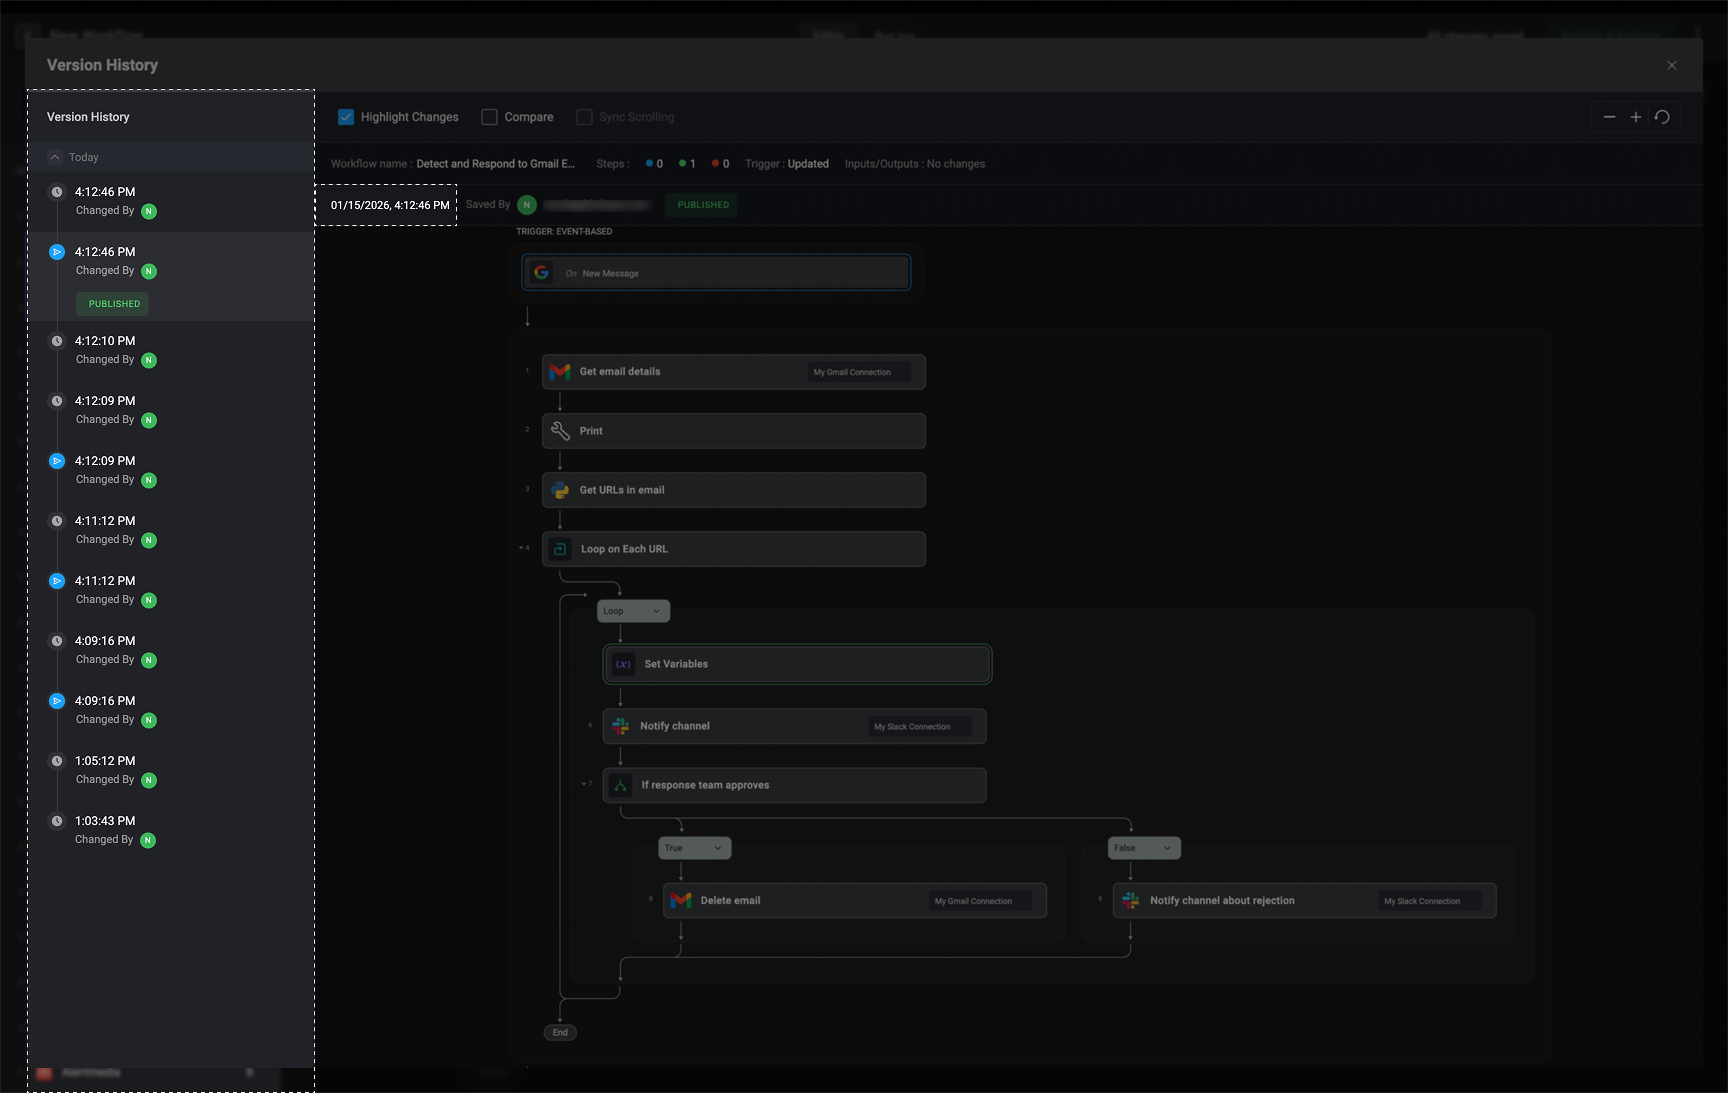
The left-hand sidebar presents a complete timeline of all workflow versions, showing when each change was made, who made it, and which versions were published, including the currently published and active workflow version. This gives you clear visibility into how the workflow has evolved over time and makes it easy to track changes and contributions.
***
## Workflow Version History Timeline
The left-hand sidebar presents a complete timeline of all workflow versions, showing when each change was made, who made it, and which versions were published, including the currently published and active workflow version. This gives you clear visibility into how the workflow has evolved over time and makes it easy to track changes and contributions.
 ***
### Restoring a Workflow Version
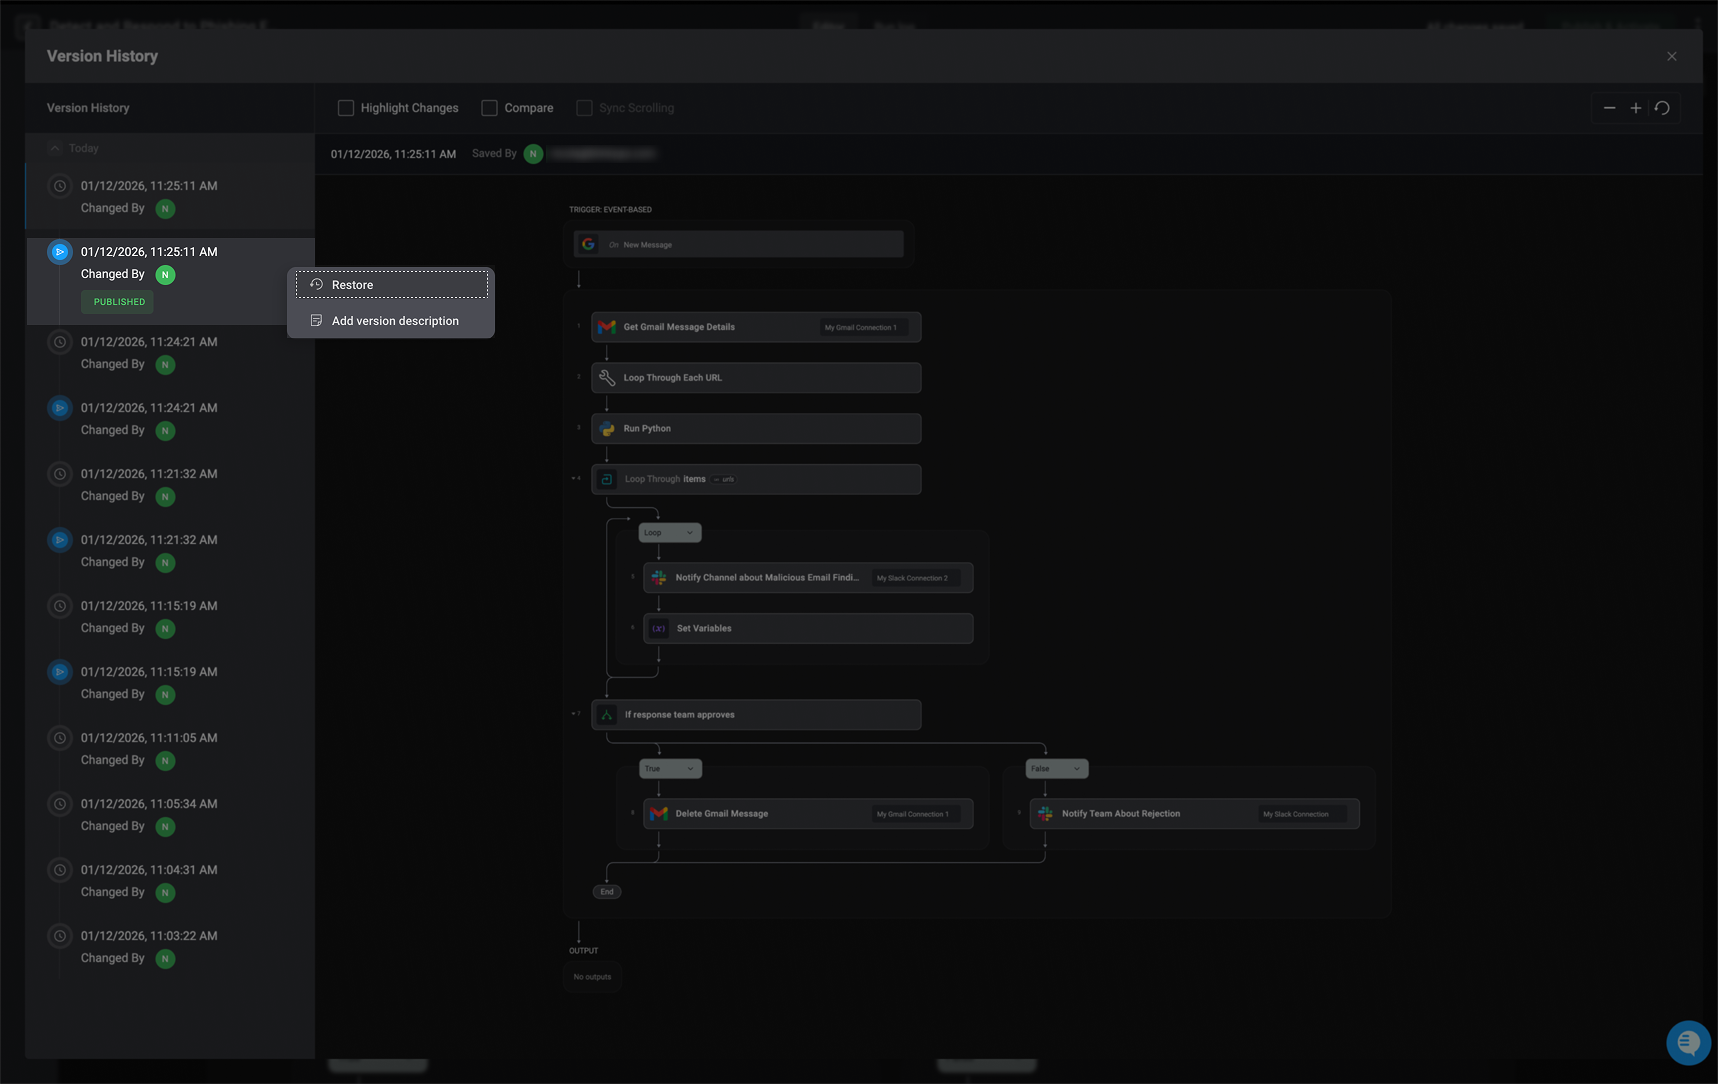
Hover over a workflow in the left-hand sidebar and click the menu. A dialog box will appear, giving you the option to Restore a specific version of the workflow. This is useful if you need to revert to a previous state after making changes or to recover an earlier configuration.
By selecting the **Restore** option, you will be taken to the workflow editor with the restored version of the chosen workflow version. Here, you can make any necessary edits and save the selected workflow version as a draft or publish it.
***
### Restoring a Workflow Version
Hover over a workflow in the left-hand sidebar and click the menu. A dialog box will appear, giving you the option to Restore a specific version of the workflow. This is useful if you need to revert to a previous state after making changes or to recover an earlier configuration.
By selecting the **Restore** option, you will be taken to the workflow editor with the restored version of the chosen workflow version. Here, you can make any necessary edits and save the selected workflow version as a draft or publish it.
 ***
### Add Version Description
Hover over the workflow in the left-hand sidebar, click the menu, and select 'Add Version Description'.
***
### Add Version Description
Hover over the workflow in the left-hand sidebar, click the menu, and select 'Add Version Description'.
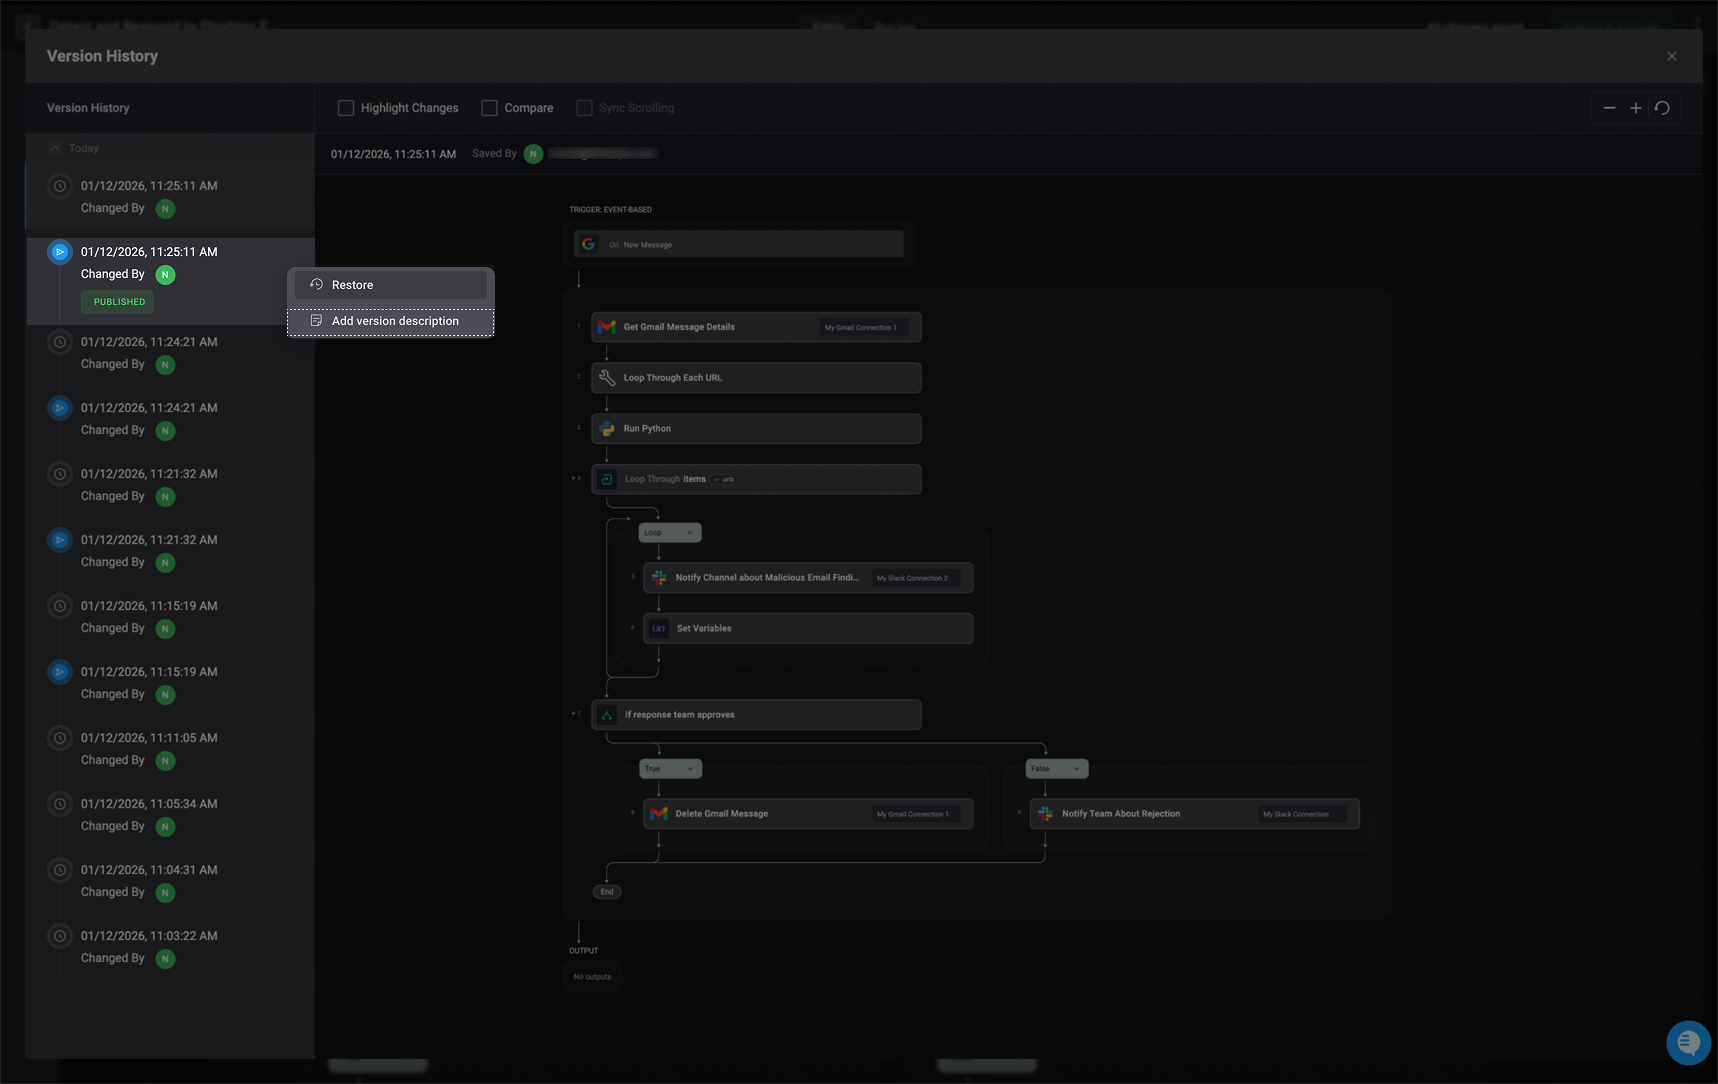 In the dialog box, provide a name and write a brief description for the selected workflow version. This helps track changes and understand the purpose of each version.
 Once entered, the description will be saved and associated with the selected workflow version, making it easy to identify later.
 ***
## Highlight Changes, Compare and Sync Scrolling
You can also select the checkboxes for all three features to enable them at the same time.
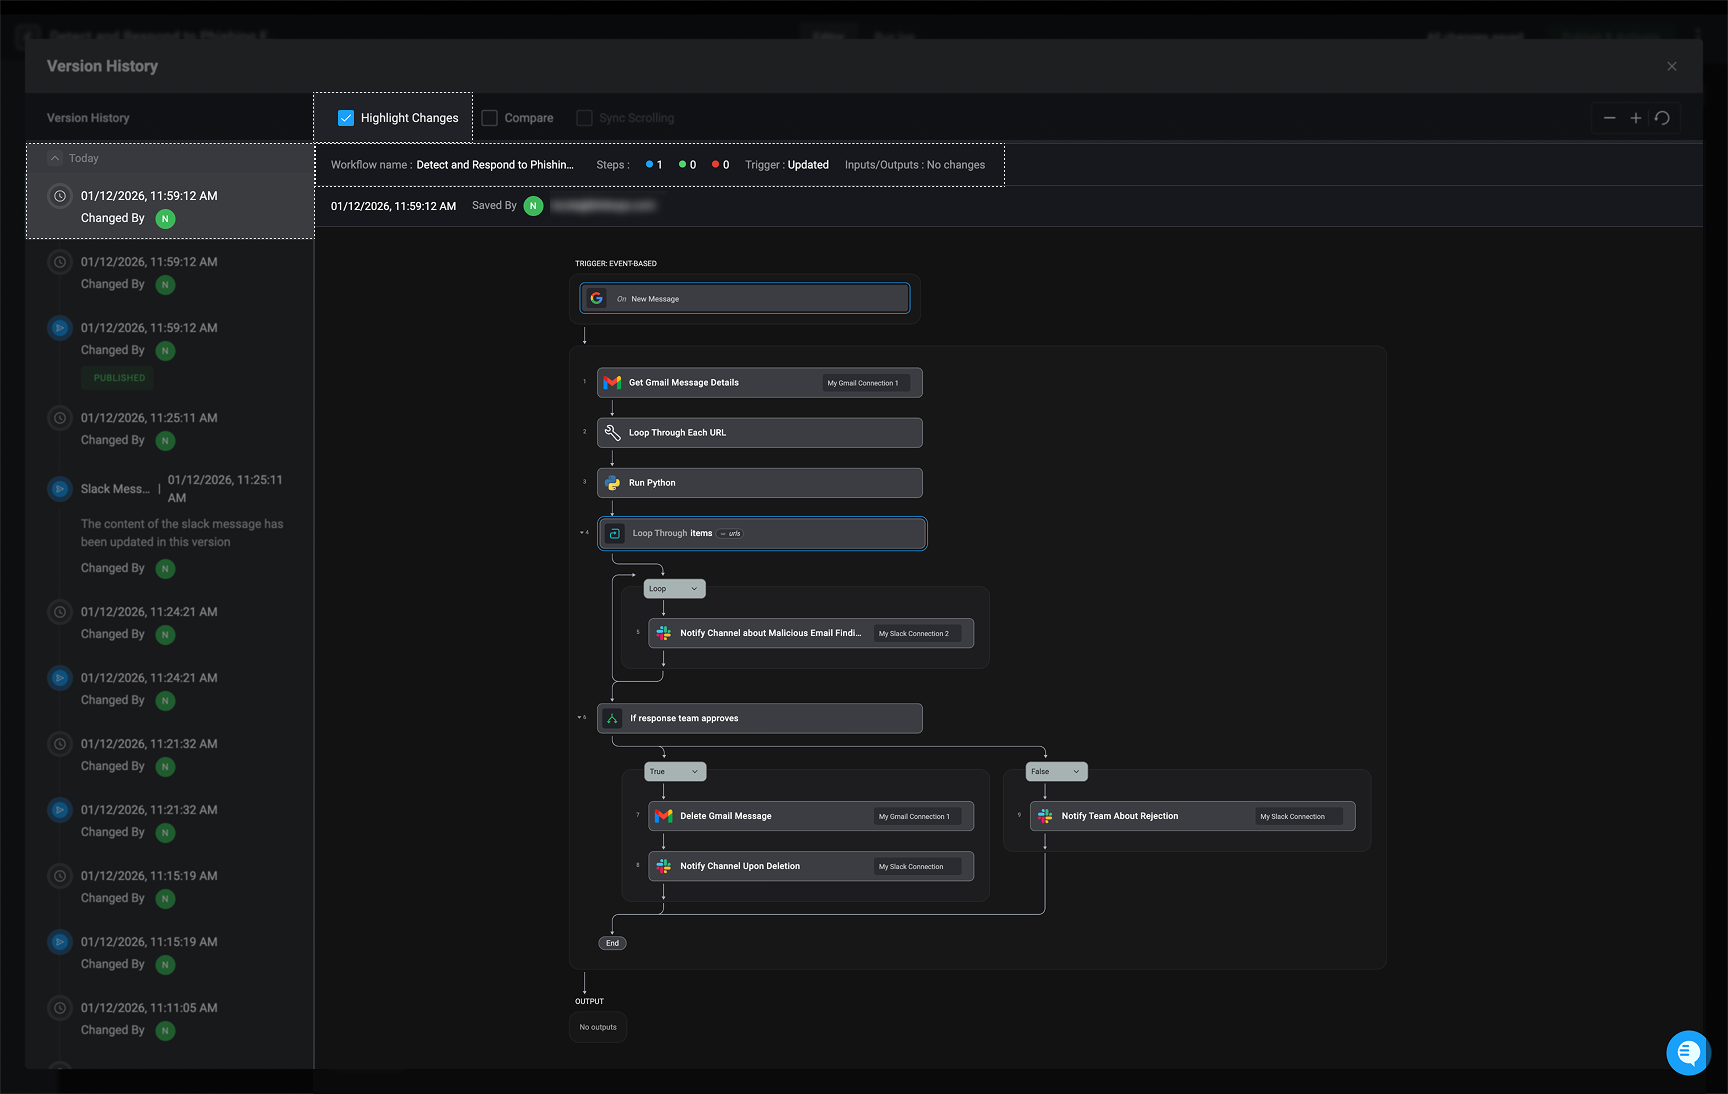
### Highlight Changes
Selecting the 'Highlight Changes' checkbox will display the differences between the selected workflow version and the workflow version immediately preceding it.
* **Green** – Indicates a new step, input, or output has been added to the workflow.
* **Blue** – Shows that an existing step, connection, step setting, input, or output has been modified.
* **Red** – Signifies that a step, input, or output has been removed.
When changes to a step setting have been made, a special indicator will reflect a change has been made.
The Status Indicator Bar provides a quick overview of the current state of the selected workflow version. It highlights key details, including:
* **Workflow Version Name** – Displays the name of the workflow version you are currently viewing or editing.
* If the name has been modified, it is marked with an 'Updated' status to indicate pending changes.
* **Step Changes Summary** - How many steps, in the selected workflow version, were changed, added, or deleted.
* **Trigger** – Indicates whether the workflow trigger has changed.
* A *'No changes'* status means the trigger remains the same
* An 'Updated' indicator confirms that changes were made to the trigger configuration or that the trigger type was modified.
* **Inputs and Outputs** – Indicates whether any workflow inputs or outputs were added, removed, updated, reconfigured, or reordered.
***
## Highlight Changes, Compare and Sync Scrolling
You can also select the checkboxes for all three features to enable them at the same time.
### Highlight Changes
Selecting the 'Highlight Changes' checkbox will display the differences between the selected workflow version and the workflow version immediately preceding it.
* **Green** – Indicates a new step, input, or output has been added to the workflow.
* **Blue** – Shows that an existing step, connection, step setting, input, or output has been modified.
* **Red** – Signifies that a step, input, or output has been removed.
When changes to a step setting have been made, a special indicator will reflect a change has been made.
The Status Indicator Bar provides a quick overview of the current state of the selected workflow version. It highlights key details, including:
* **Workflow Version Name** – Displays the name of the workflow version you are currently viewing or editing.
* If the name has been modified, it is marked with an 'Updated' status to indicate pending changes.
* **Step Changes Summary** - How many steps, in the selected workflow version, were changed, added, or deleted.
* **Trigger** – Indicates whether the workflow trigger has changed.
* A *'No changes'* status means the trigger remains the same
* An 'Updated' indicator confirms that changes were made to the trigger configuration or that the trigger type was modified.
* **Inputs and Outputs** – Indicates whether any workflow inputs or outputs were added, removed, updated, reconfigured, or reordered.
 ***
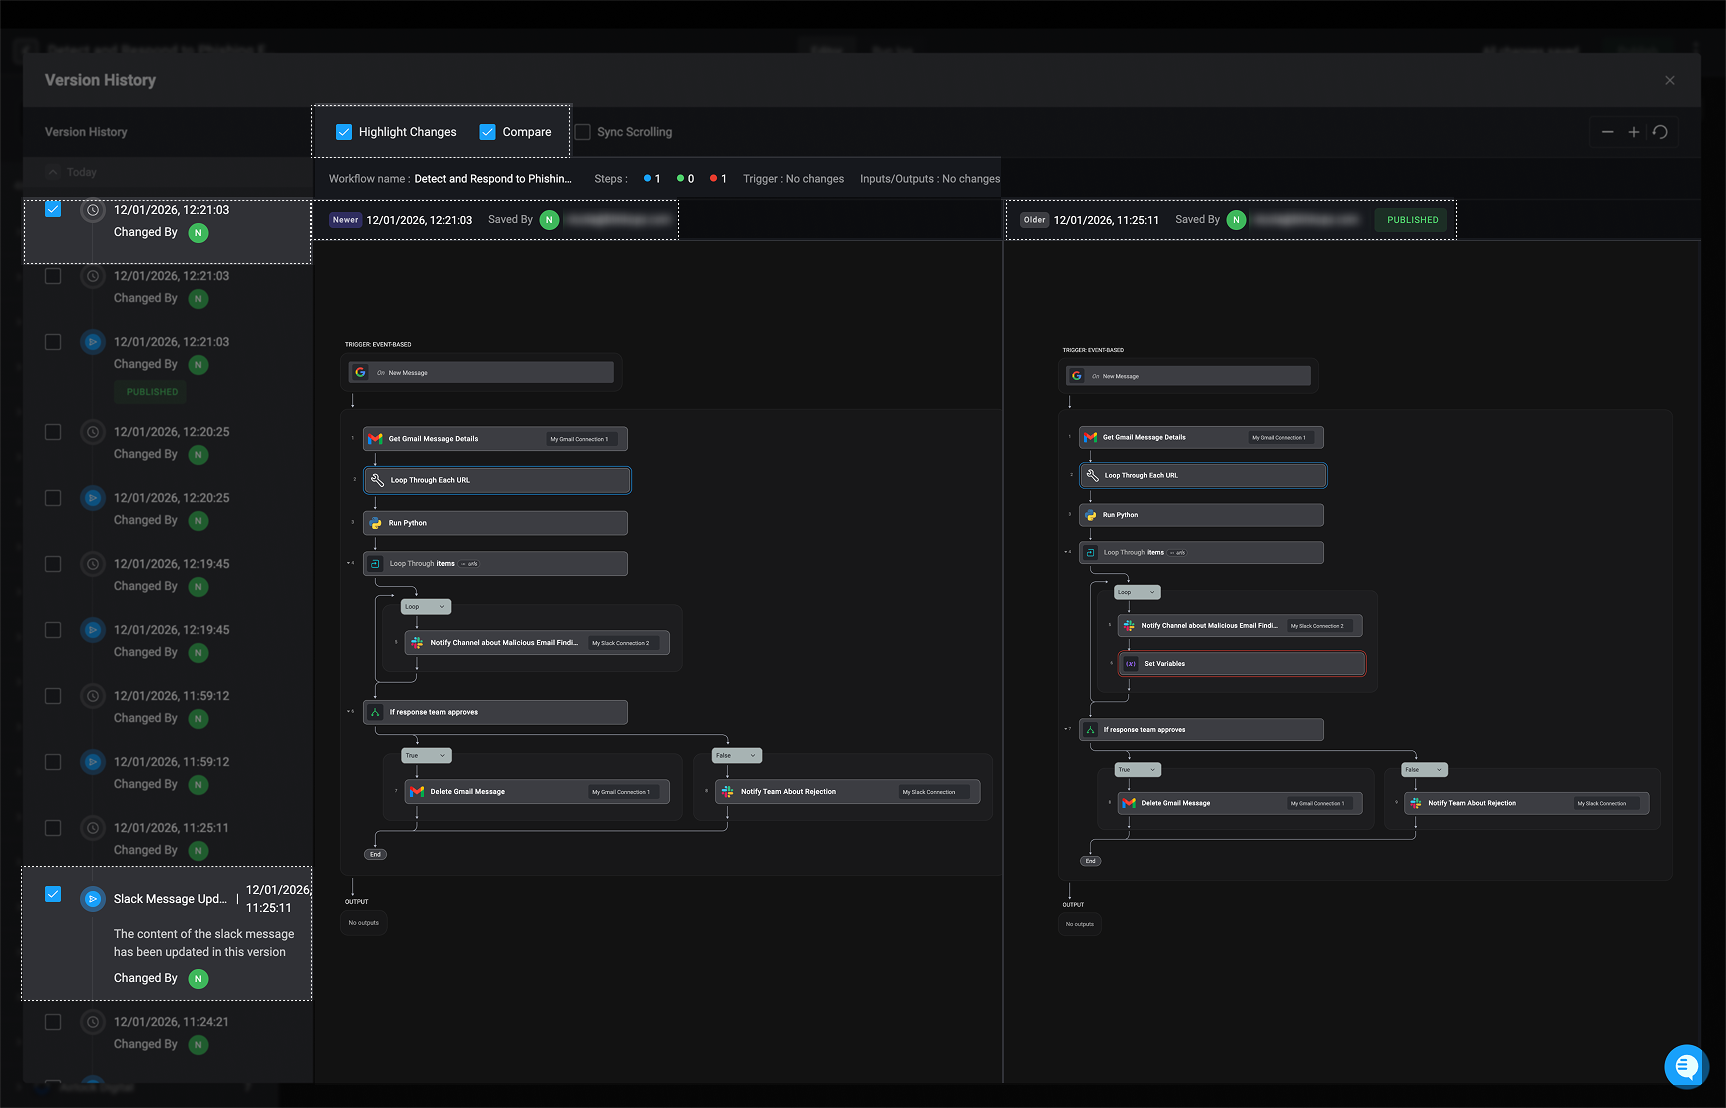
### Compare
Selecting the 'Compare' checkbox enables a side-by-side comparison of two different workflow versions. When comparison mode is active, each version is clearly labeled with a **Newer** or **Older** indicator, making it easy to identify which version is the most recent and which represents the previous state. It also displays when the changes were made, who saved them, and whether the selected version has been published.
Simply check the boxes for the workflow's versions you want to compare.
***
### Compare
Selecting the 'Compare' checkbox enables a side-by-side comparison of two different workflow versions. When comparison mode is active, each version is clearly labeled with a **Newer** or **Older** indicator, making it easy to identify which version is the most recent and which represents the previous state. It also displays when the changes were made, who saved them, and whether the selected version has been published.
Simply check the boxes for the workflow's versions you want to compare.
 ***
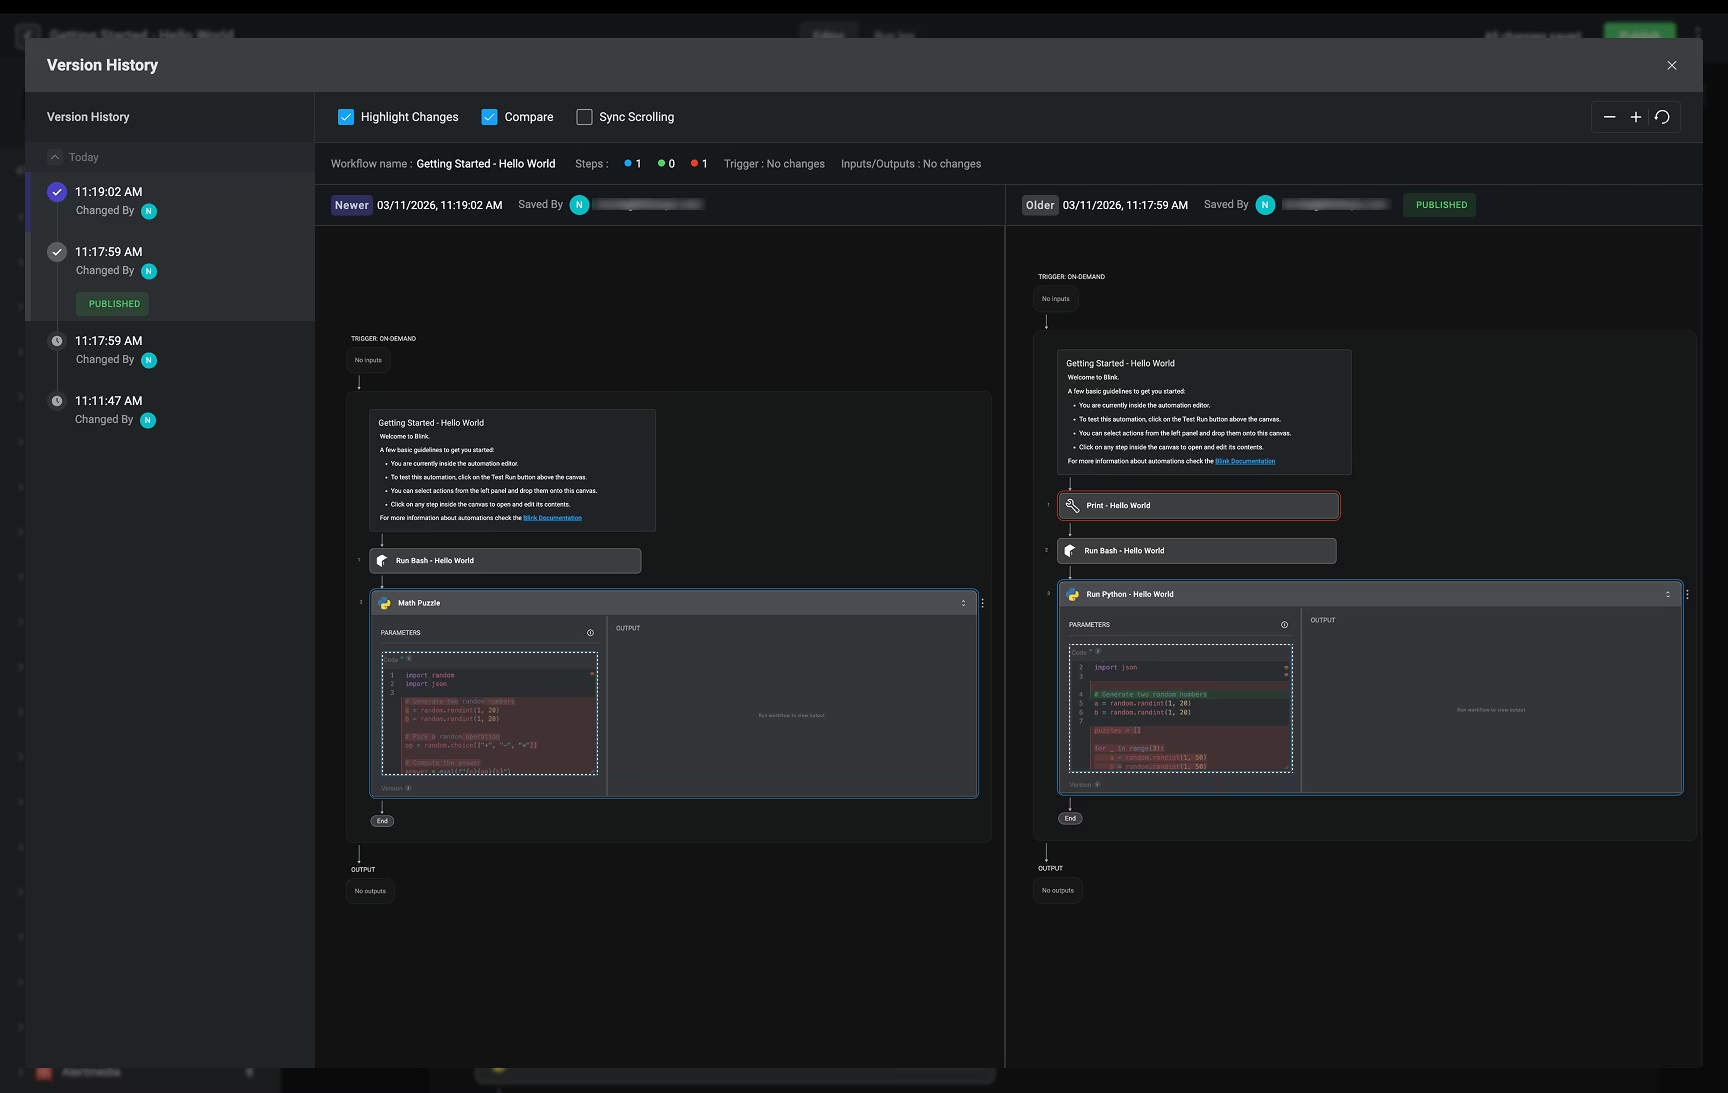
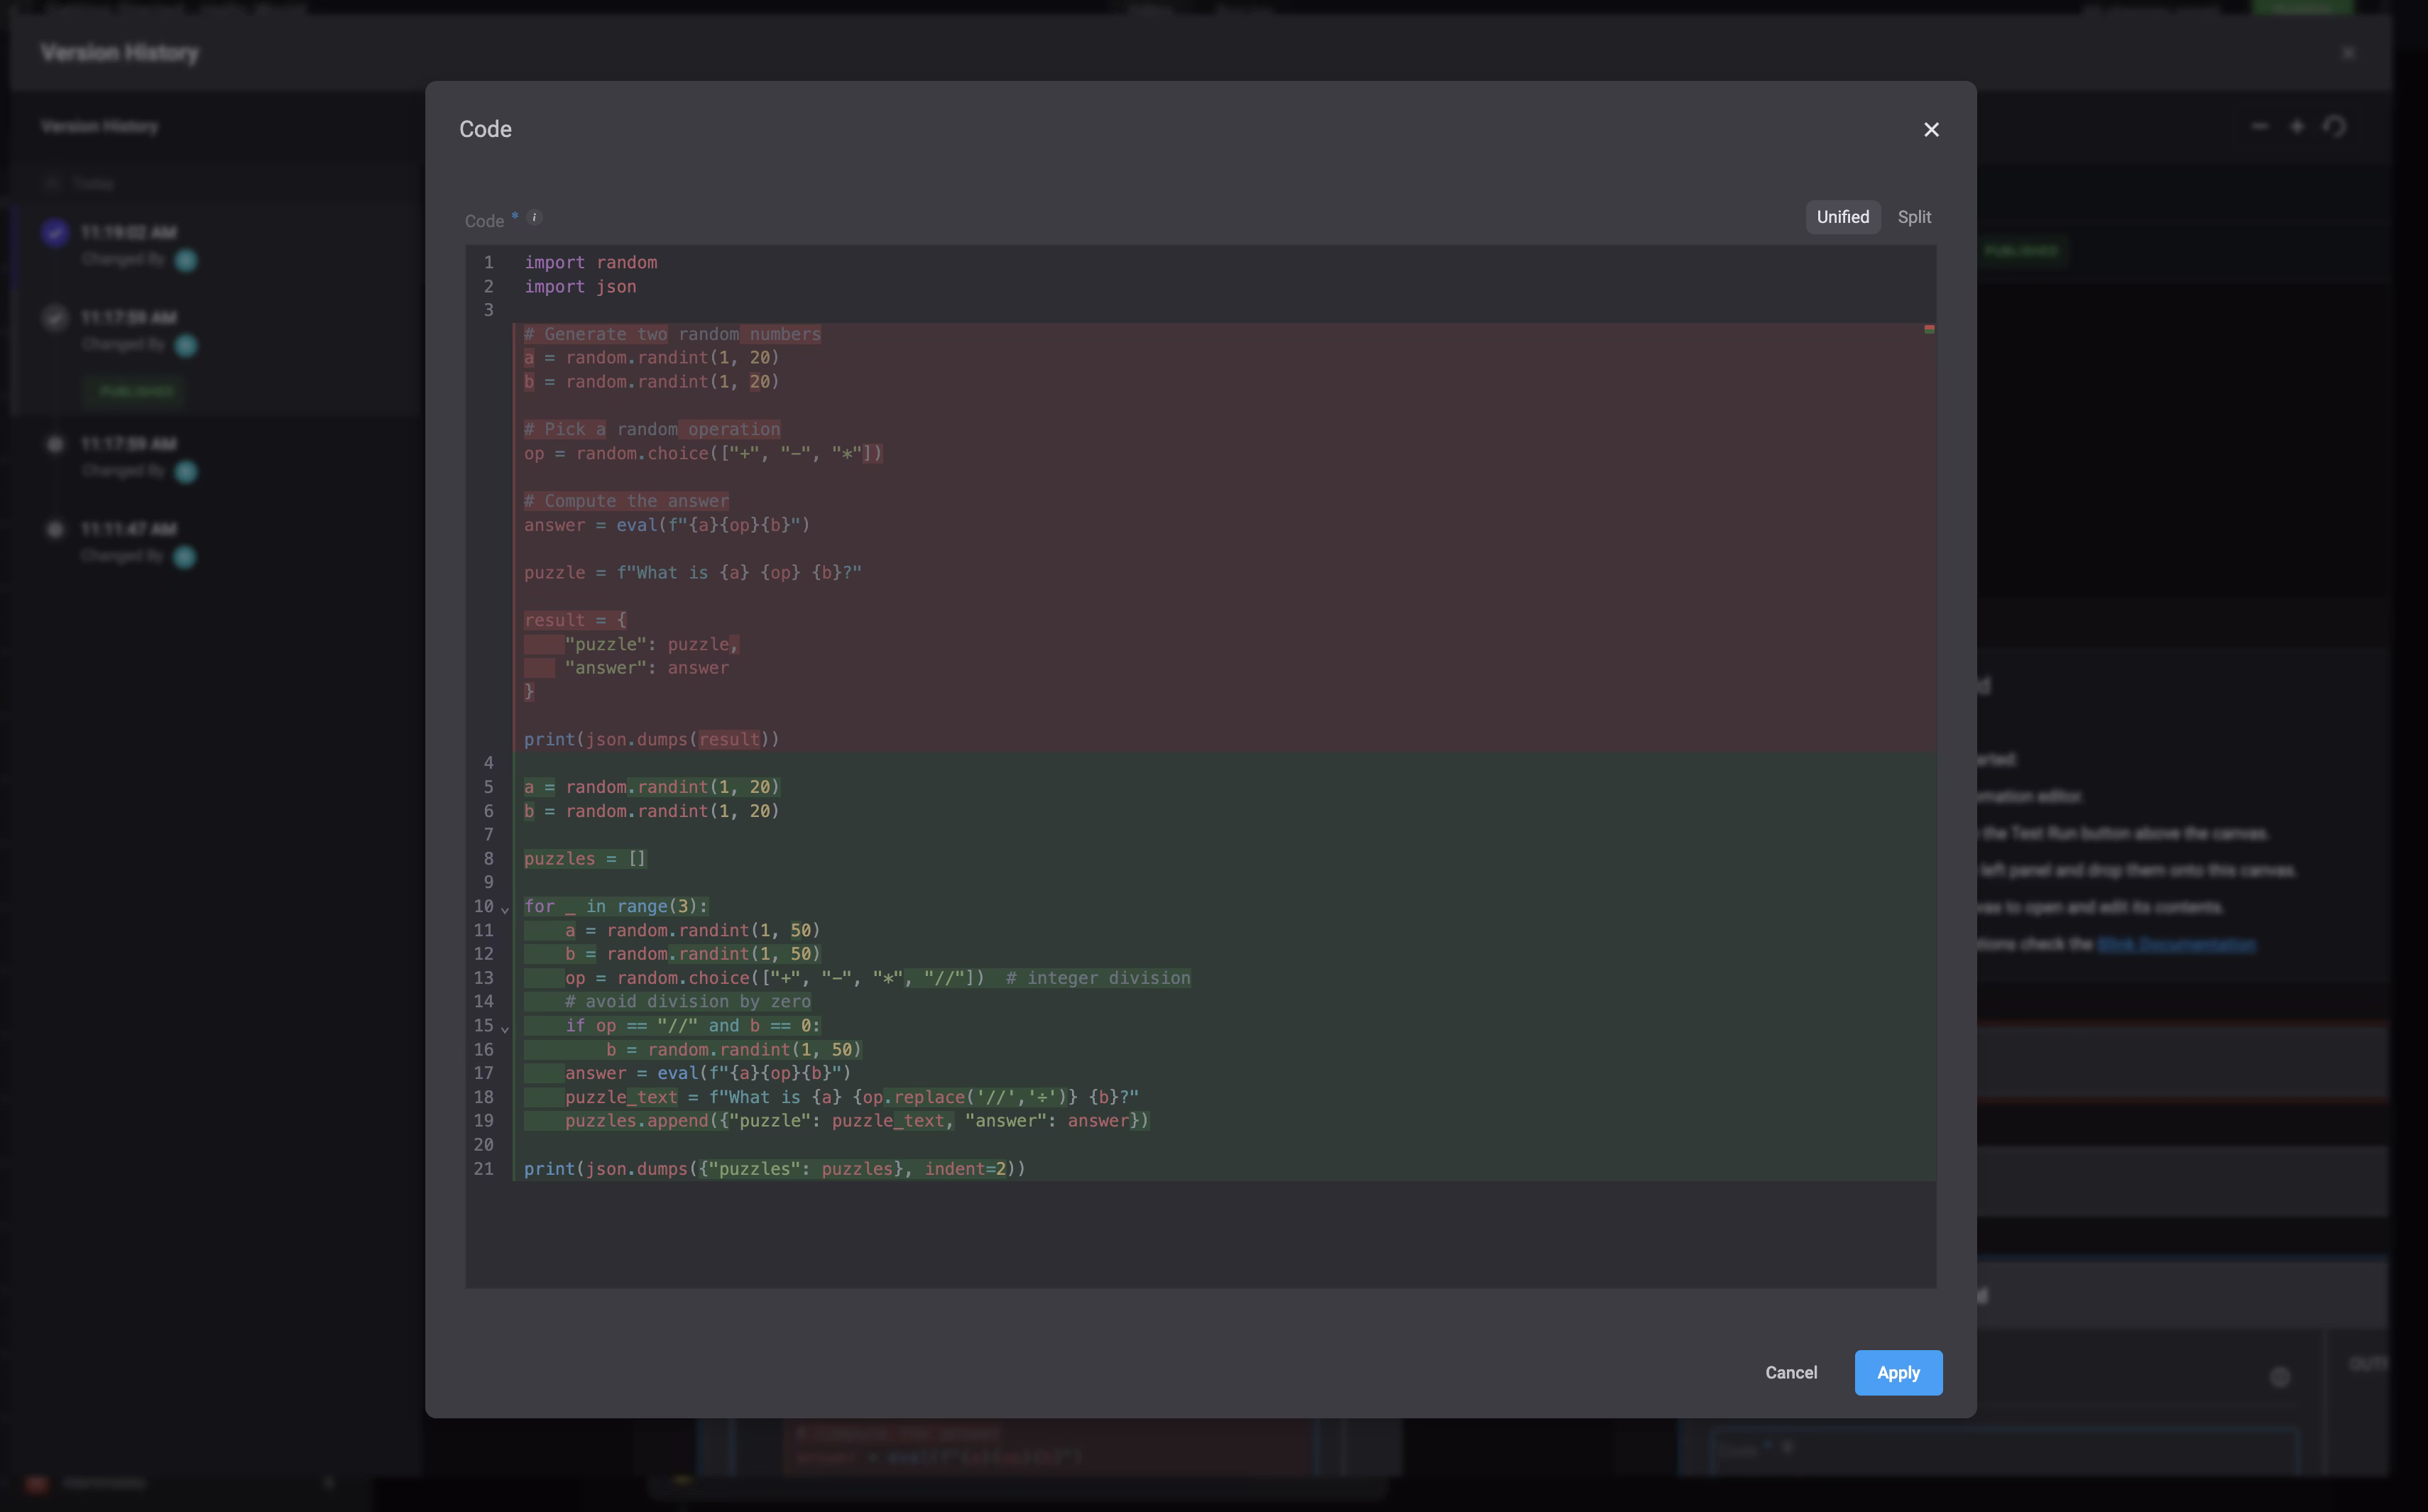
### Highlight and Compare Code Actions
In any [code action](/docs/workflows/building-workflows/actions/basic-actions/code-actions) or workflow actions that contains code or script, you can easily track changes made to your code, line by line.
* **Green** – Highlights lines of code that have been **added**.
* **Red** – Highlights lines of code that have been **removed**.
***
### Highlight and Compare Code Actions
In any [code action](/docs/workflows/building-workflows/actions/basic-actions/code-actions) or workflow actions that contains code or script, you can easily track changes made to your code, line by line.
* **Green** – Highlights lines of code that have been **added**.
* **Red** – Highlights lines of code that have been **removed**.
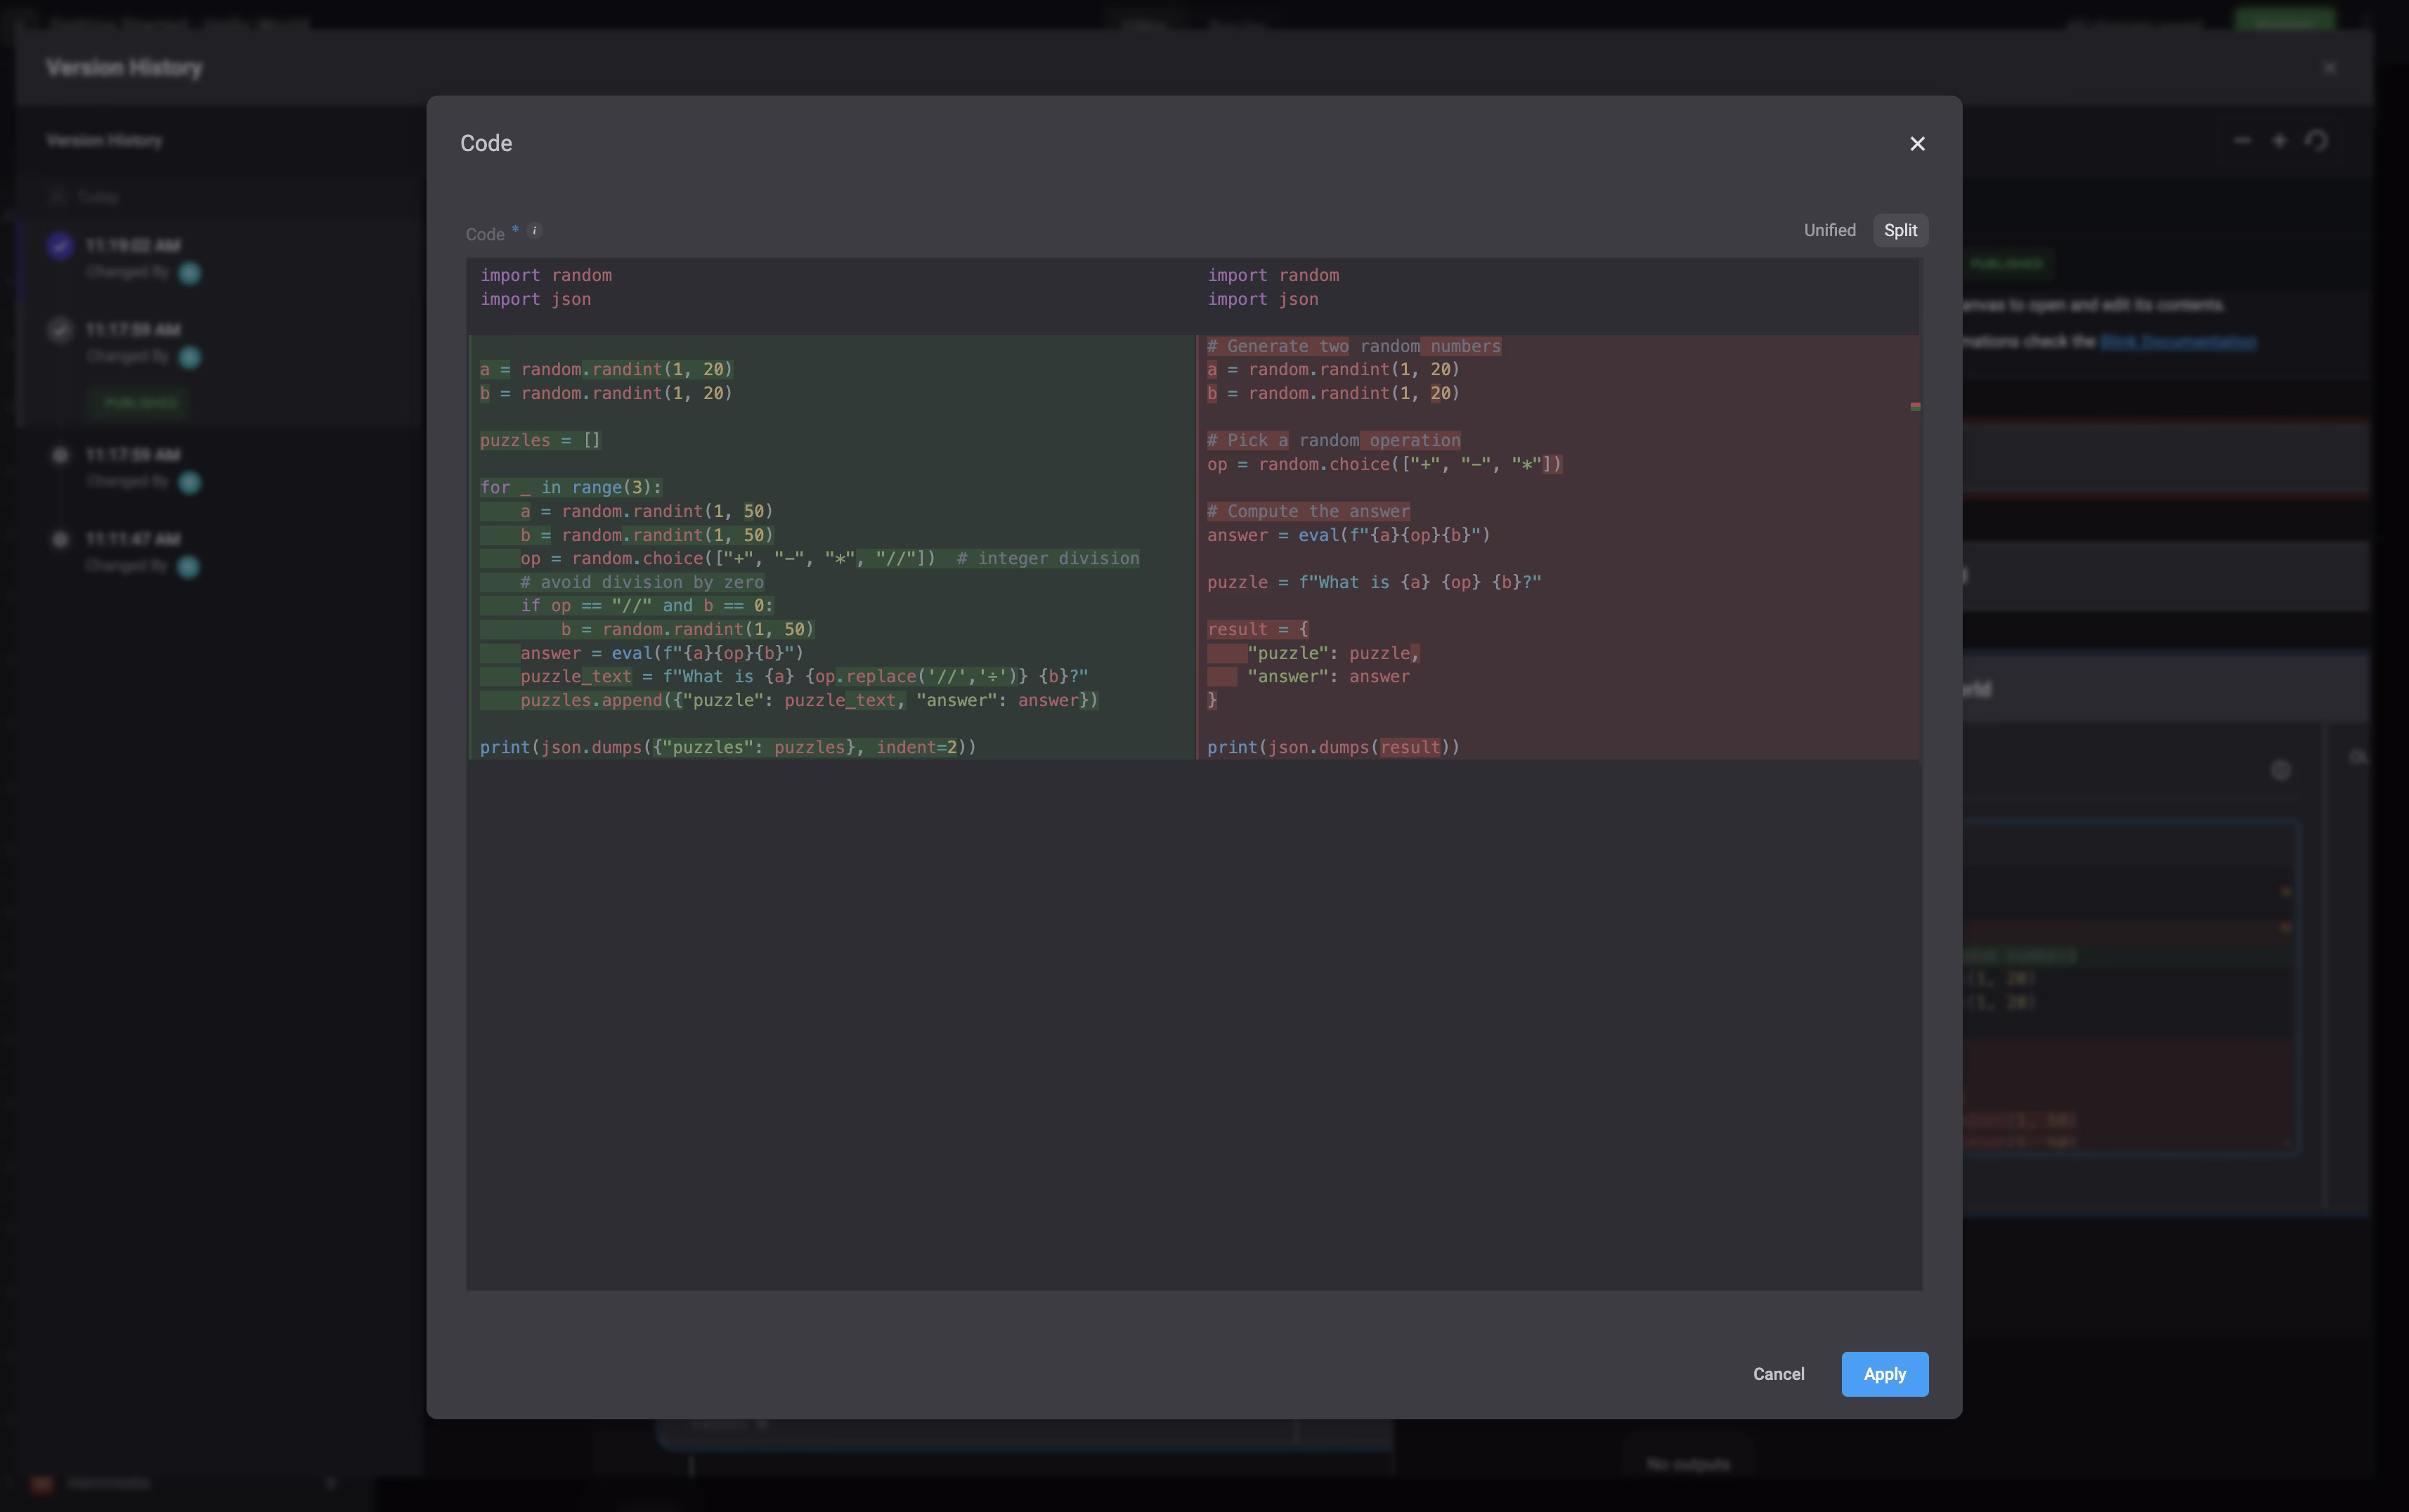
 By clicking the icon, you can choose between two ways to view these changes:
1. **Unified Mode** – Displays all additions and deletions together in a single view.
By clicking the icon, you can choose between two ways to view these changes:
1. **Unified Mode** – Displays all additions and deletions together in a single view.
 2. **Split Mode** – Shows the original code and the updated code side by side, making it easier to compare changes line by line.
 ***
### Sync Scrolling
The Sync Scrolling feature can only be enabled when the Compare option is selected. When the 'Sync Scroll' option is selected, it keeps both workflow versions aligned as you scroll.
***
***
### Sync Scrolling
The Sync Scrolling feature can only be enabled when the Compare option is selected. When the 'Sync Scroll' option is selected, it keeps both workflow versions aligned as you scroll.
***