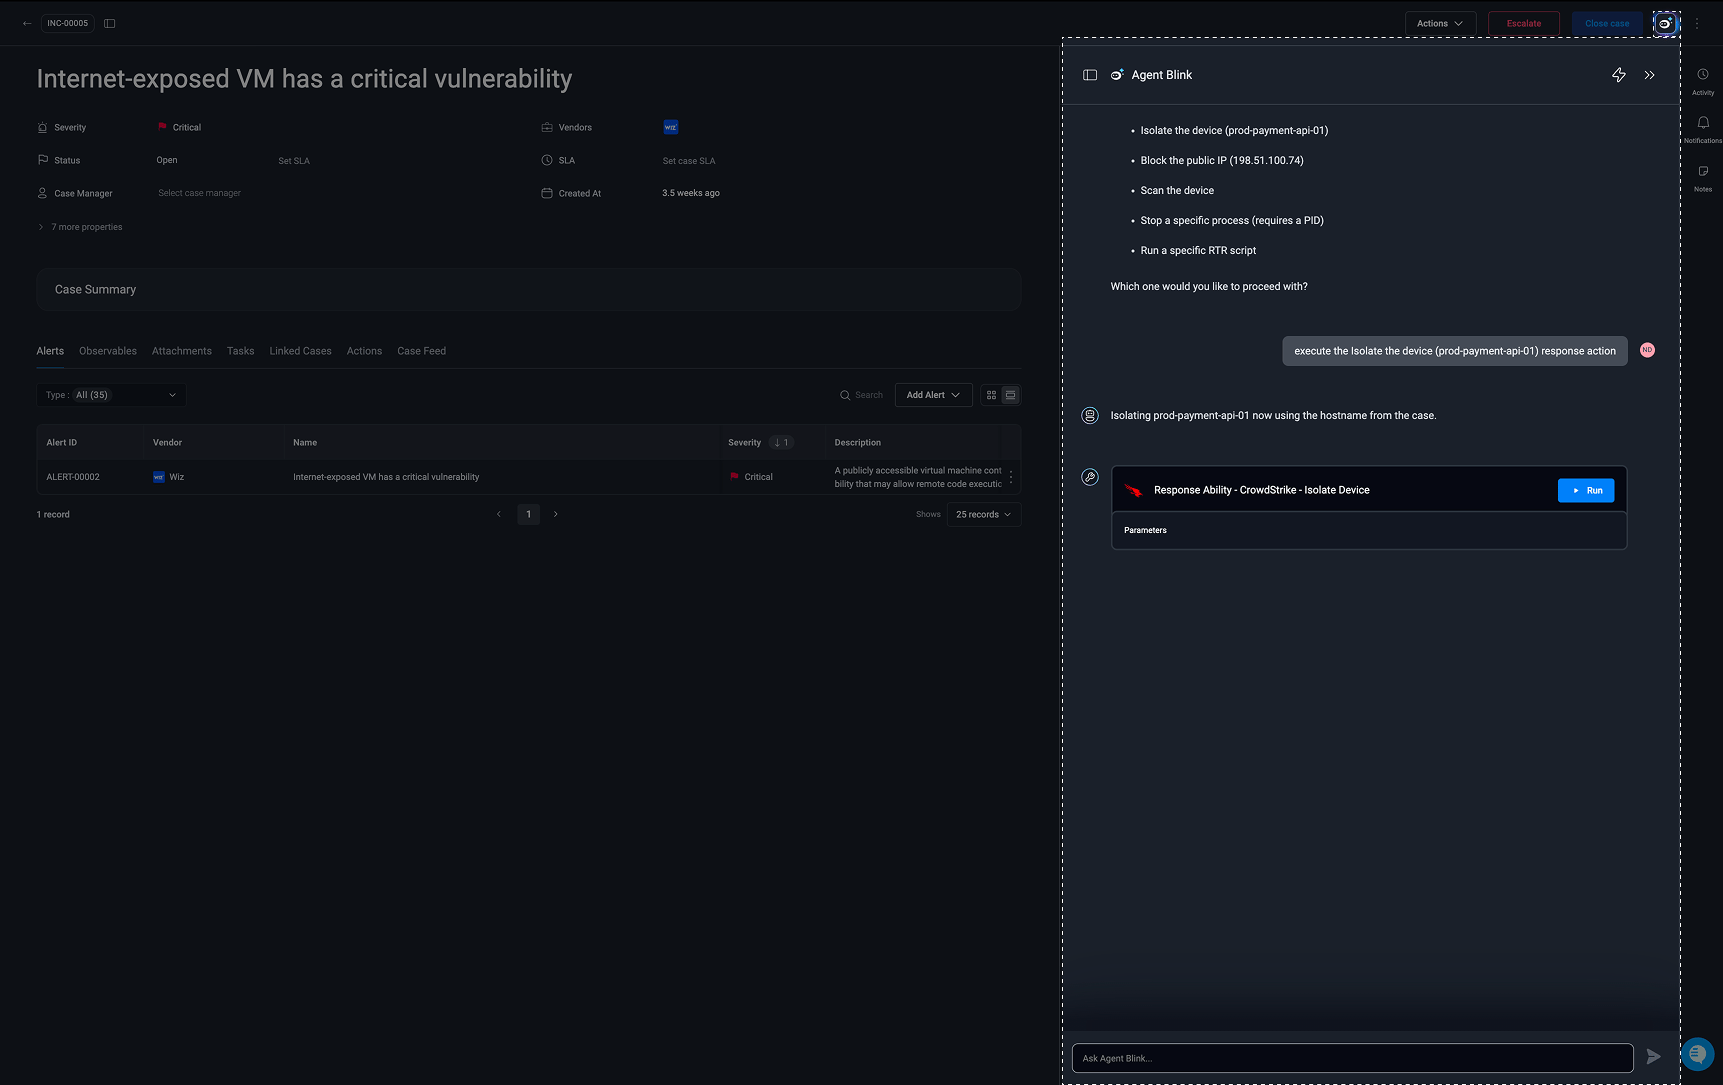
- Isolate a compromised endpoint.
- Block a malicious IP address or domain.
- Disable a compromised user account.
- Quarantine a malicious file.
Configuring Response Actions
Response actions allow analysts to execute predefined workflows directly from the Cases Interface. You can configure response actions for specific entities, such as cases, alerts, observables, attachments, or tasks, and make them available wherever analysts need to take action.1
Select the Vendor Source
To configure a response action, open the Deployment Wizard and select the vendor source you want to use and configure it. The response action workflows are deployed as part of that vendor’s pack.The Deployment Wizard provides pre-built response workflows for supported vendor sources. You can also use a custom workflow as a response action.
Note: Once deployed, the response workflows appear in the vendor’s Response pack. Each workflow is named using the format
Response Ability - <Vendor Name> - <Response Action>, for example, Response Ability - CrowdStrike - Isolate Endpoint.2
Select Where the Response Action Is Available
Navigate to Case Management Settings and select the entity where you want the response action to be available.You can configure response actions for the following entities: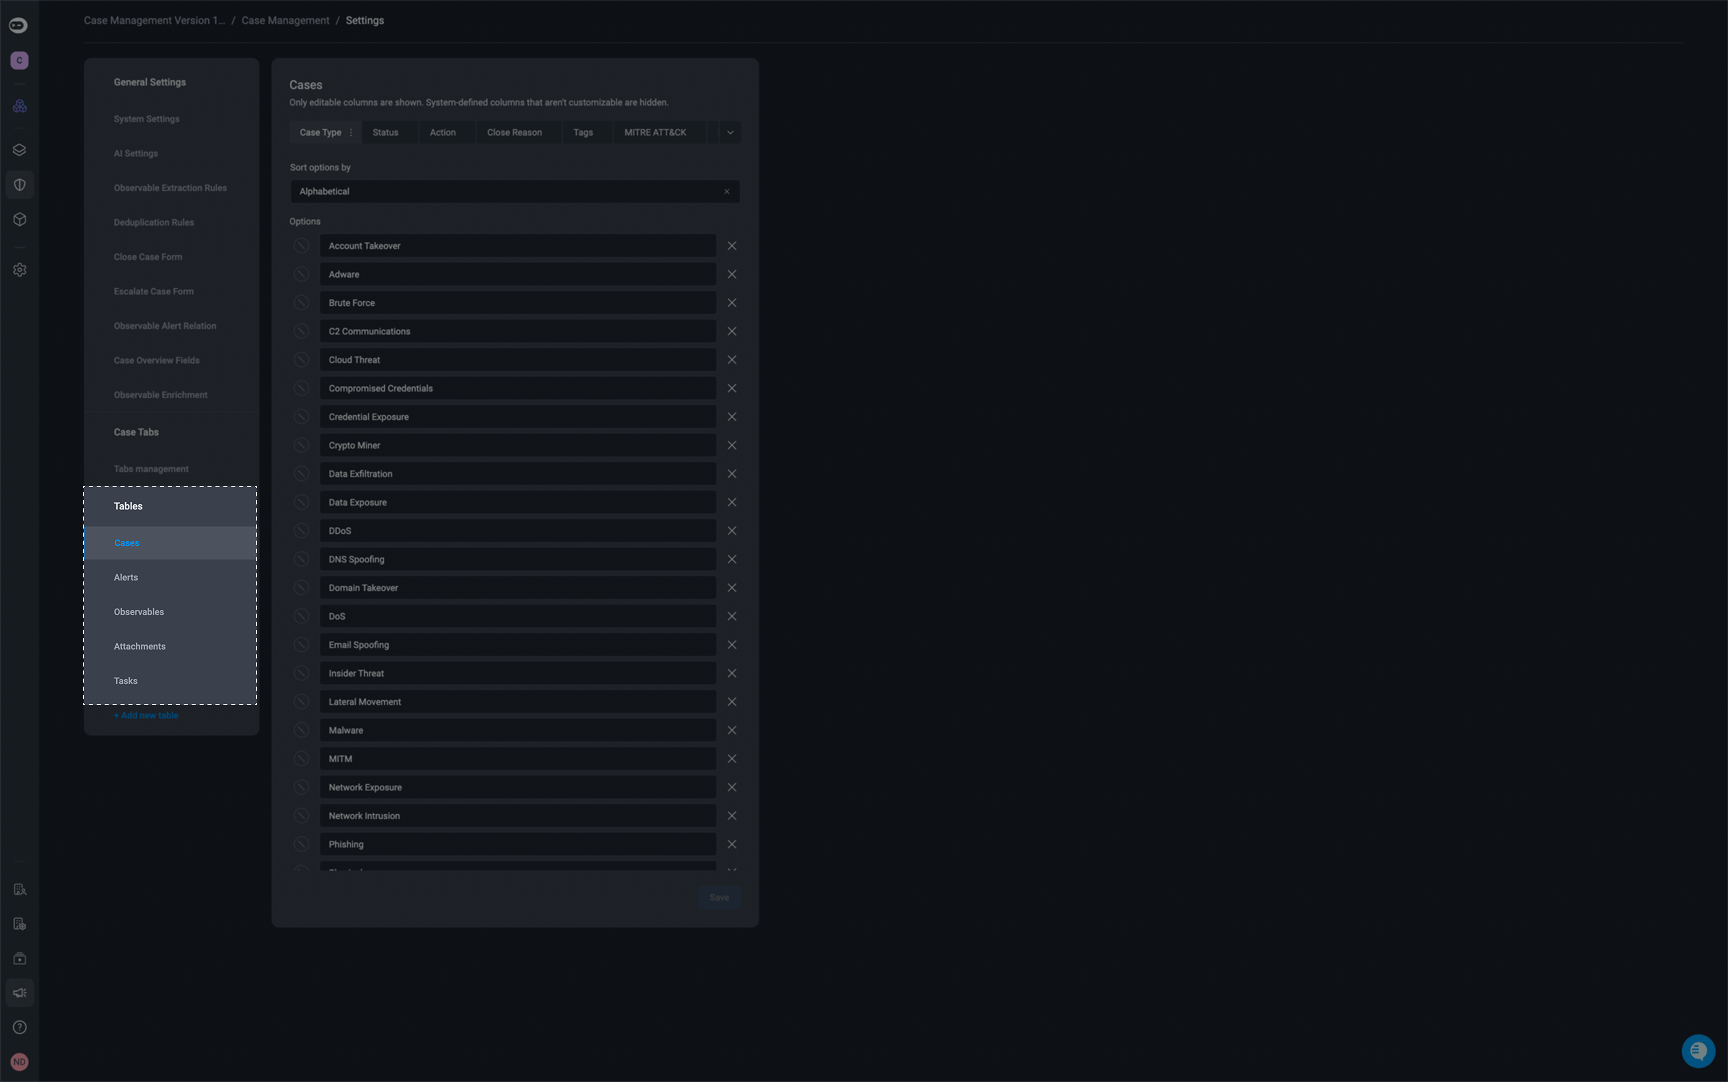
- Cases
- Alerts
- Observables
- Attachments
- Tasks
3
Configure the Response Action
Configure the response action by completing the required fields: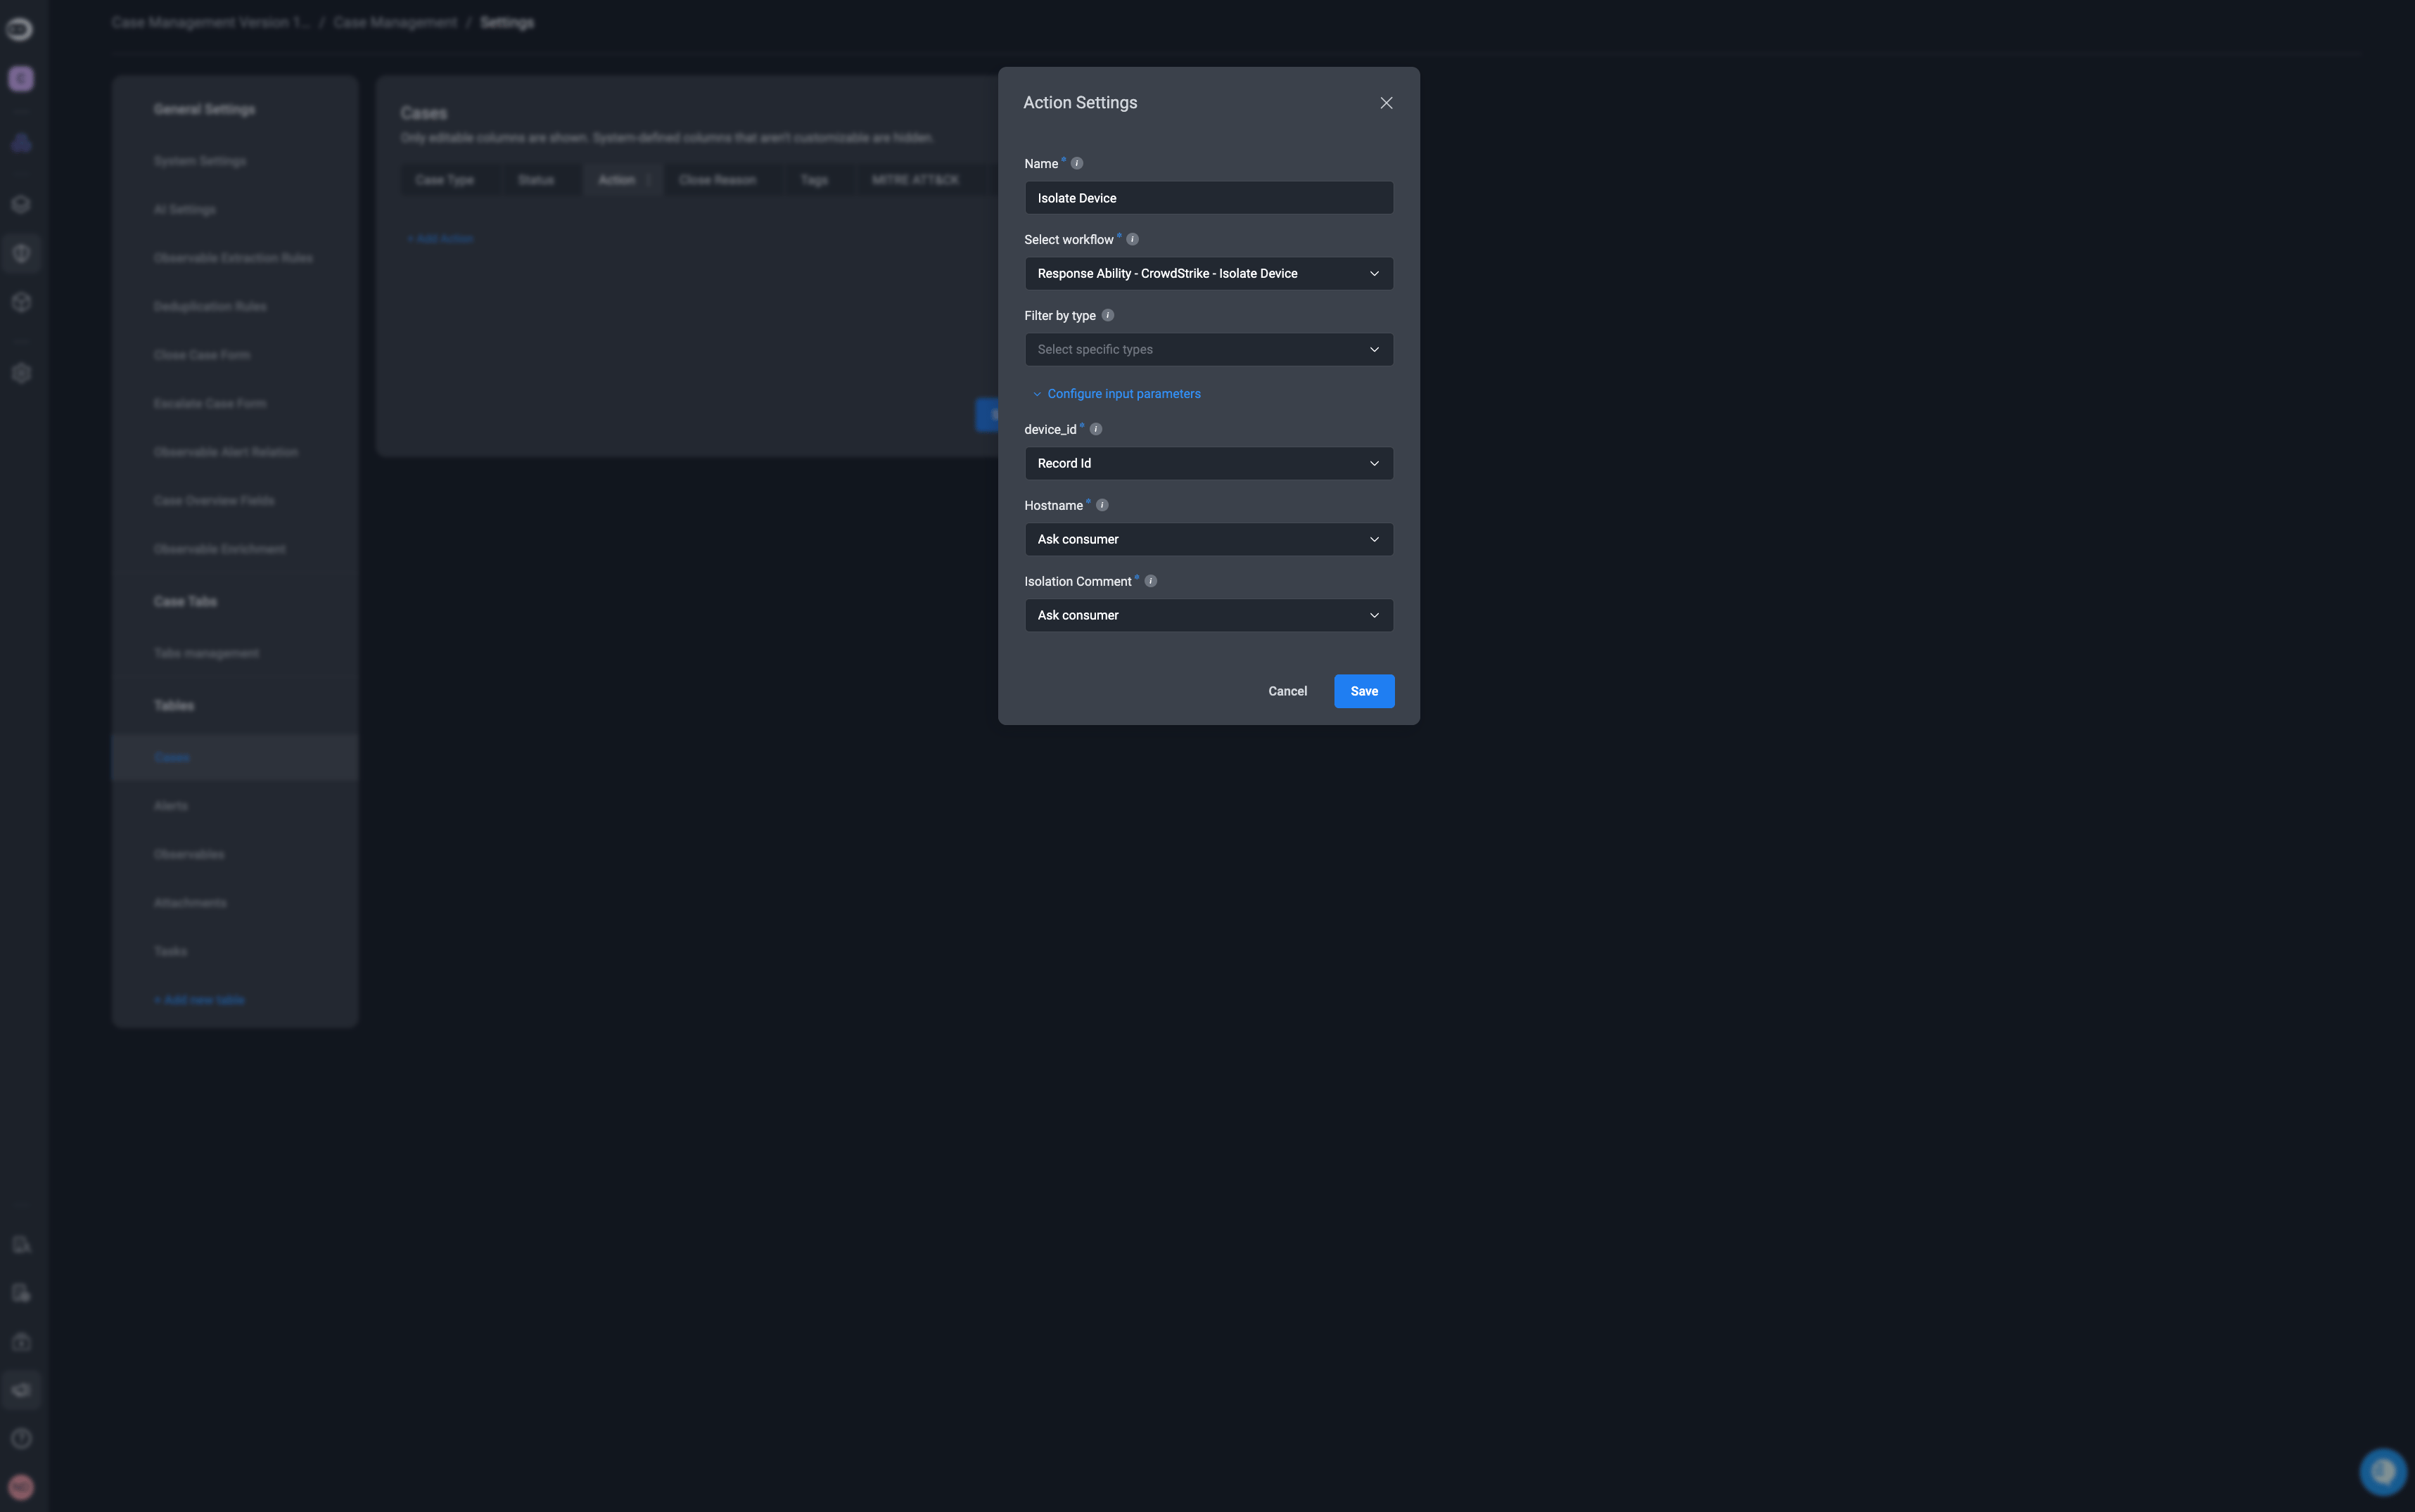
- Name: Enter a descriptive name that clearly identifies what the response action does.
- Select Workflow: Select the workflow that should run when the response action is executed. You can select a pre-built response workflow configured through the Deployment Wizard or a custom workflow.
- Filter by Type (Optional): Restrict the response action to specific record types. If left empty, the response action is available for all record types within the selected entity.
- Record (Optional): Specify a default value to use when the action is executed without a value provided by the user. Leave this field empty if no default value is required.
4
Execute the Response Action
Once configured, the response action is available to analysts from multiple locations in Case Management.
-
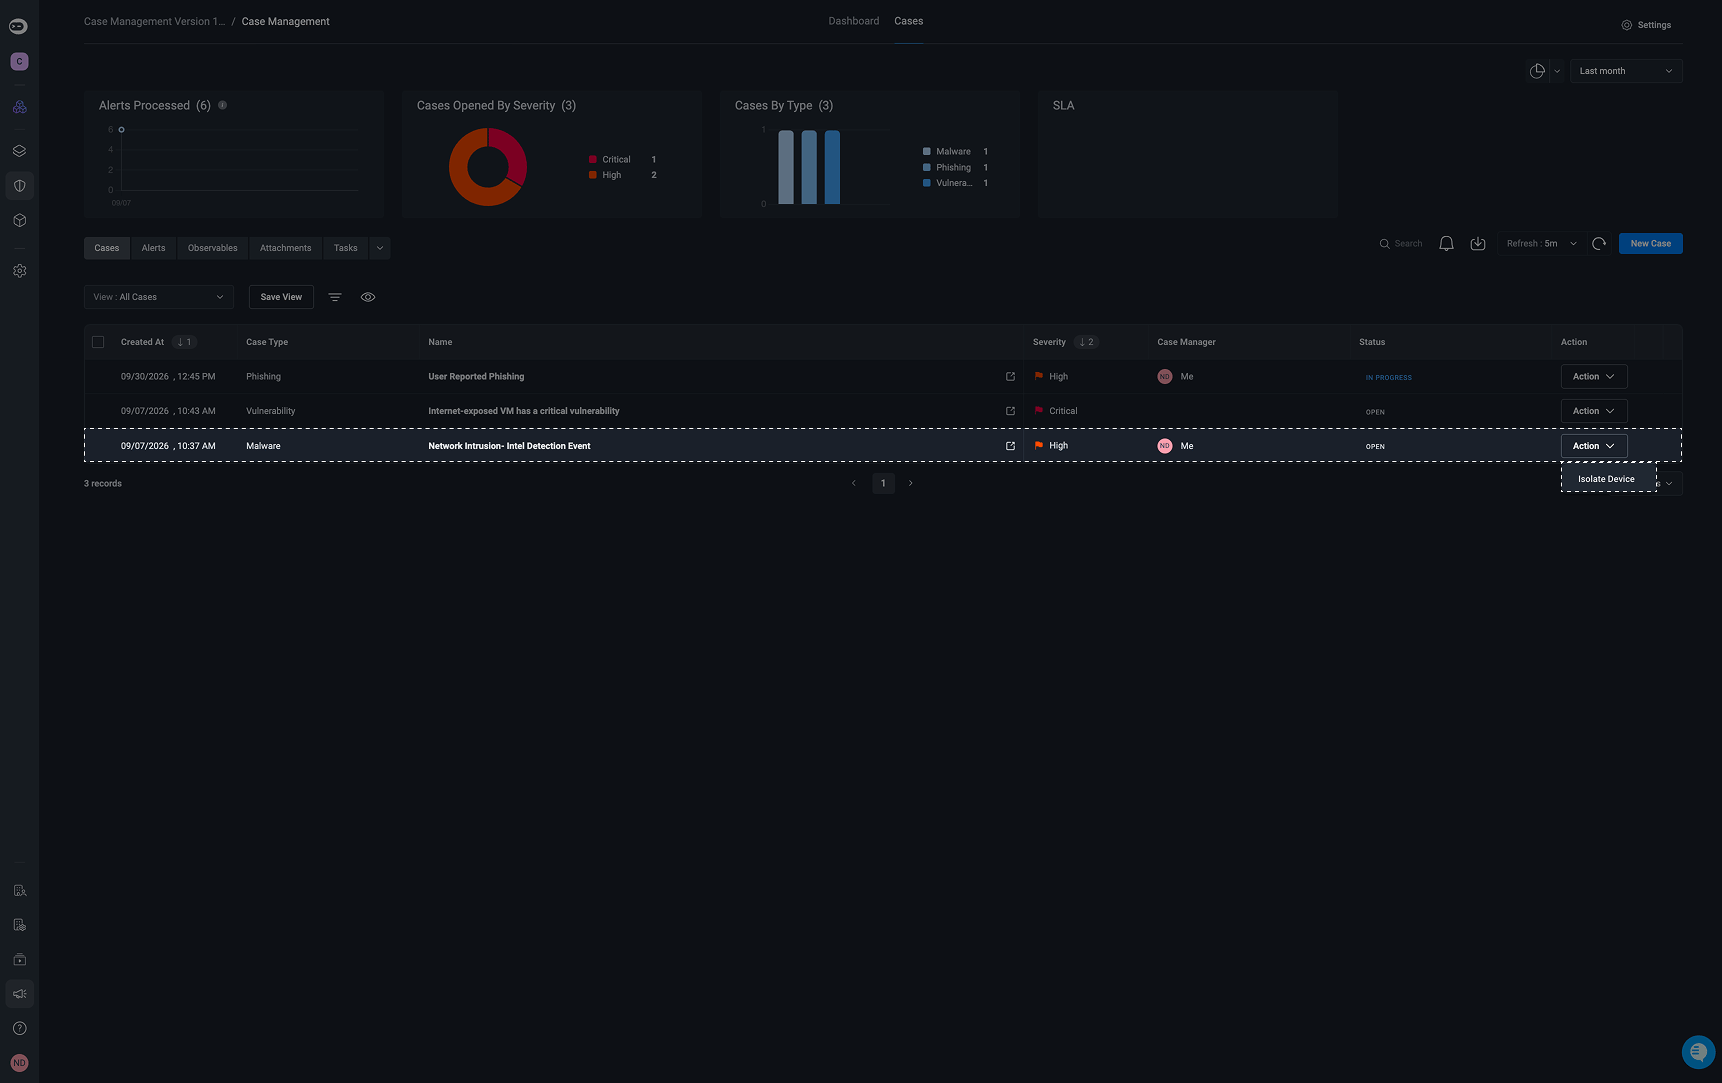
From the Entity Table
- Open the table for the entity where you configured the response action, such as Cases.
- Select the icon and enable the Action column.
- Save the view.
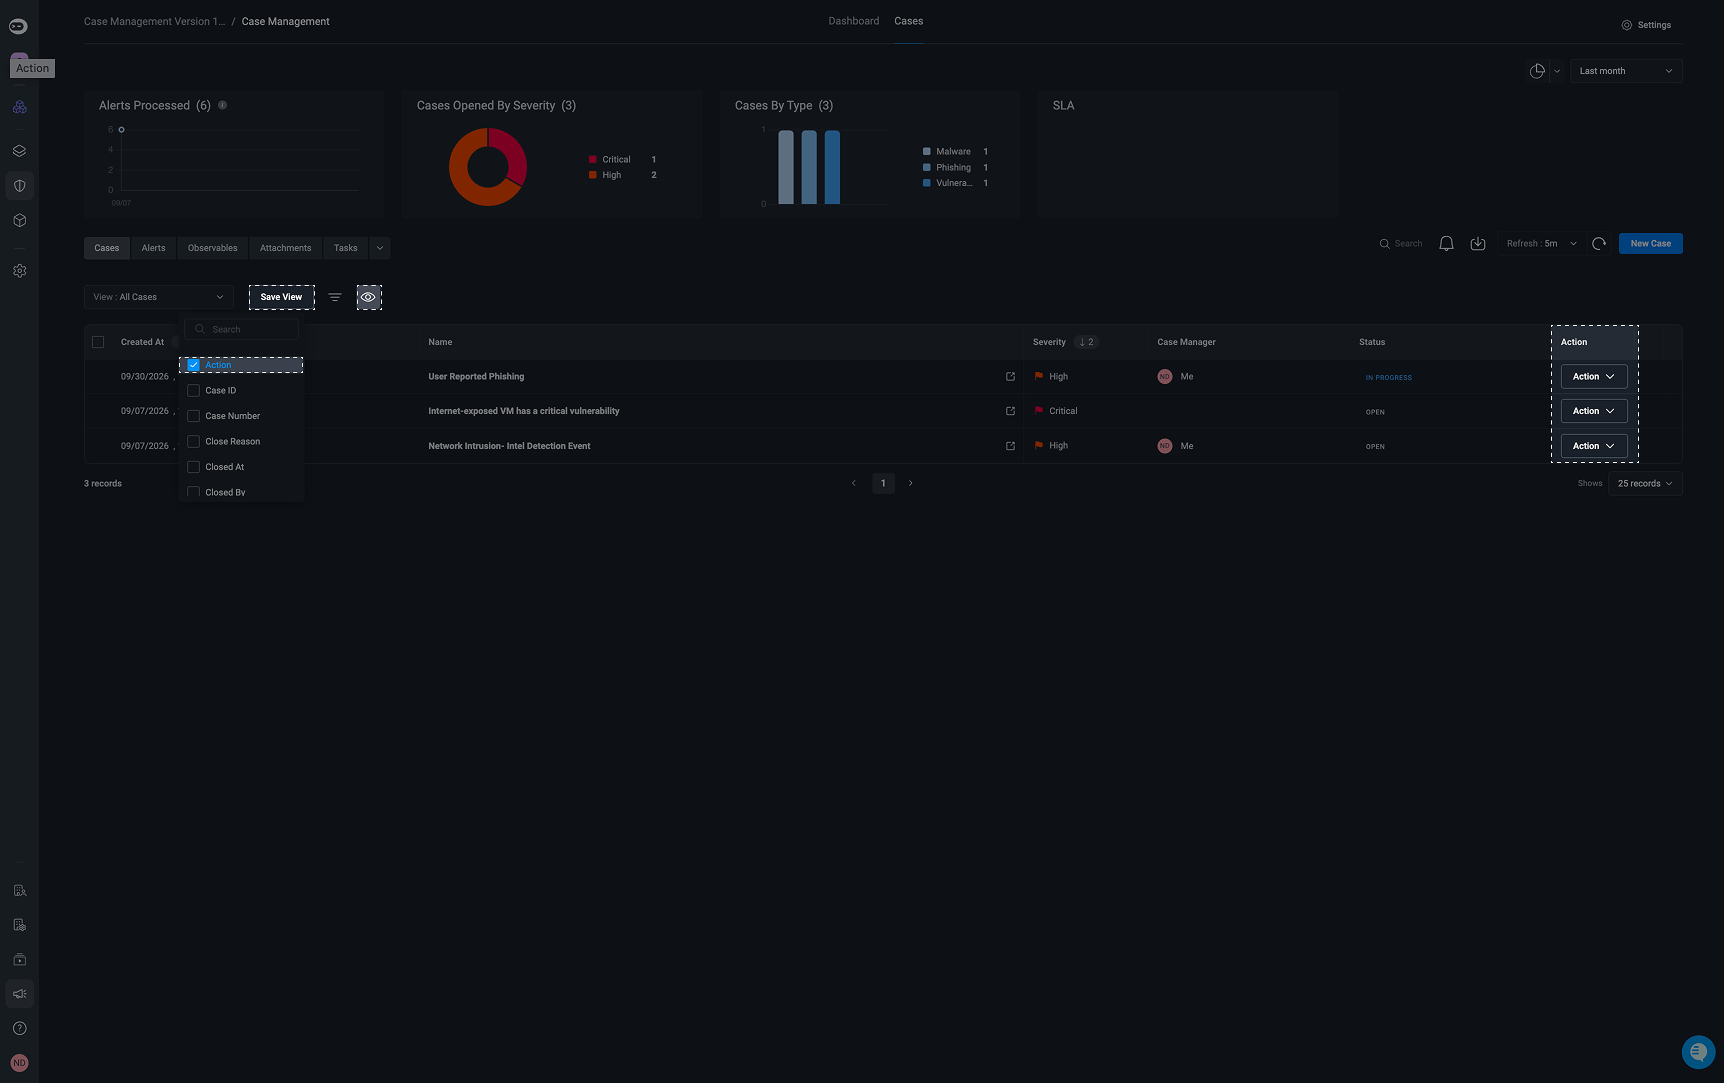
- Find the specific record you want to take action on, such as a case, alert, or observable.
- In the Action column, select the configured response action to execute it.
-
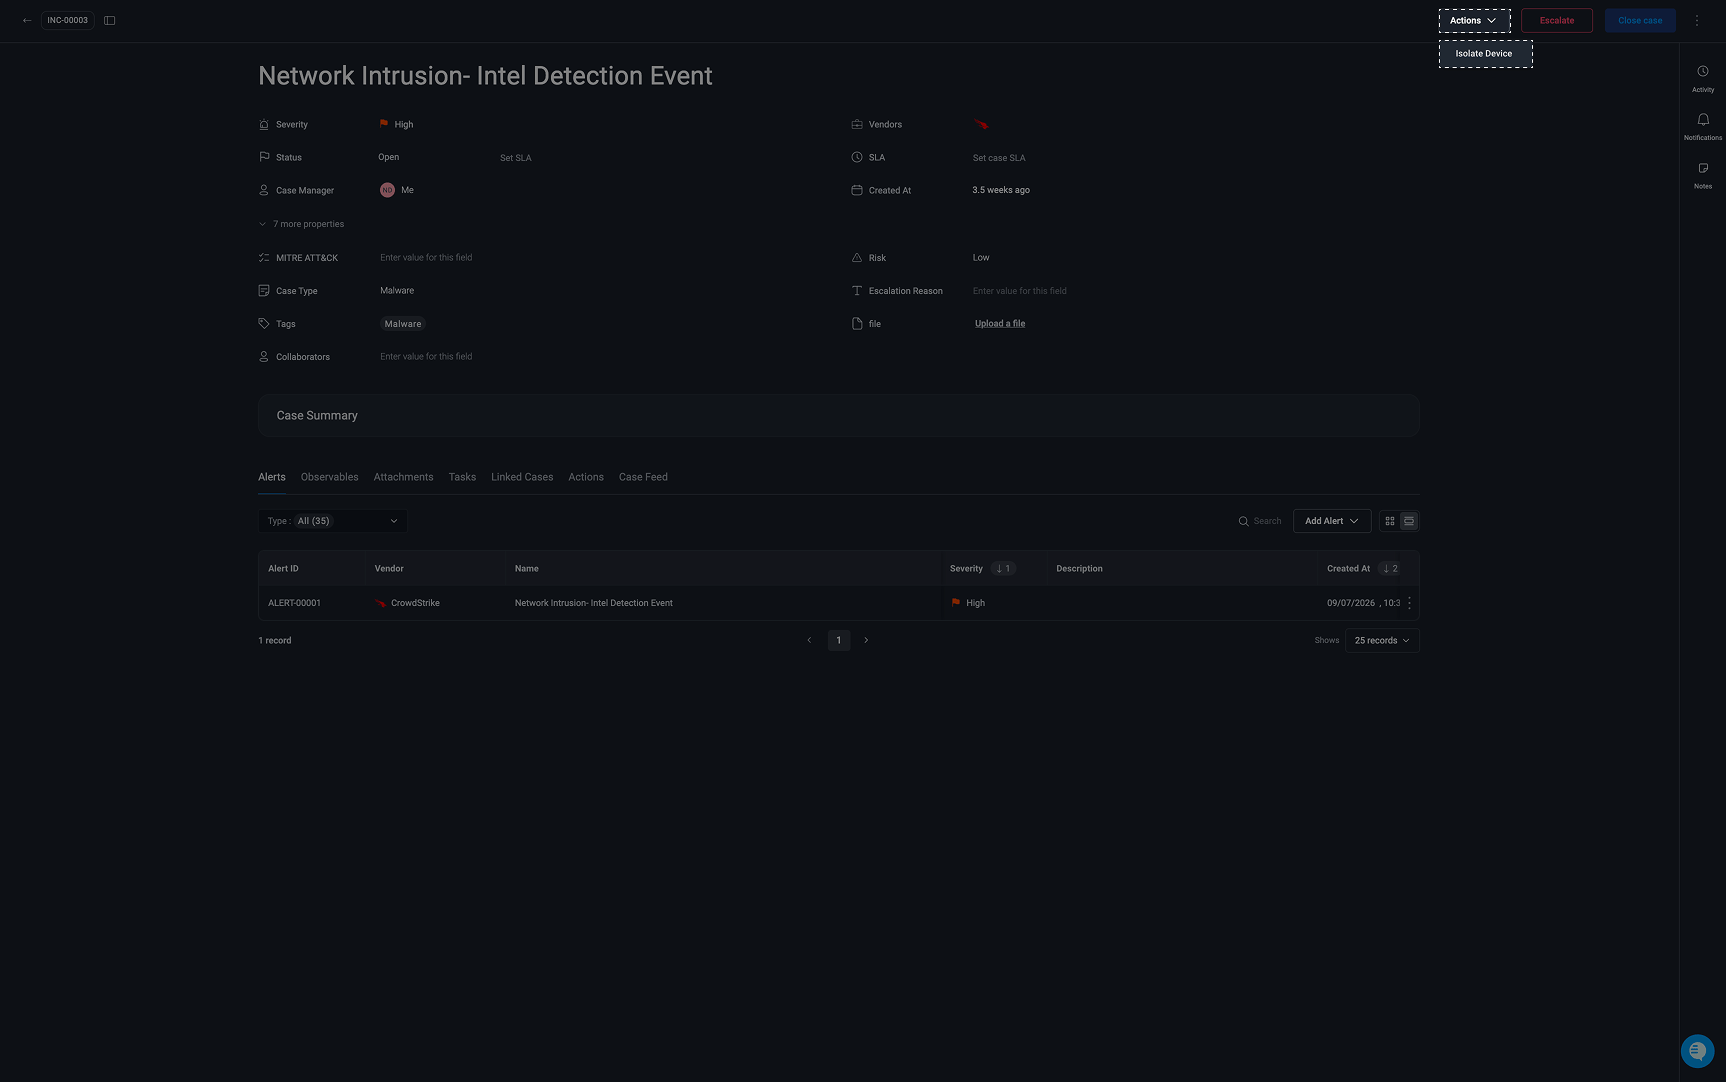
From the Case Overview: You can also execute response actions directly from the Case Overview.
- In the top-right corner of the Case Overview, select the Action button, select the response workflow you want to run, provide any required parameters and proceed by executing it.
-
Using Agent Blink: You can also use Agent Blink via the Chat Interface to identify and execute an appropriate response action.
- Ask Agent Blink to recommend a response action based on the case context. Review the suggested action and, when ready, select Run to execute the response workflow.