1
As the workspace owner, you will receive an email notification when another user requests approval to publish a workflow to your workspace.
2
The email notification includes key details about the request, such as the target workspace, the time the request was submitted, the workflow version, the request ID, and an optional note from the requester explaining the purpose of the workflow or the changes made.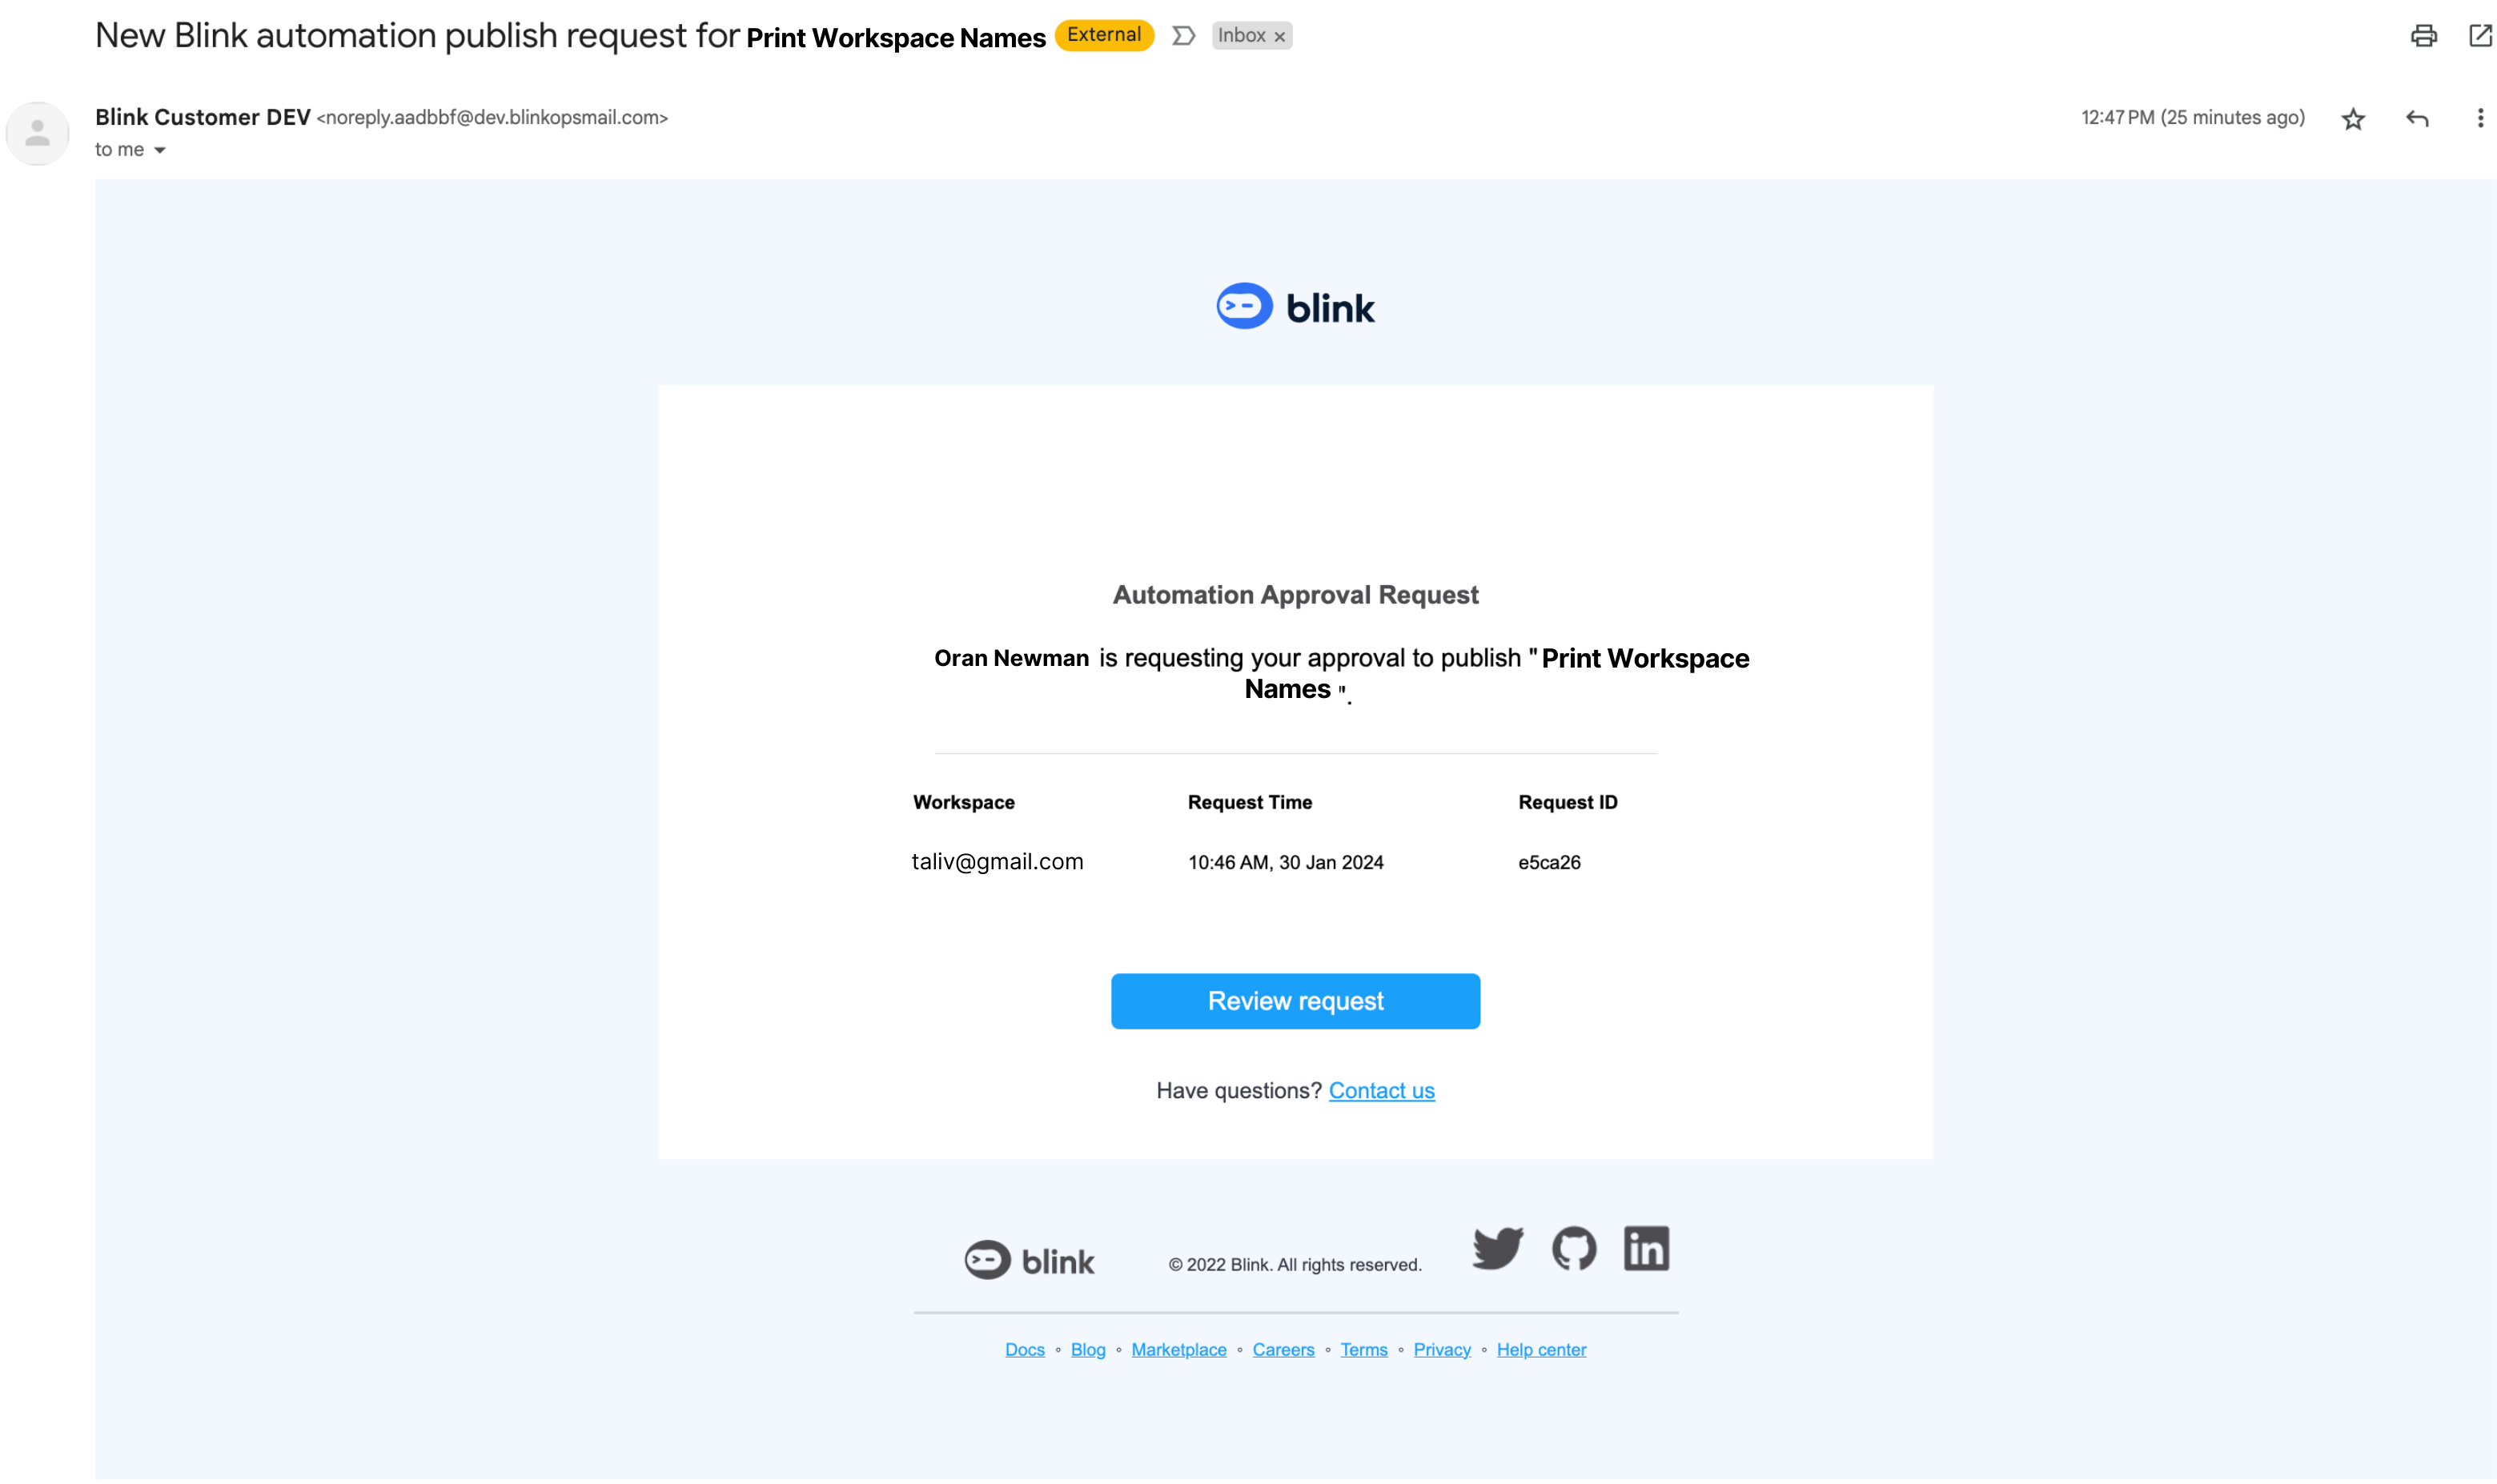
3
To review the request, click the Review Request button in the email. This will take you directly to the approval screen.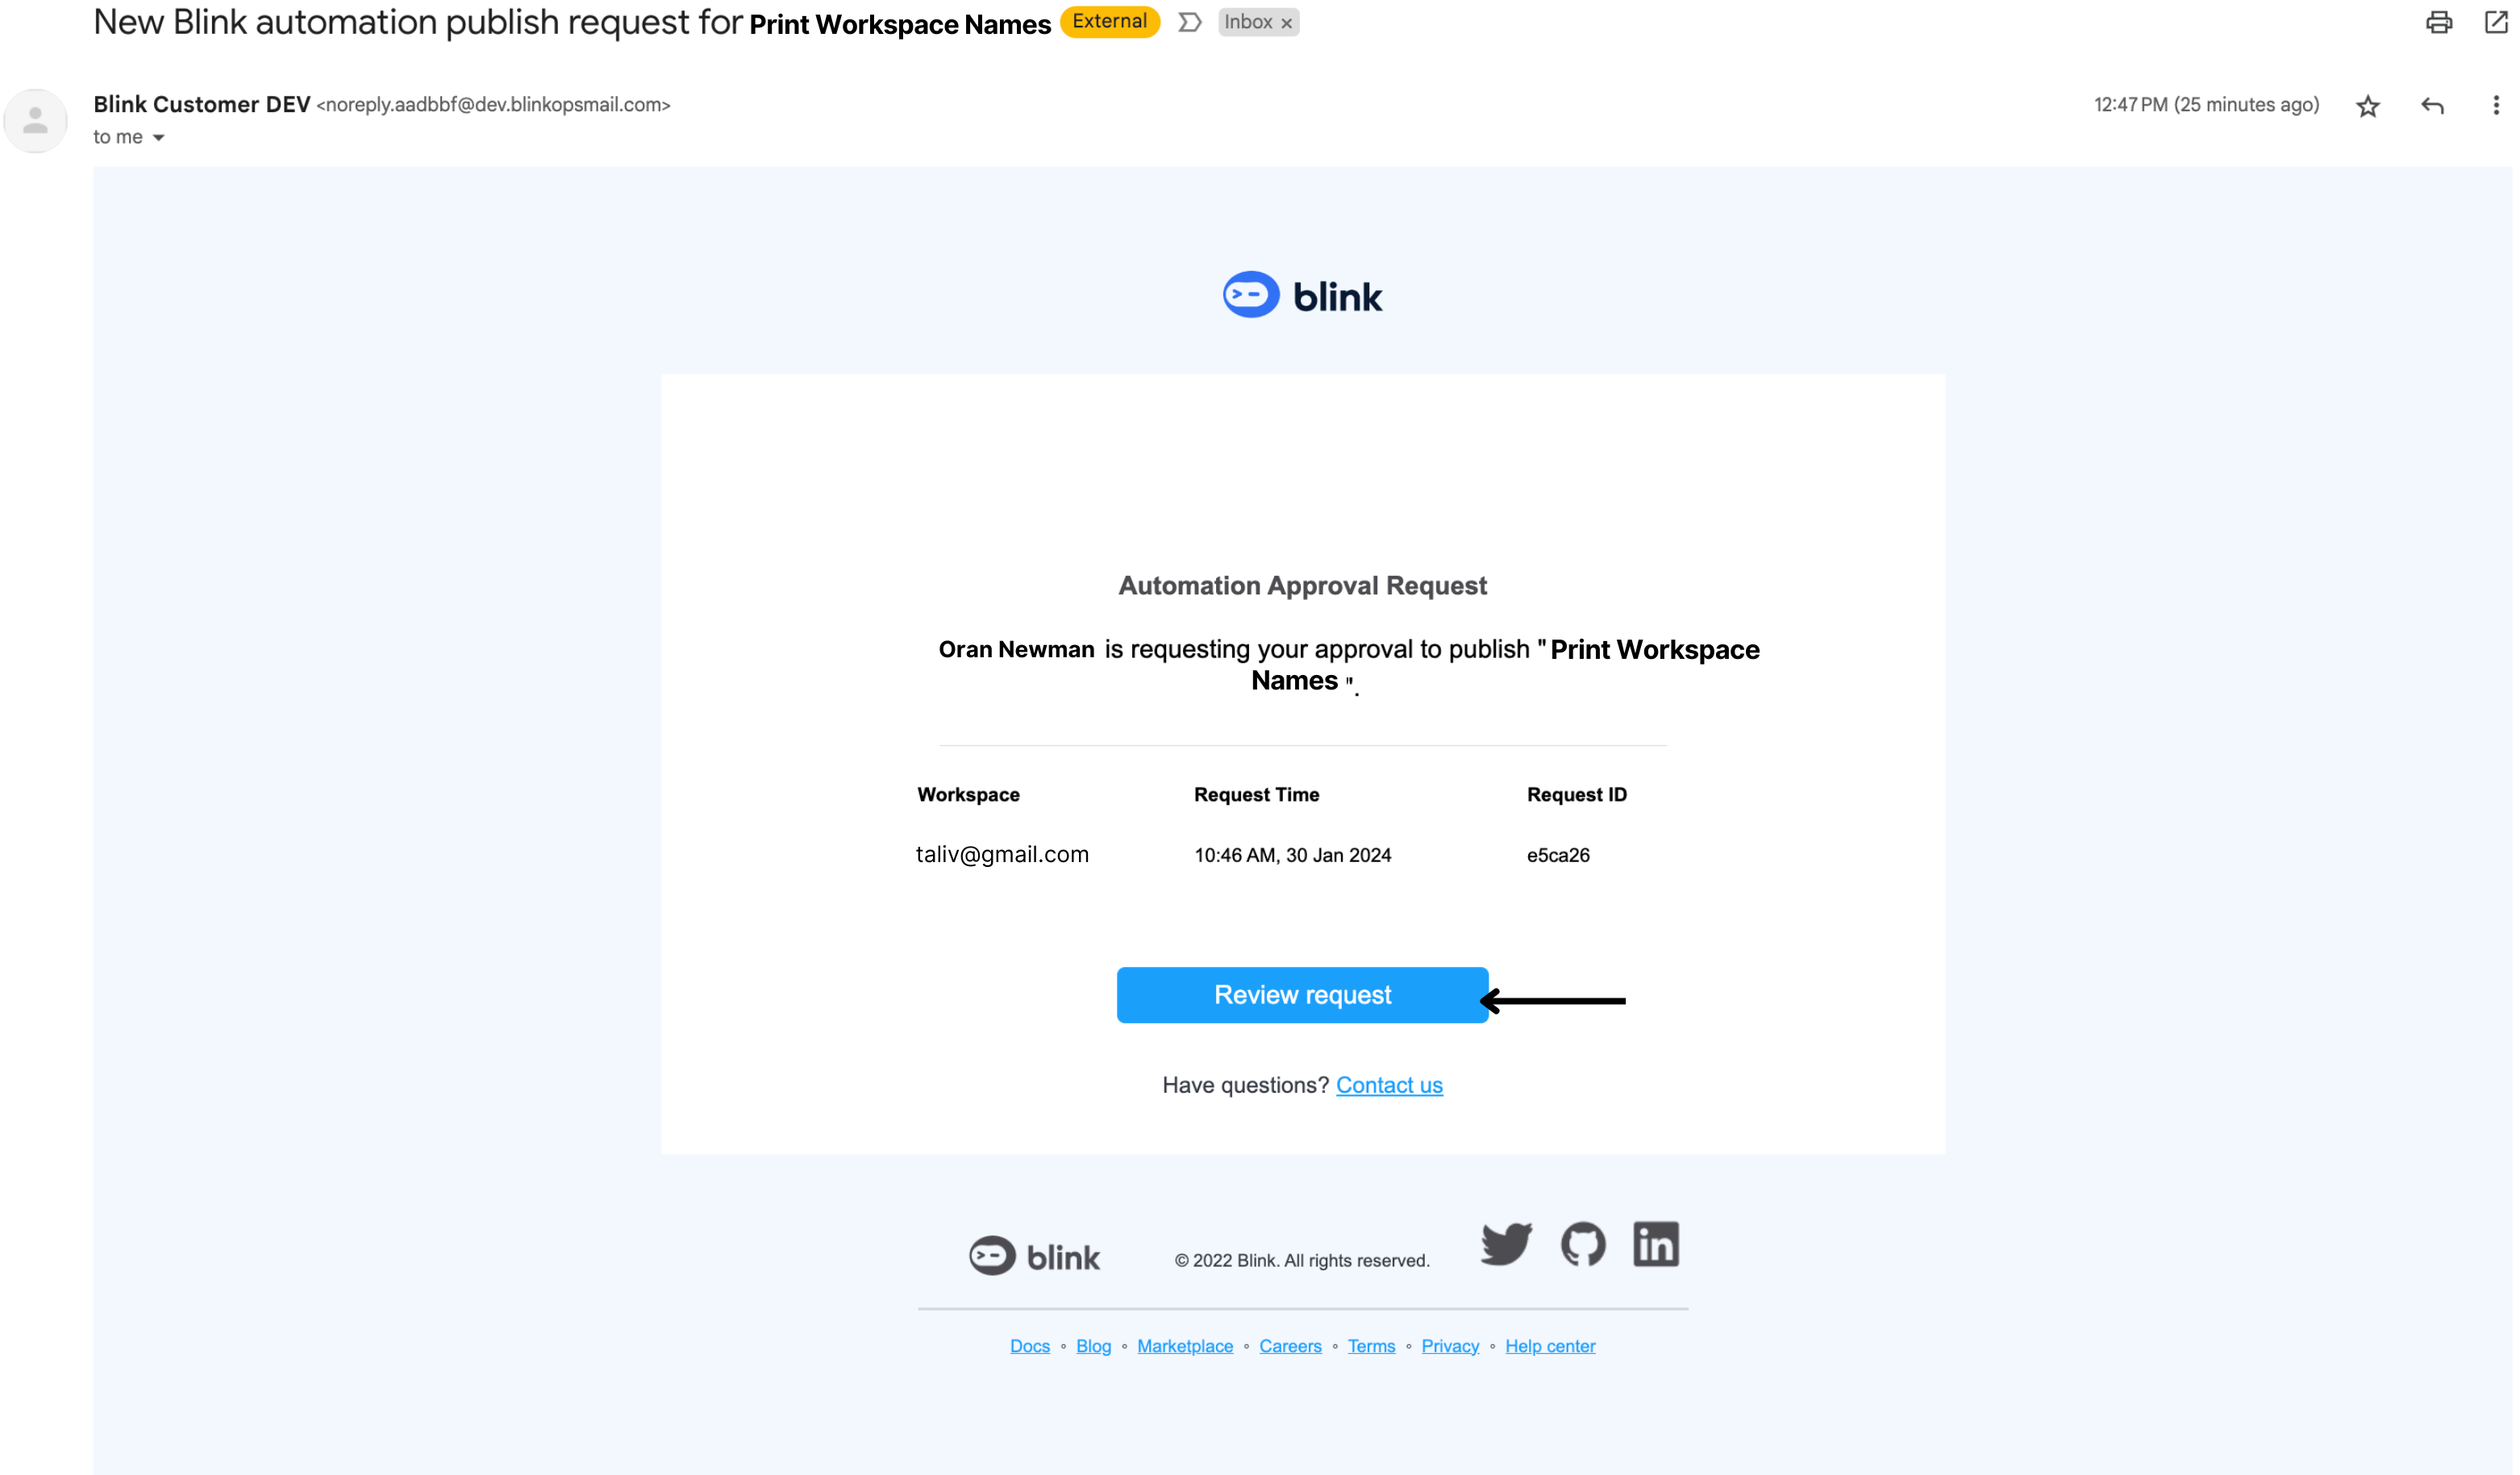
4
A popup will display the requested workflow for approval, along with all its details. You can also explore the Workflow Version History as well as you can also compare the published workflow version with the version sent for approval.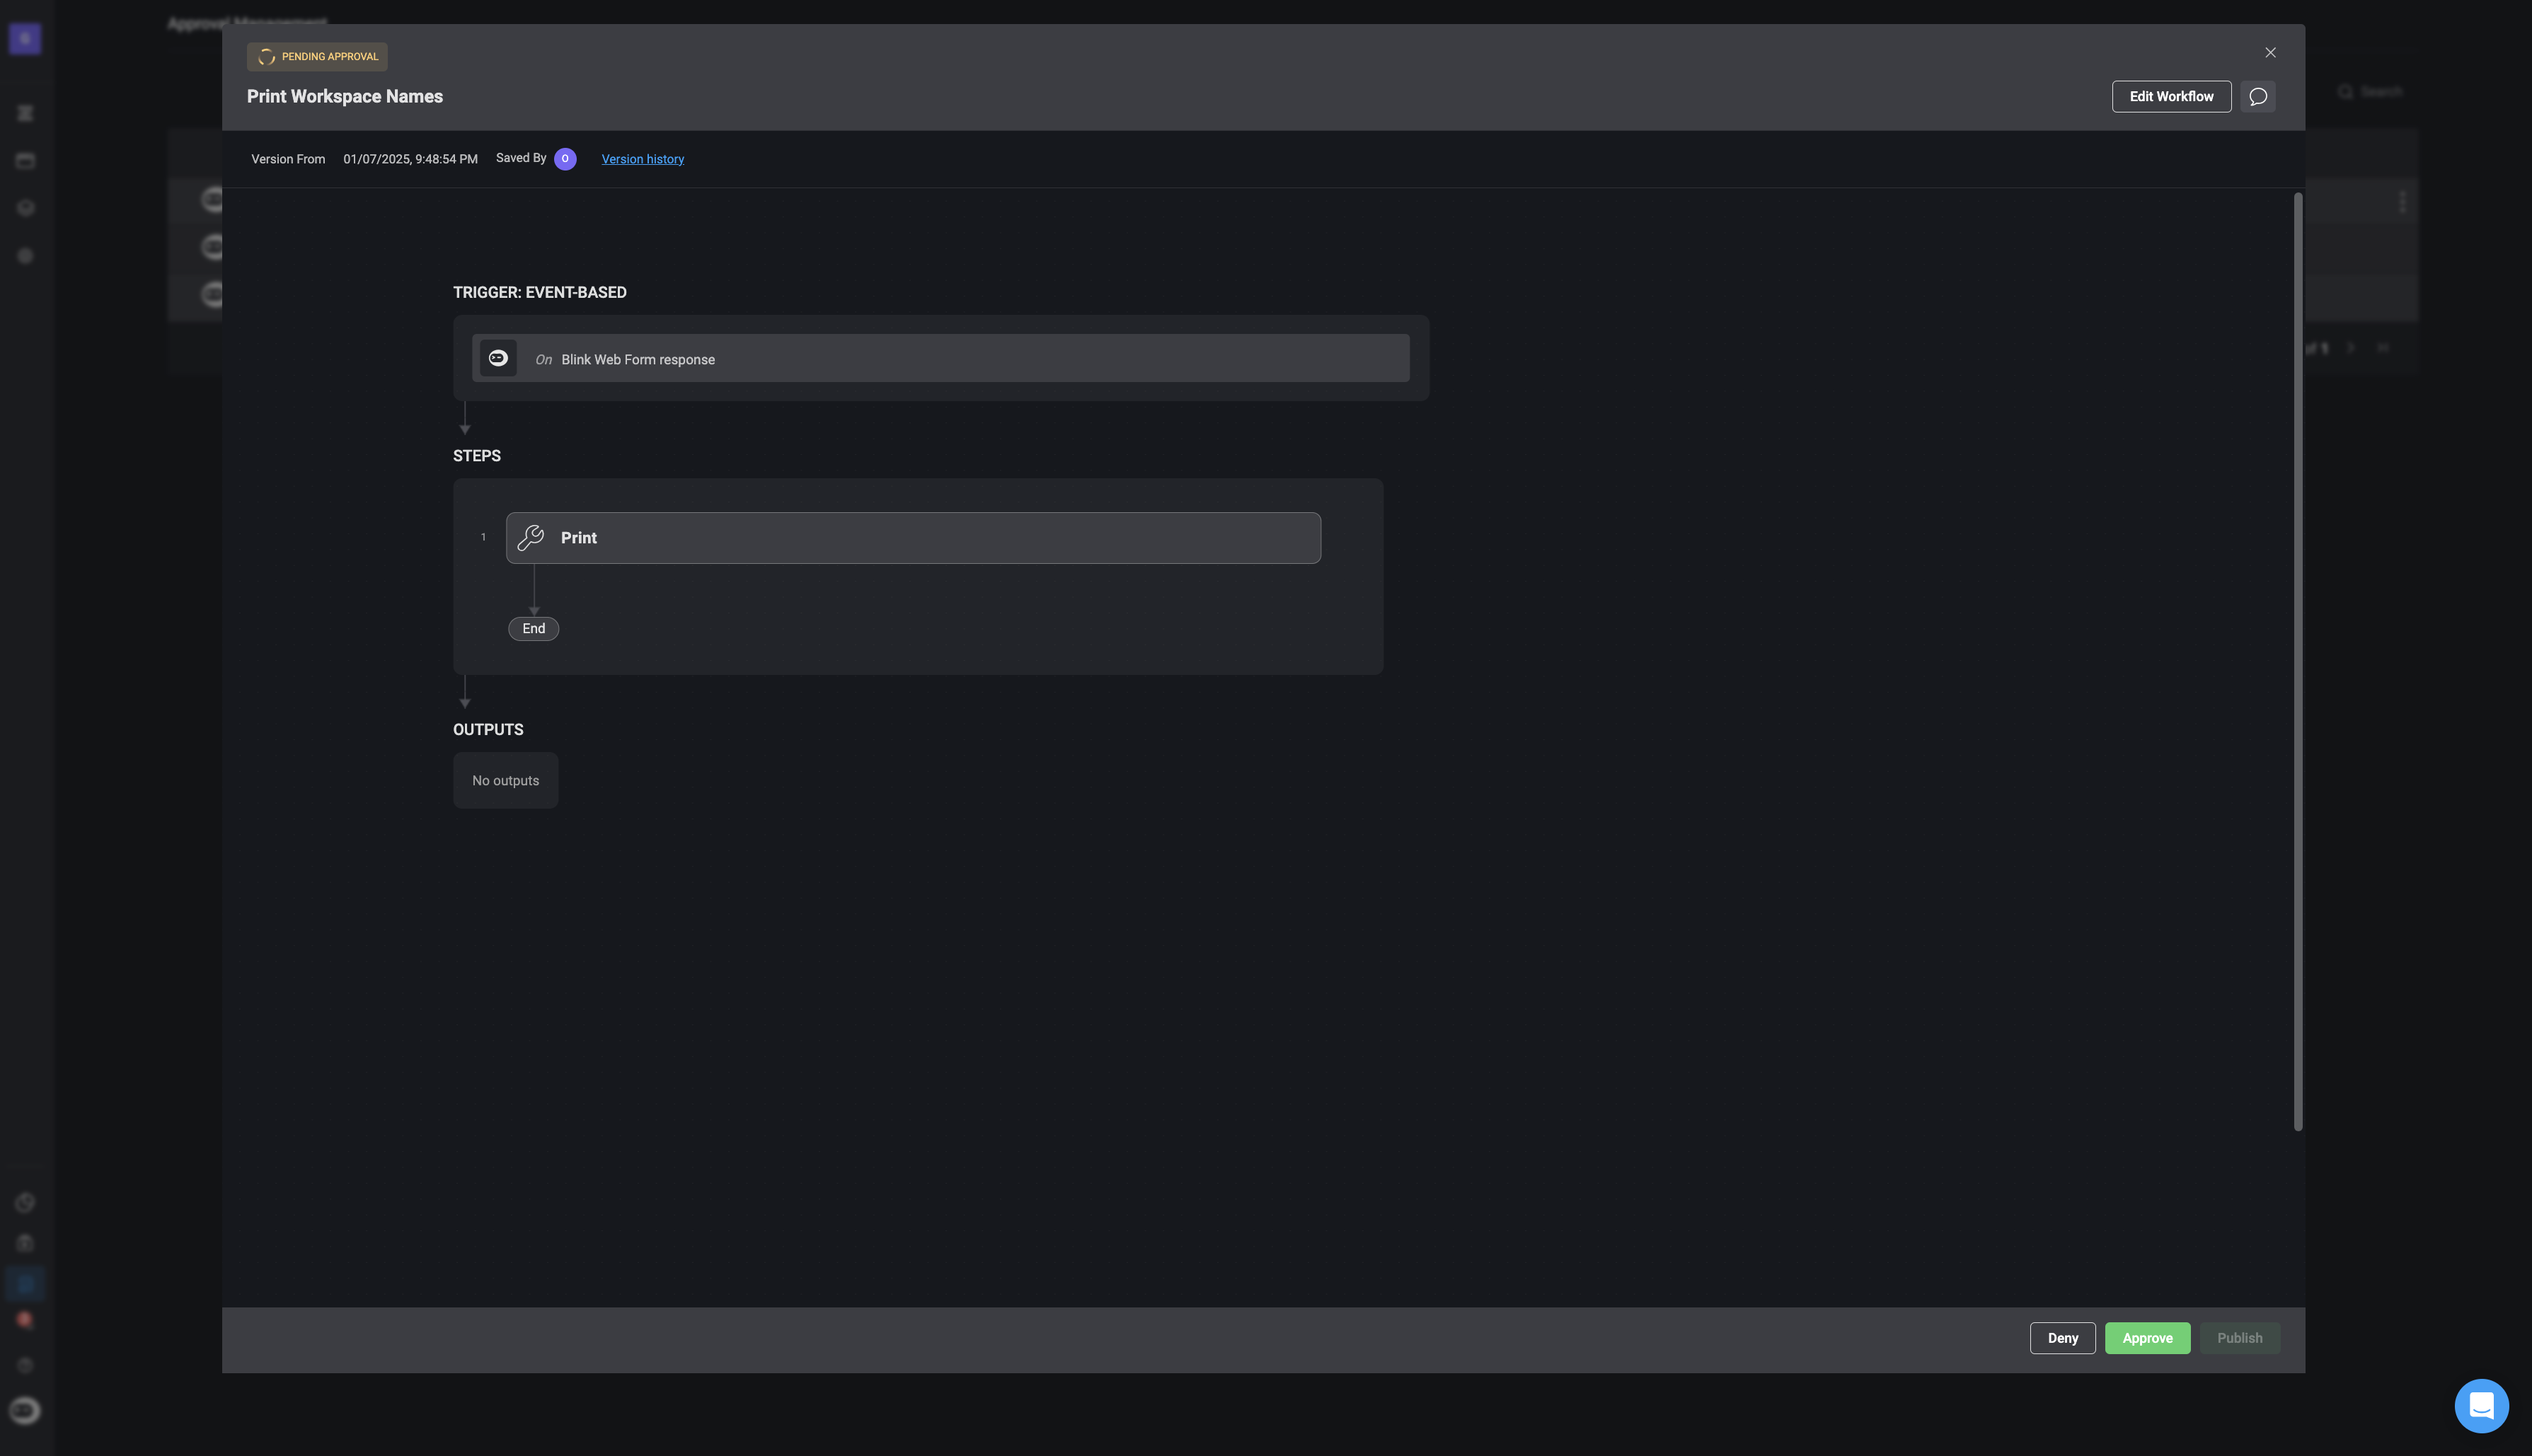
5
As the approver, you can choose to either Approve or Deny the request to publish the workflow to your workspace.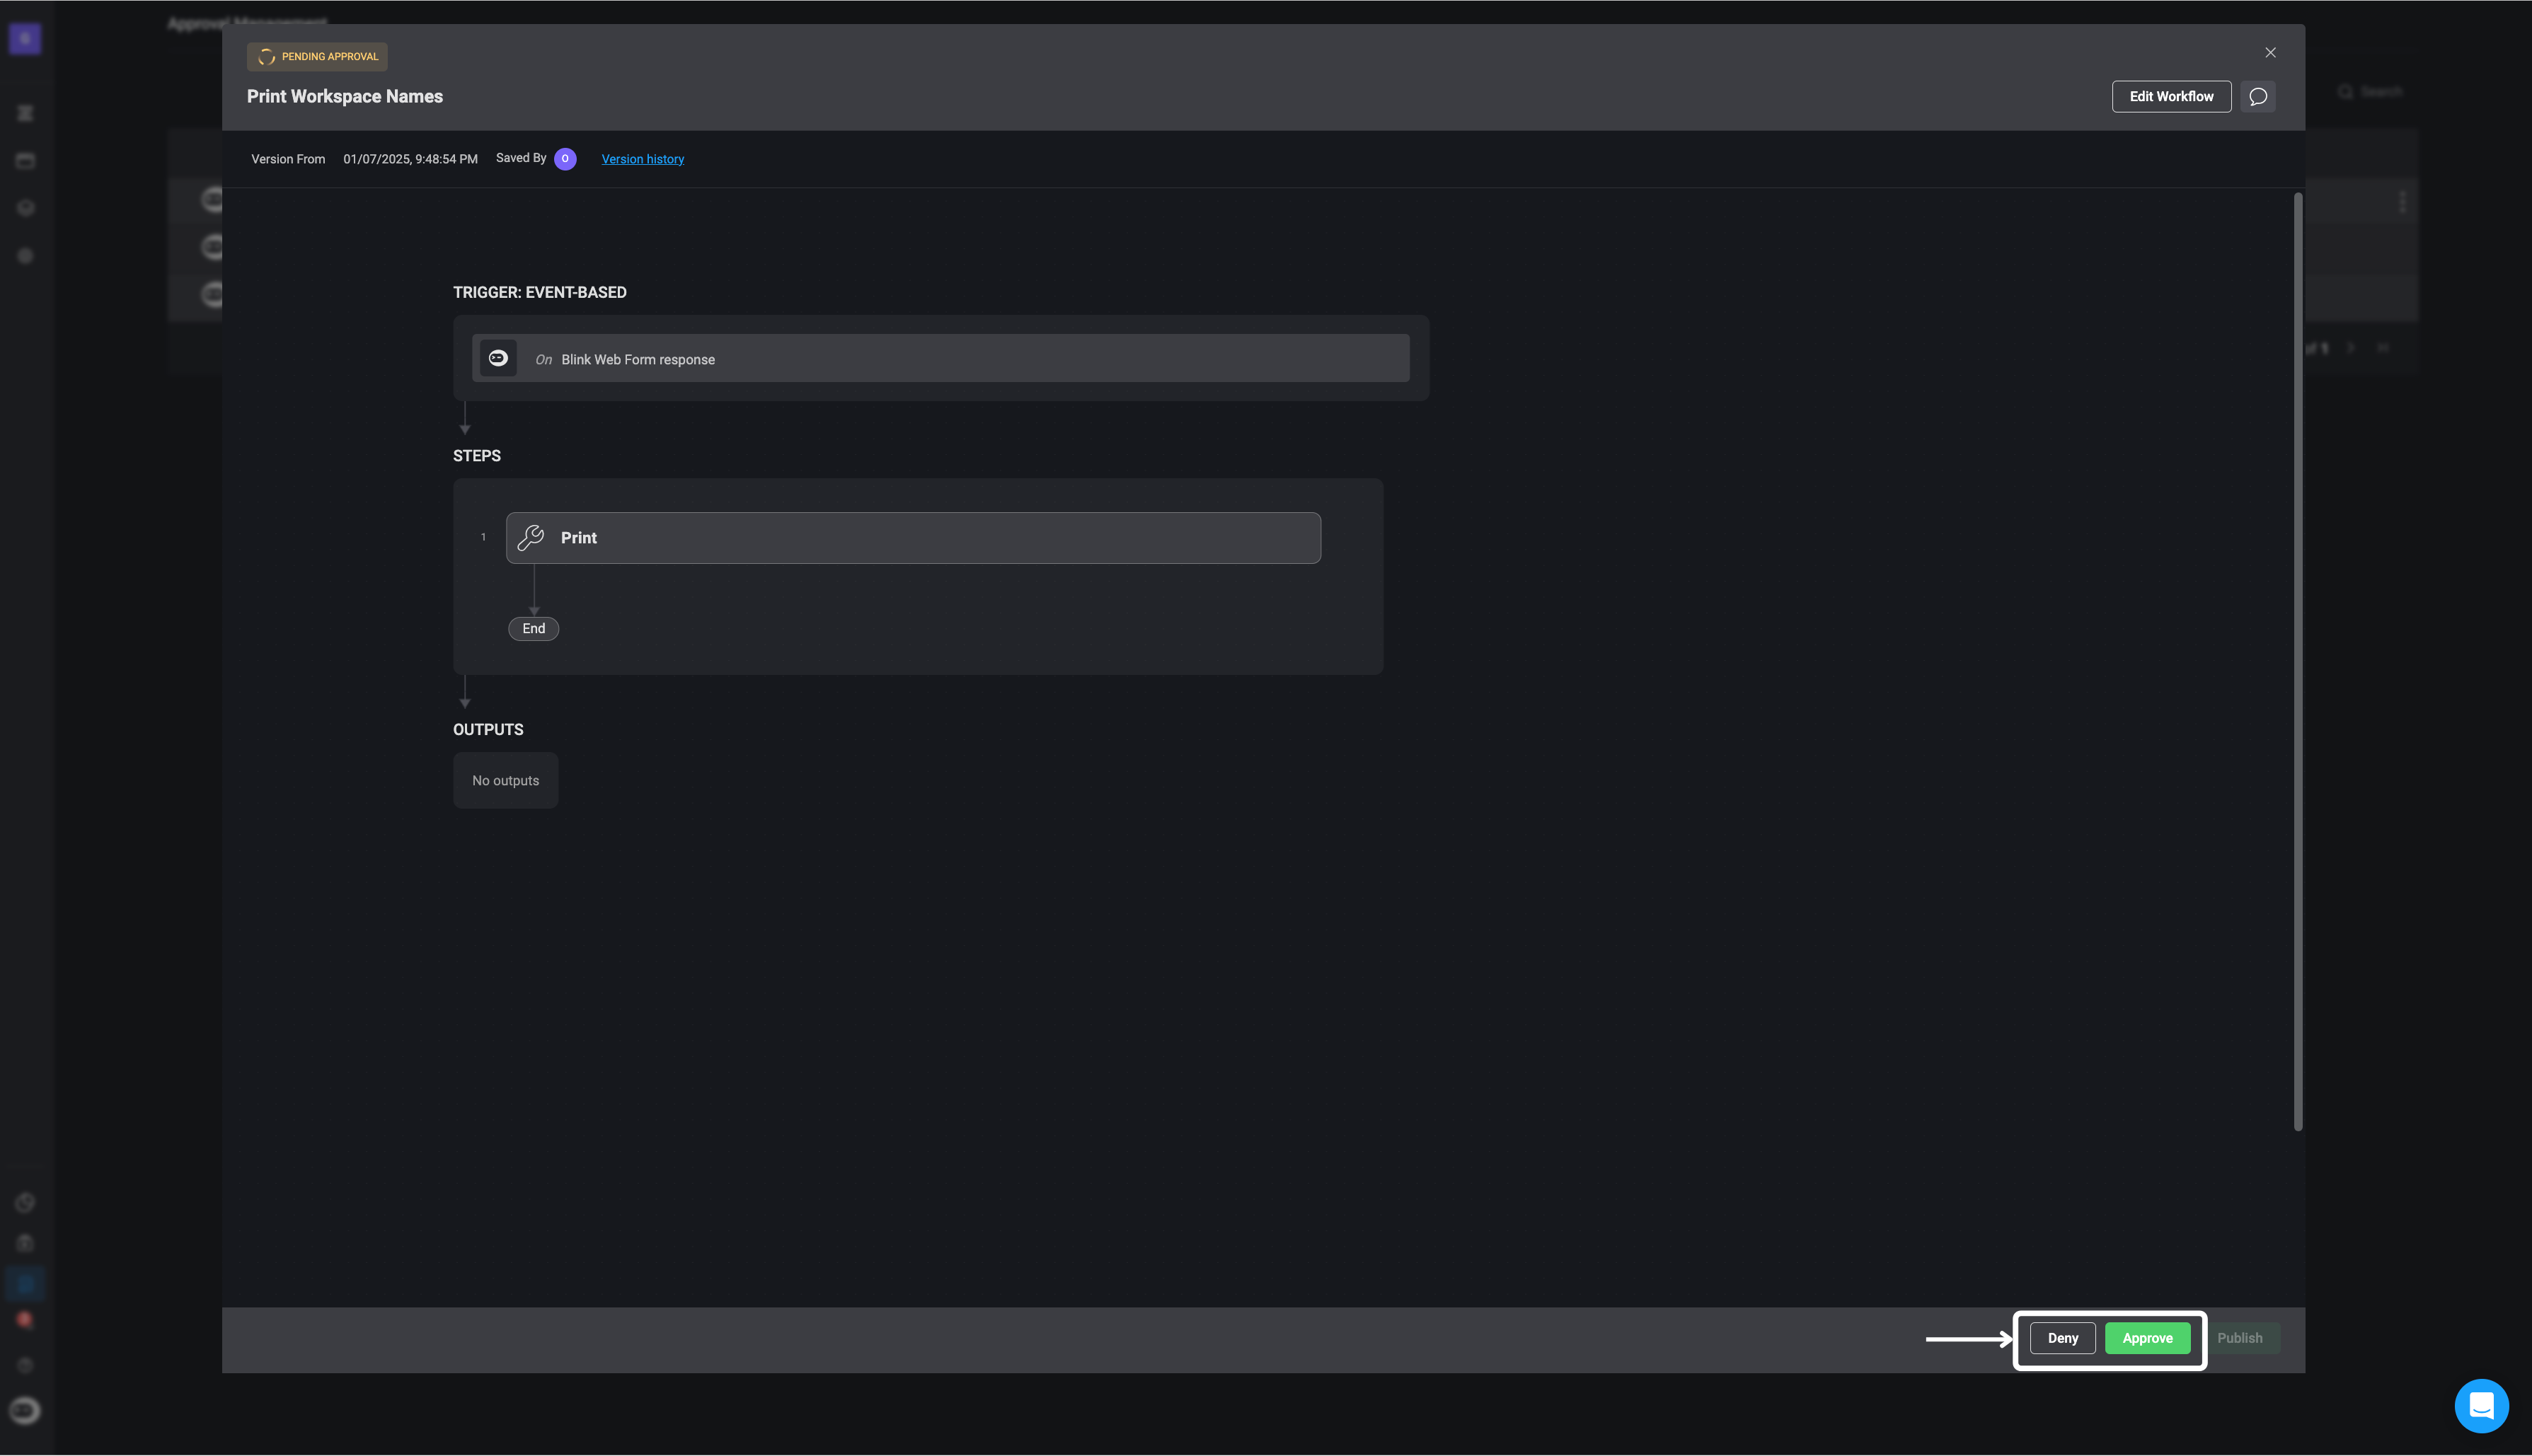
6
If you select ‘Deny’, a confirmation popup will appear prompting you to provide a reason for the rejection. This feedback is shared with the requester to explain why the approval was denied. Click ‘Deny’ to finalize your decision.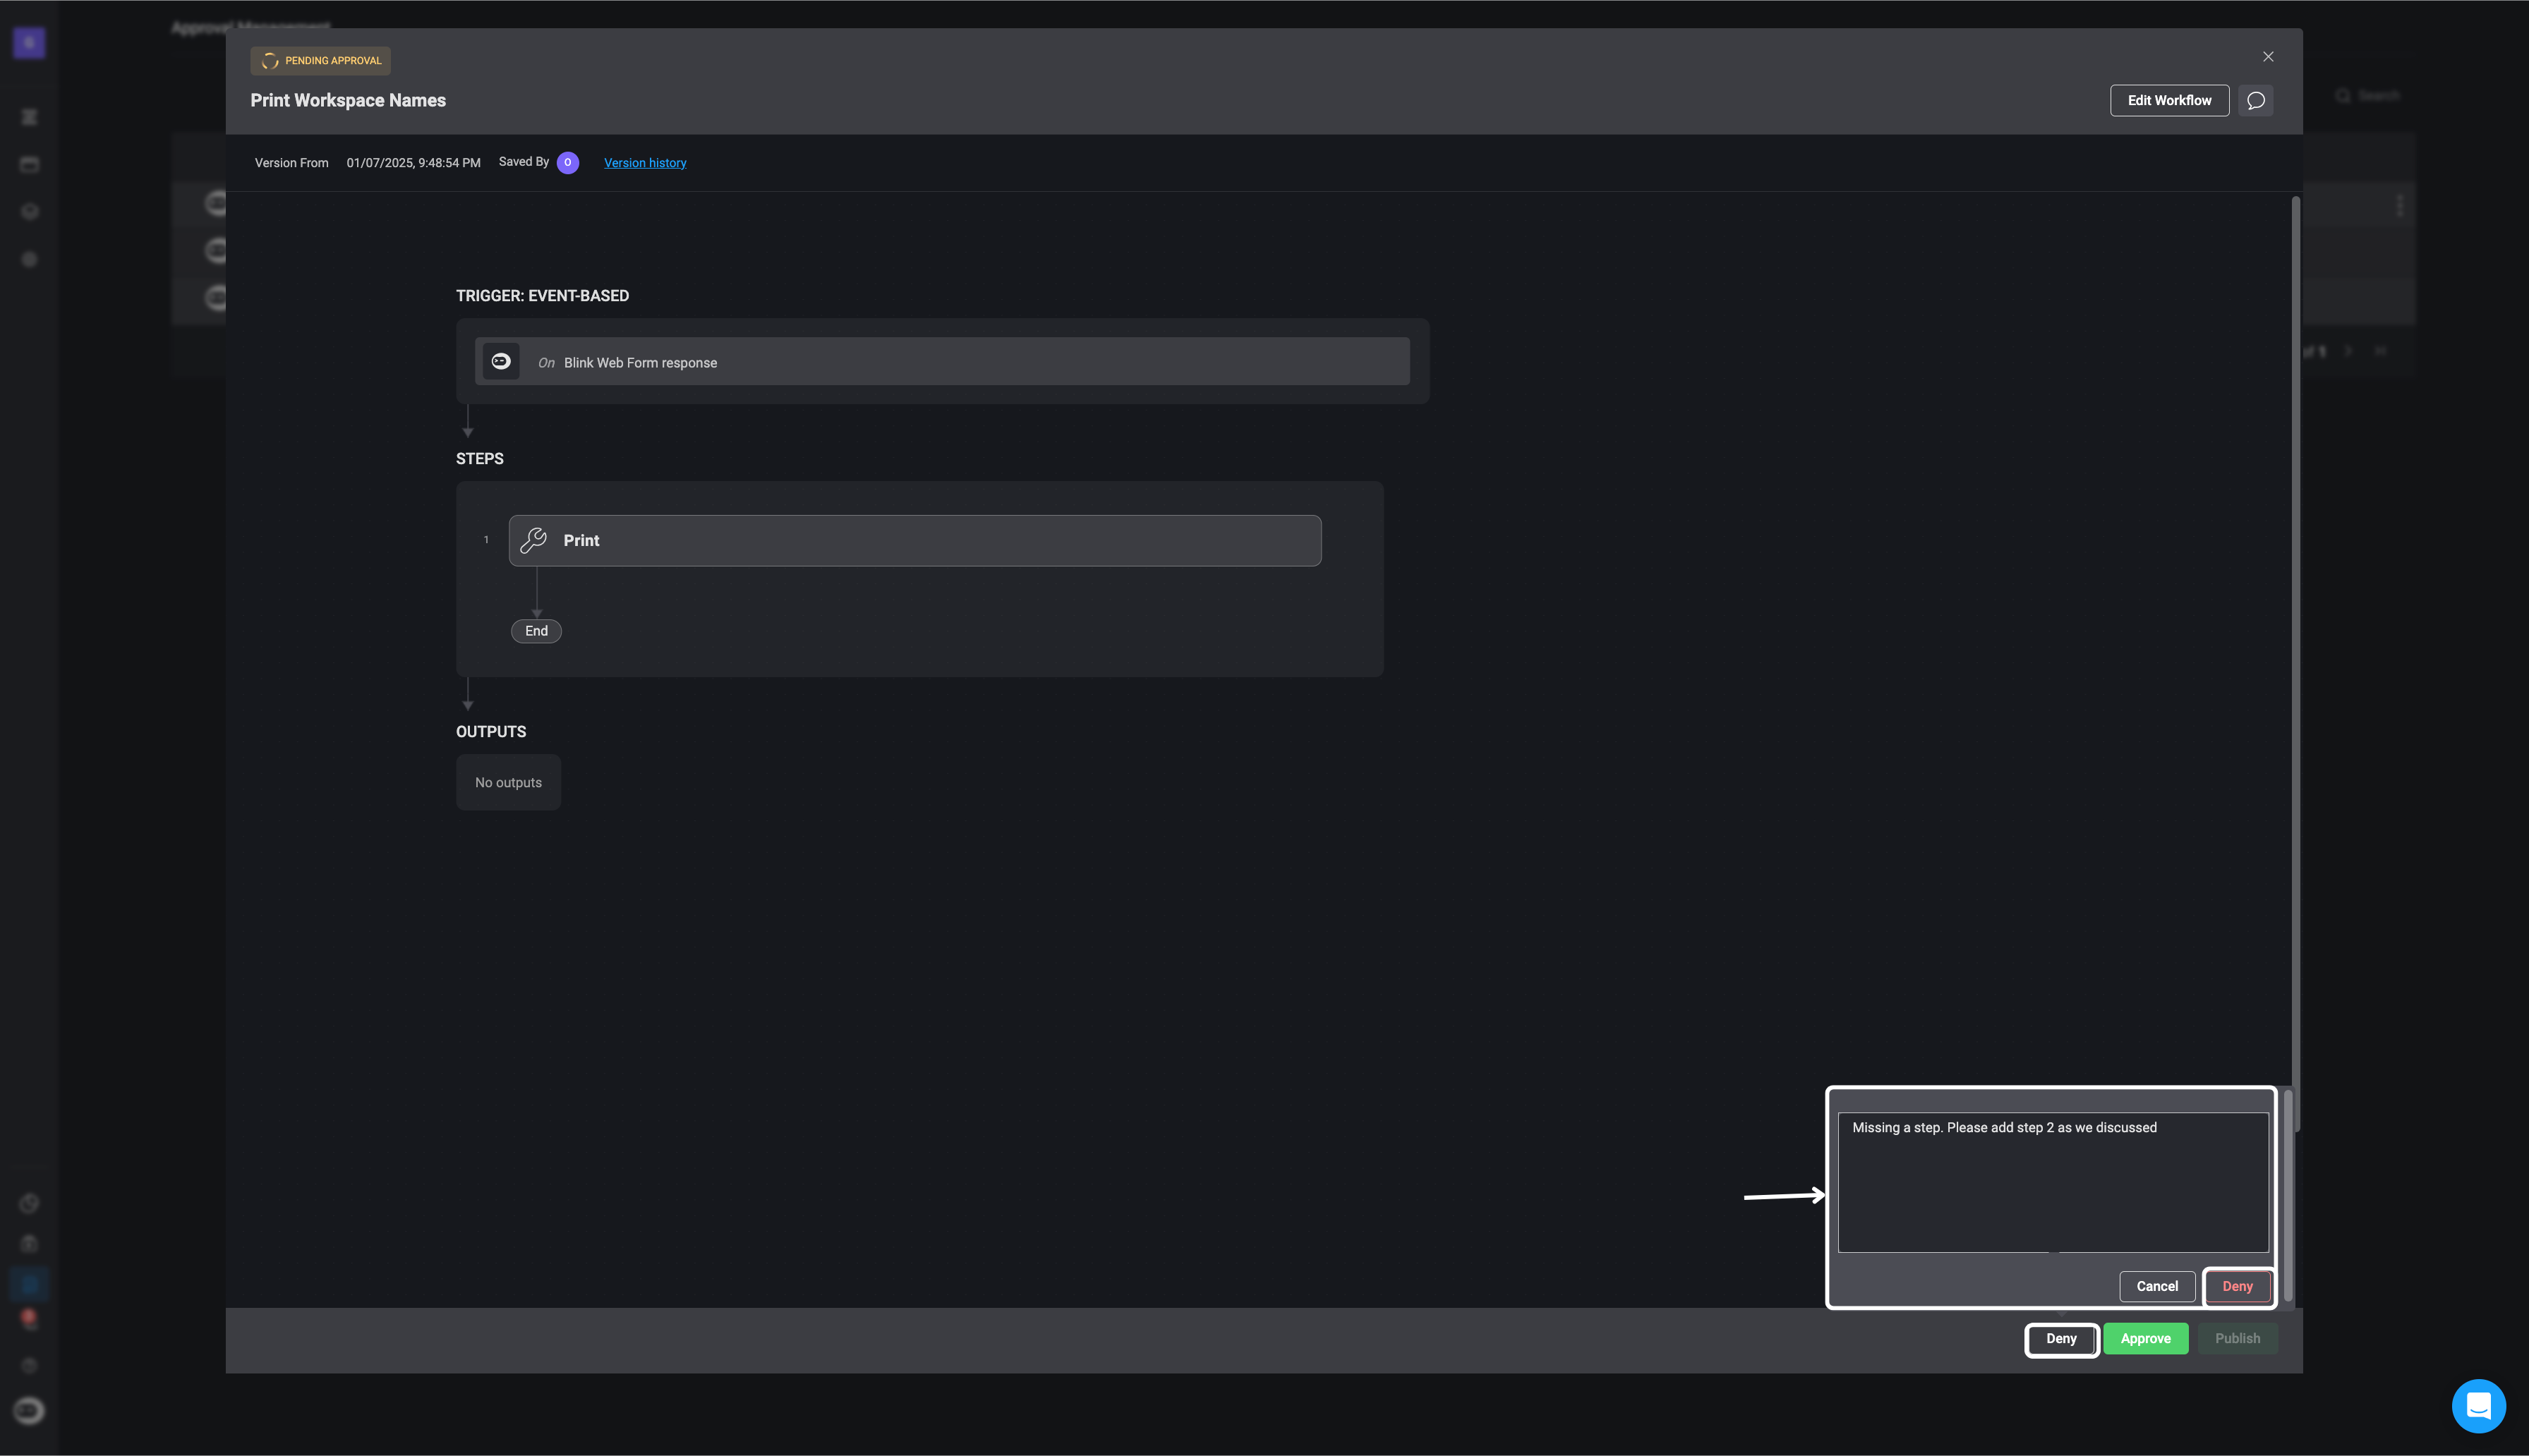
7
If you select ‘Approve’, a confirmation popup will appear where you can optionally add a note for the requester. Click ‘Approve’ to confirm your decision.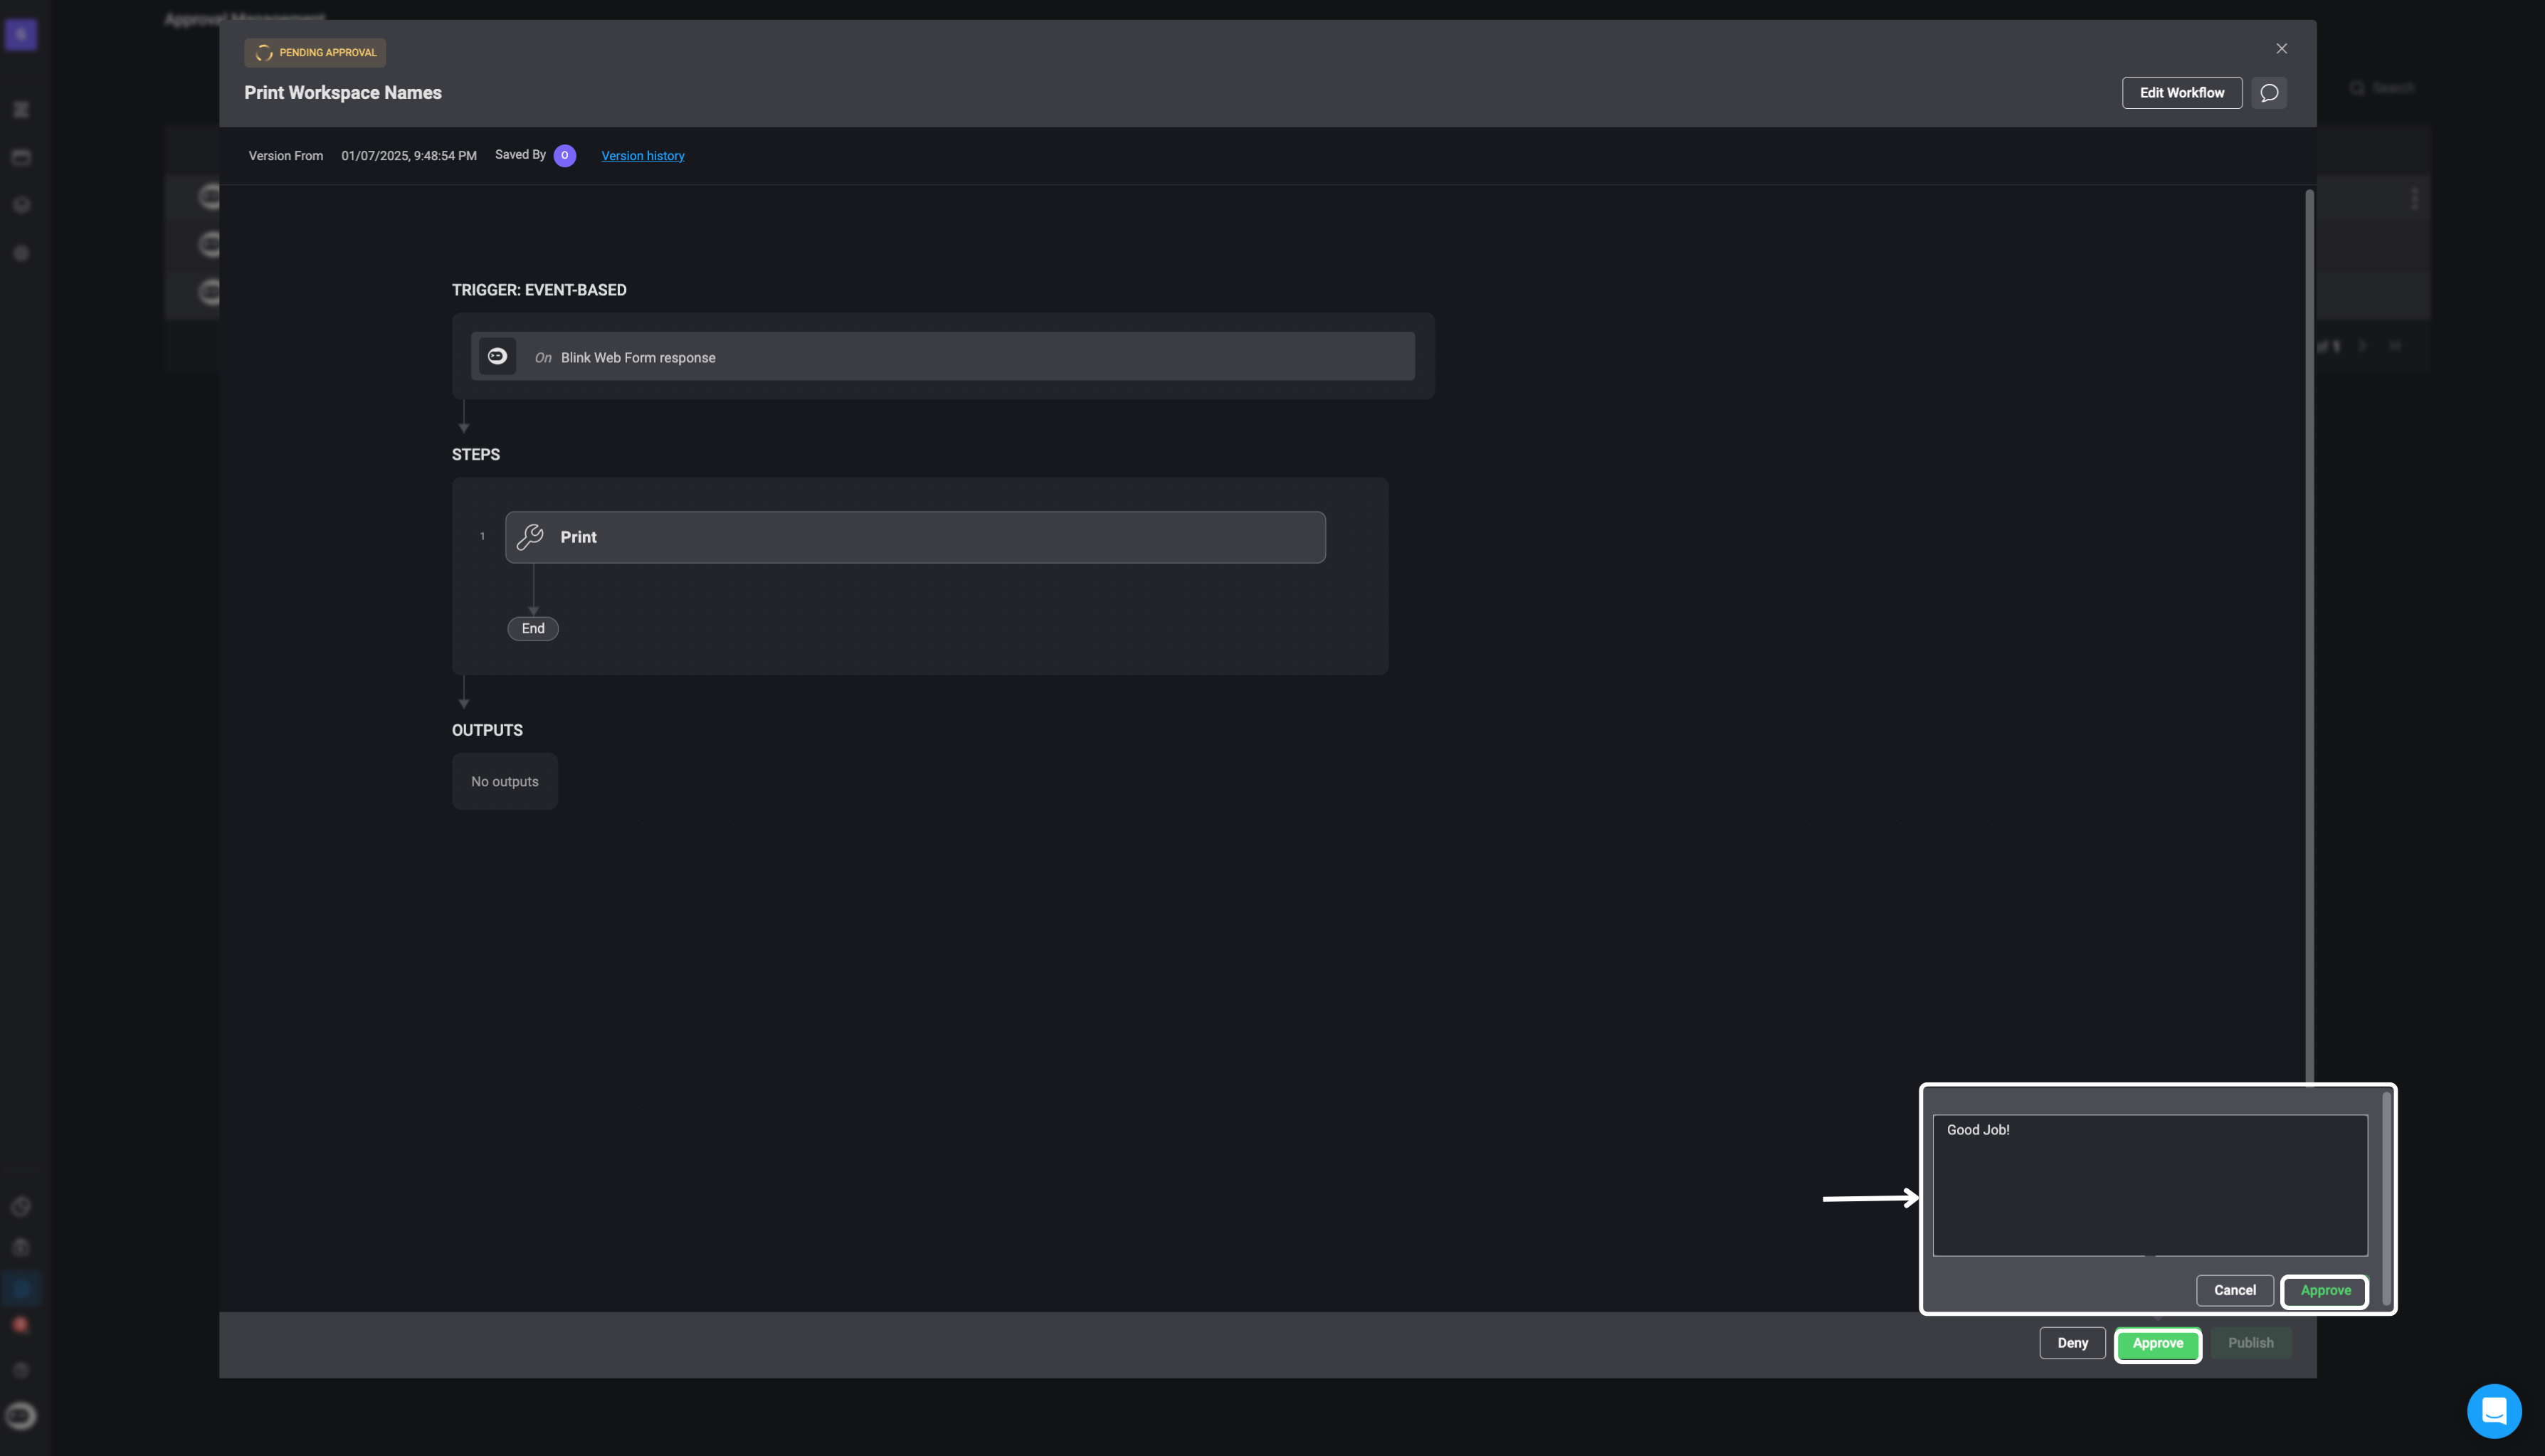
8
After approving the request, you can complete the process by clicking the ‘Publish’ button, which publishes the approved workflow to your workspace.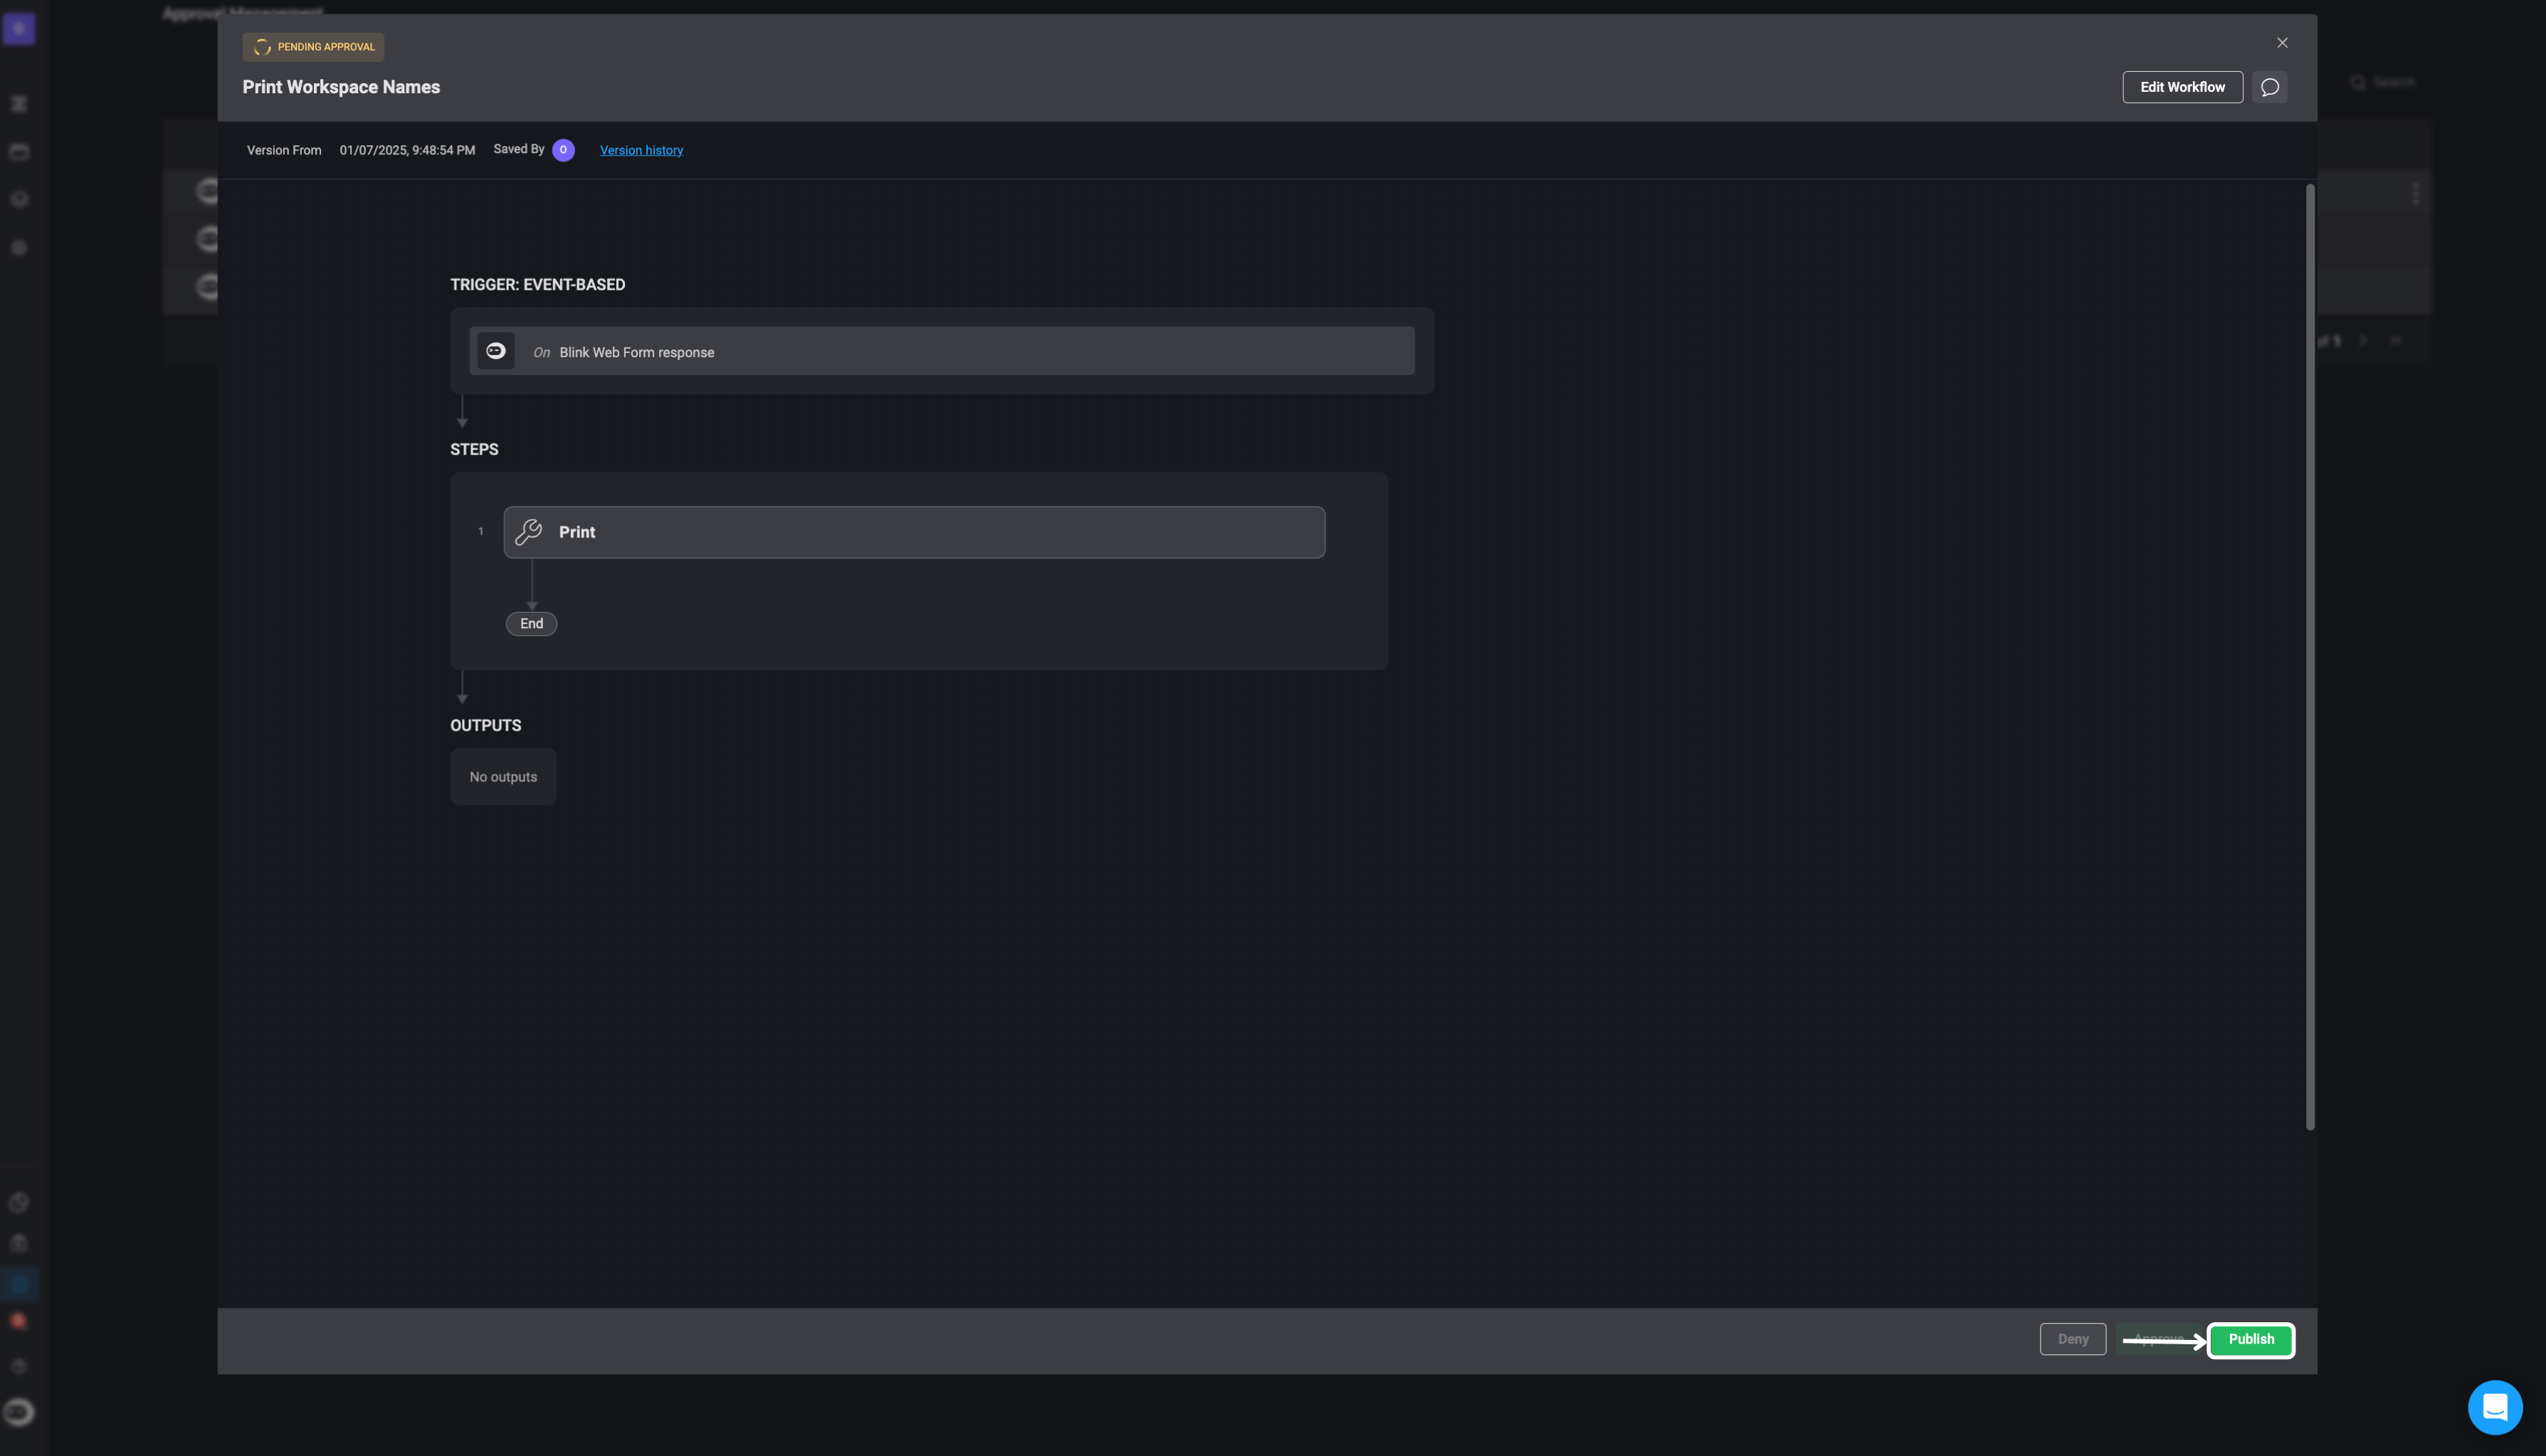
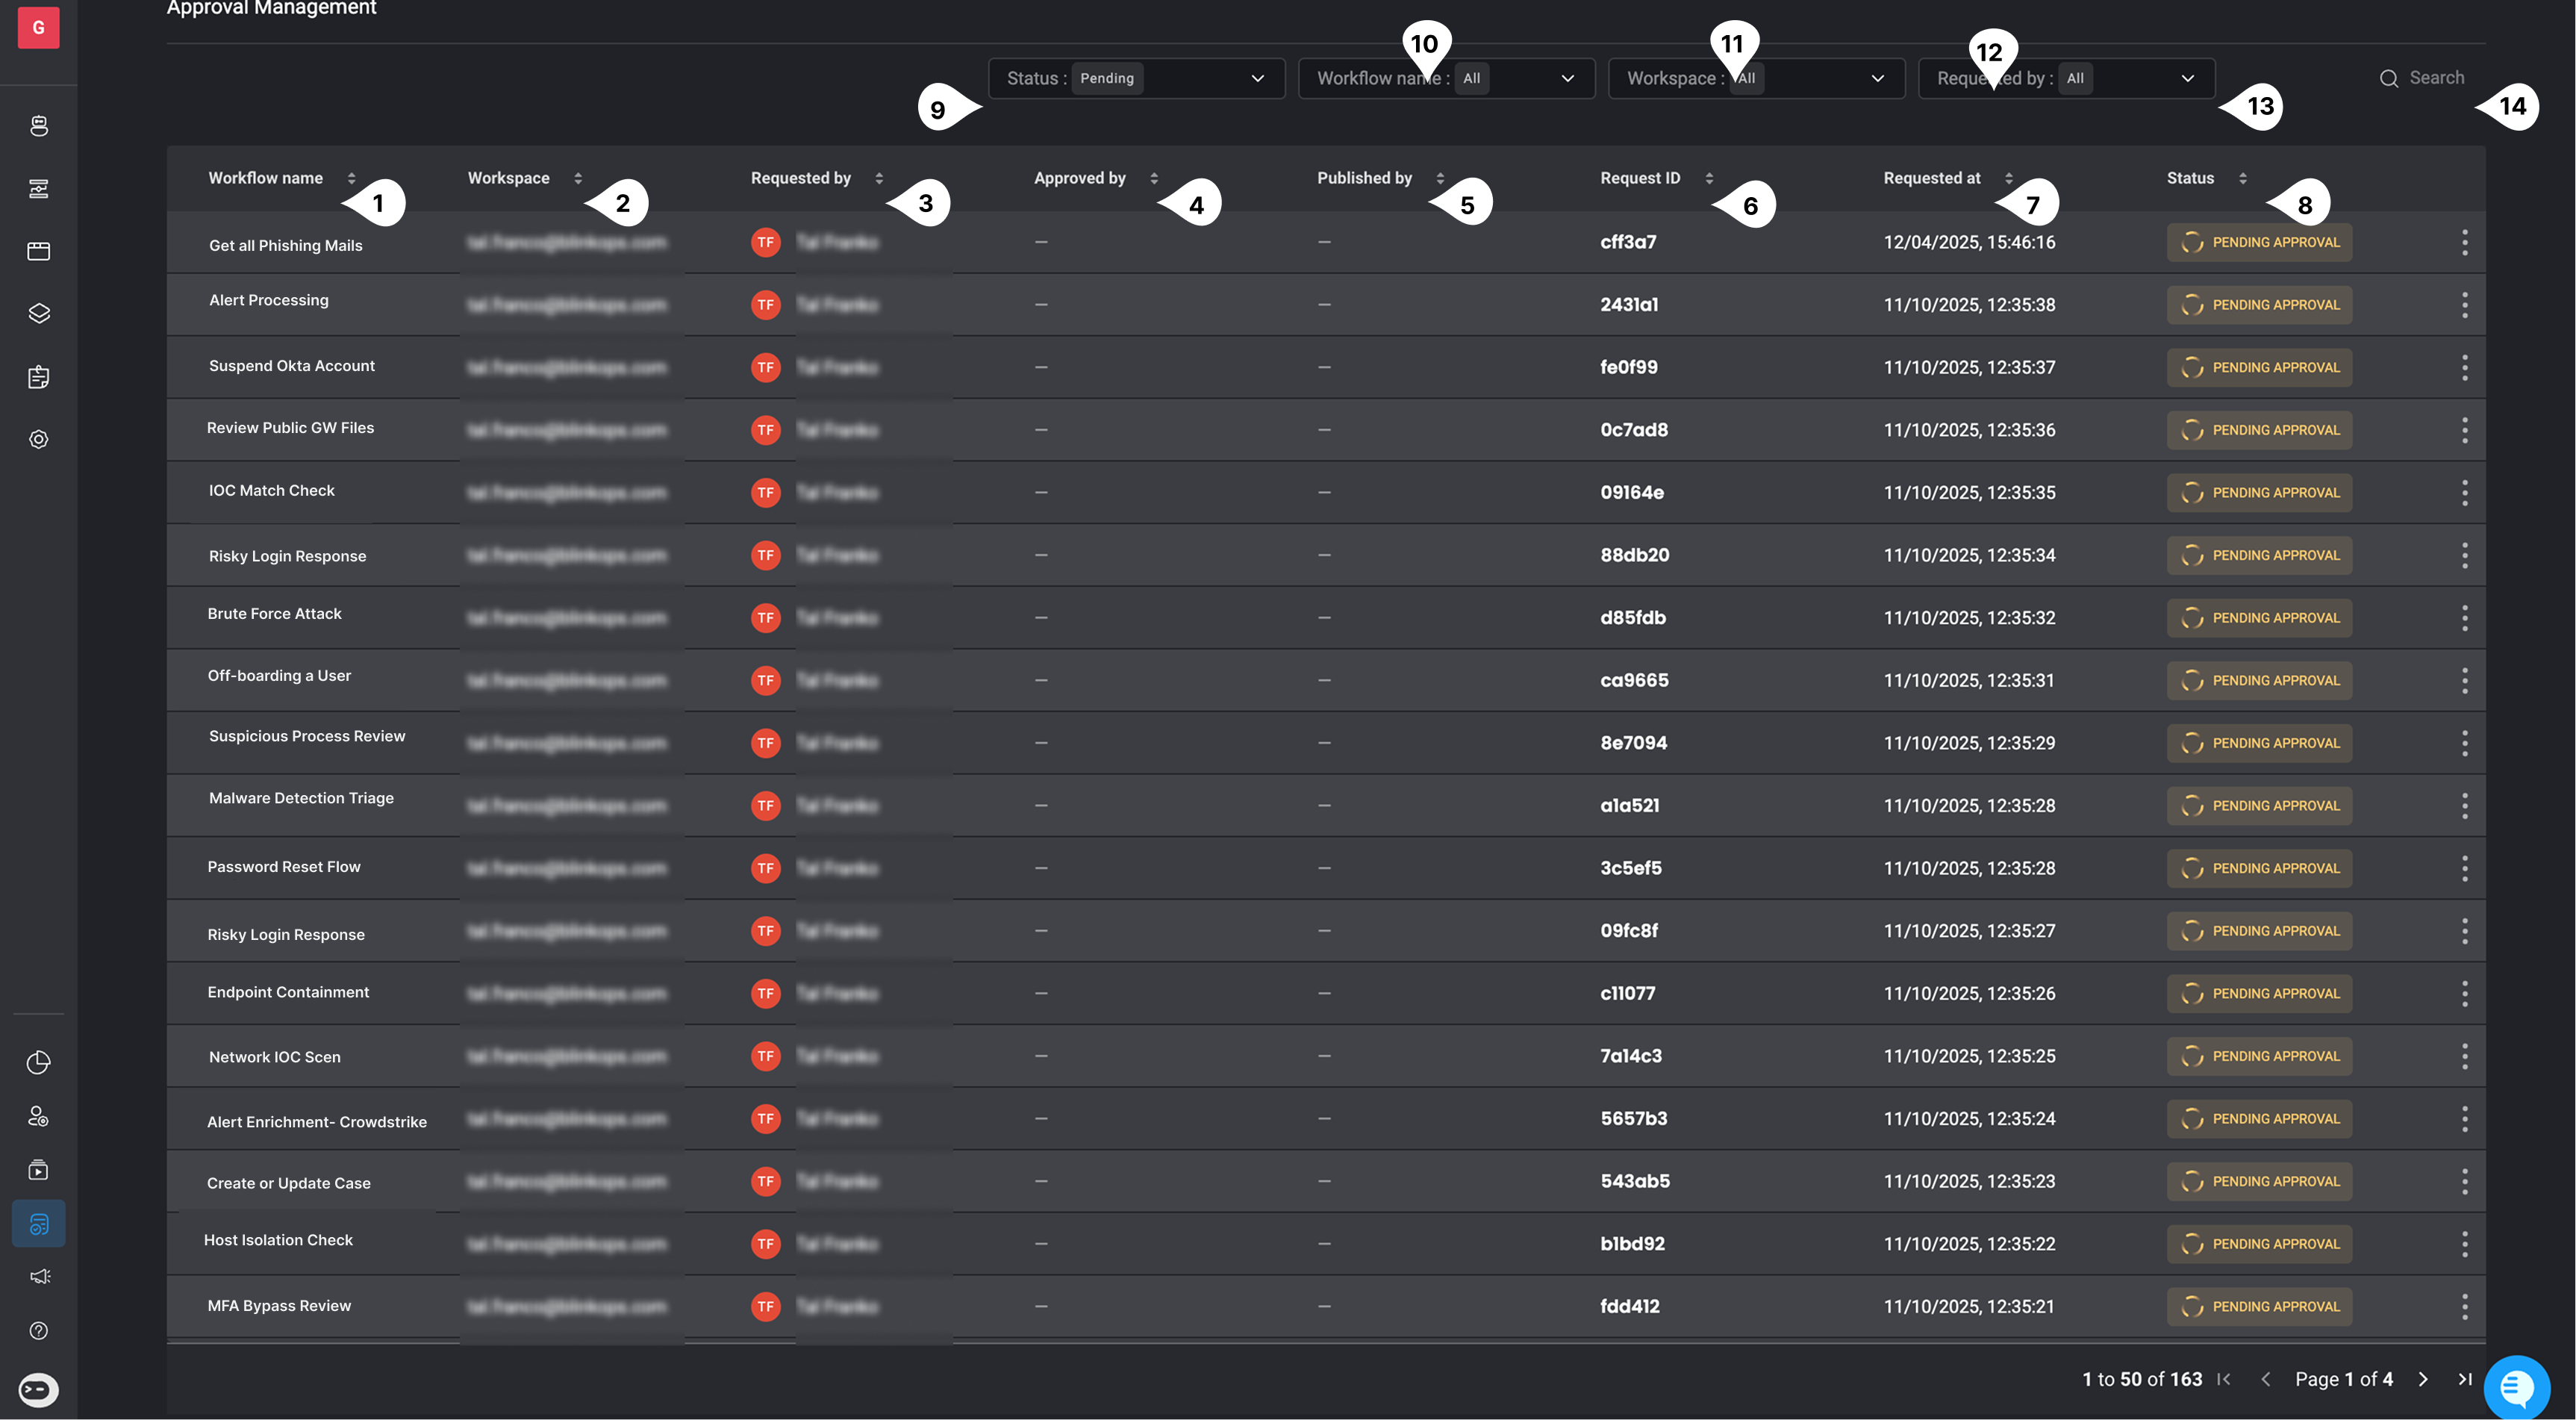
Approval Management as the Workspace Owner
By default, the “Approval Management” page is pre-filtered to show only requests that are still relevant for action:- Pending (waiting for approval)
- Approved
- Denied
Note:
- The Approval Management page is on the tenant level, therefore if you are the owner of a few different workspaces you can see all the publish approval requests from all your workspaces.
- You can also deny or approve the request from the ‘Approval Management Table’ by clicking the icon and selecting a request action.