

Prerequisites
- Kubernetes Cluster: You need to have a Kubernetes cluster up and running. This can be an on-premises cluster or a cloud-based Kubernetes service like Amazon EKS, Google Kubernetes Engine (GKE), or Azure Kubernetes Service (AKS).
- Blink User: You must have either the Owner role,Contributor role, or a custom role that includes both the
runners:viewandrunners:editpermissions. To learn more about role-based access and permissions, see the User Roles documentation. - (Optional)-SSH Access to Kubernetes Cluster: If you need to manually manage your Kubernetes cluster or troubleshoot any issues, you should have SSH access or appropriate permissions to interact with the cluster.
Deployment Guide
1
Navigate to the Runners page
In the left-hand navigation bar, select Runners. Then, click the New Runner button in the top-right corner to open the configuration dialog.
2
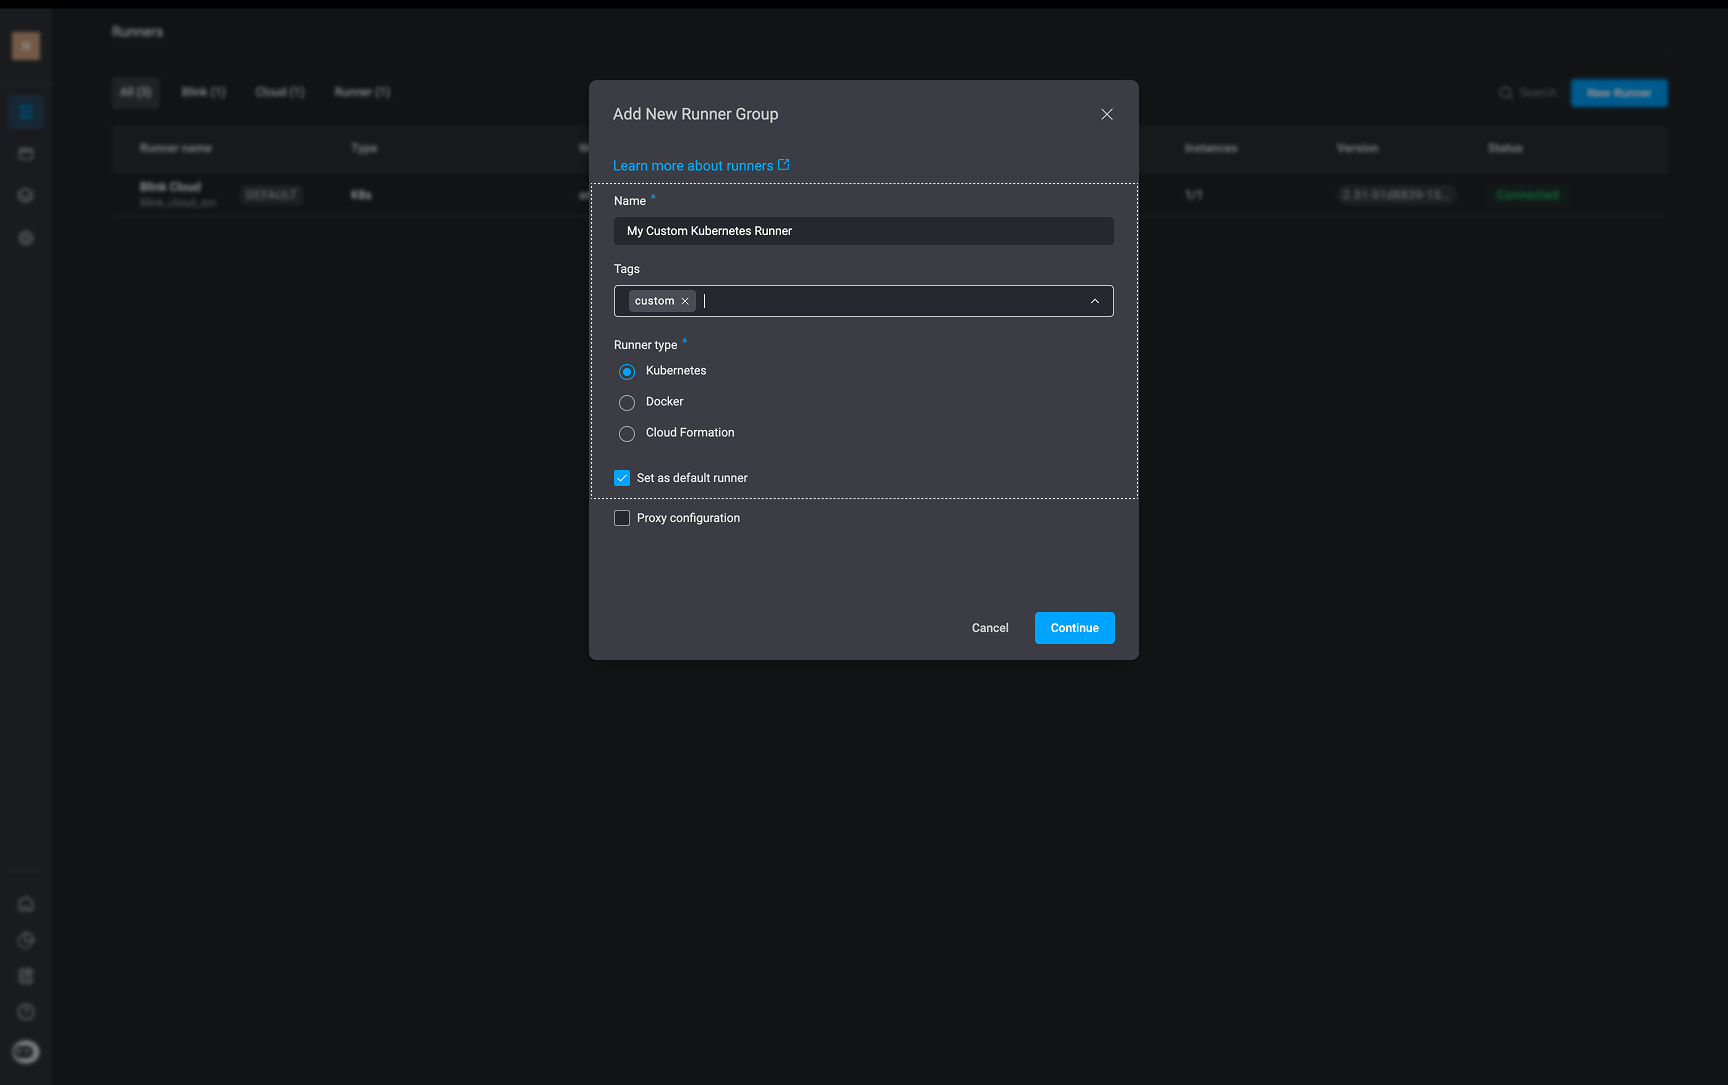
Configure the Runner:
- Runner types: Kubernetes
- Name: Enter a name for the Runner group.
- Tags: Add or create tags (optional).
-
Set as default runner: Check this box to set this Runner group as the default. When enabled, any workflows that do not explicitly specify a Runner group will automatically be assigned to this one.
-
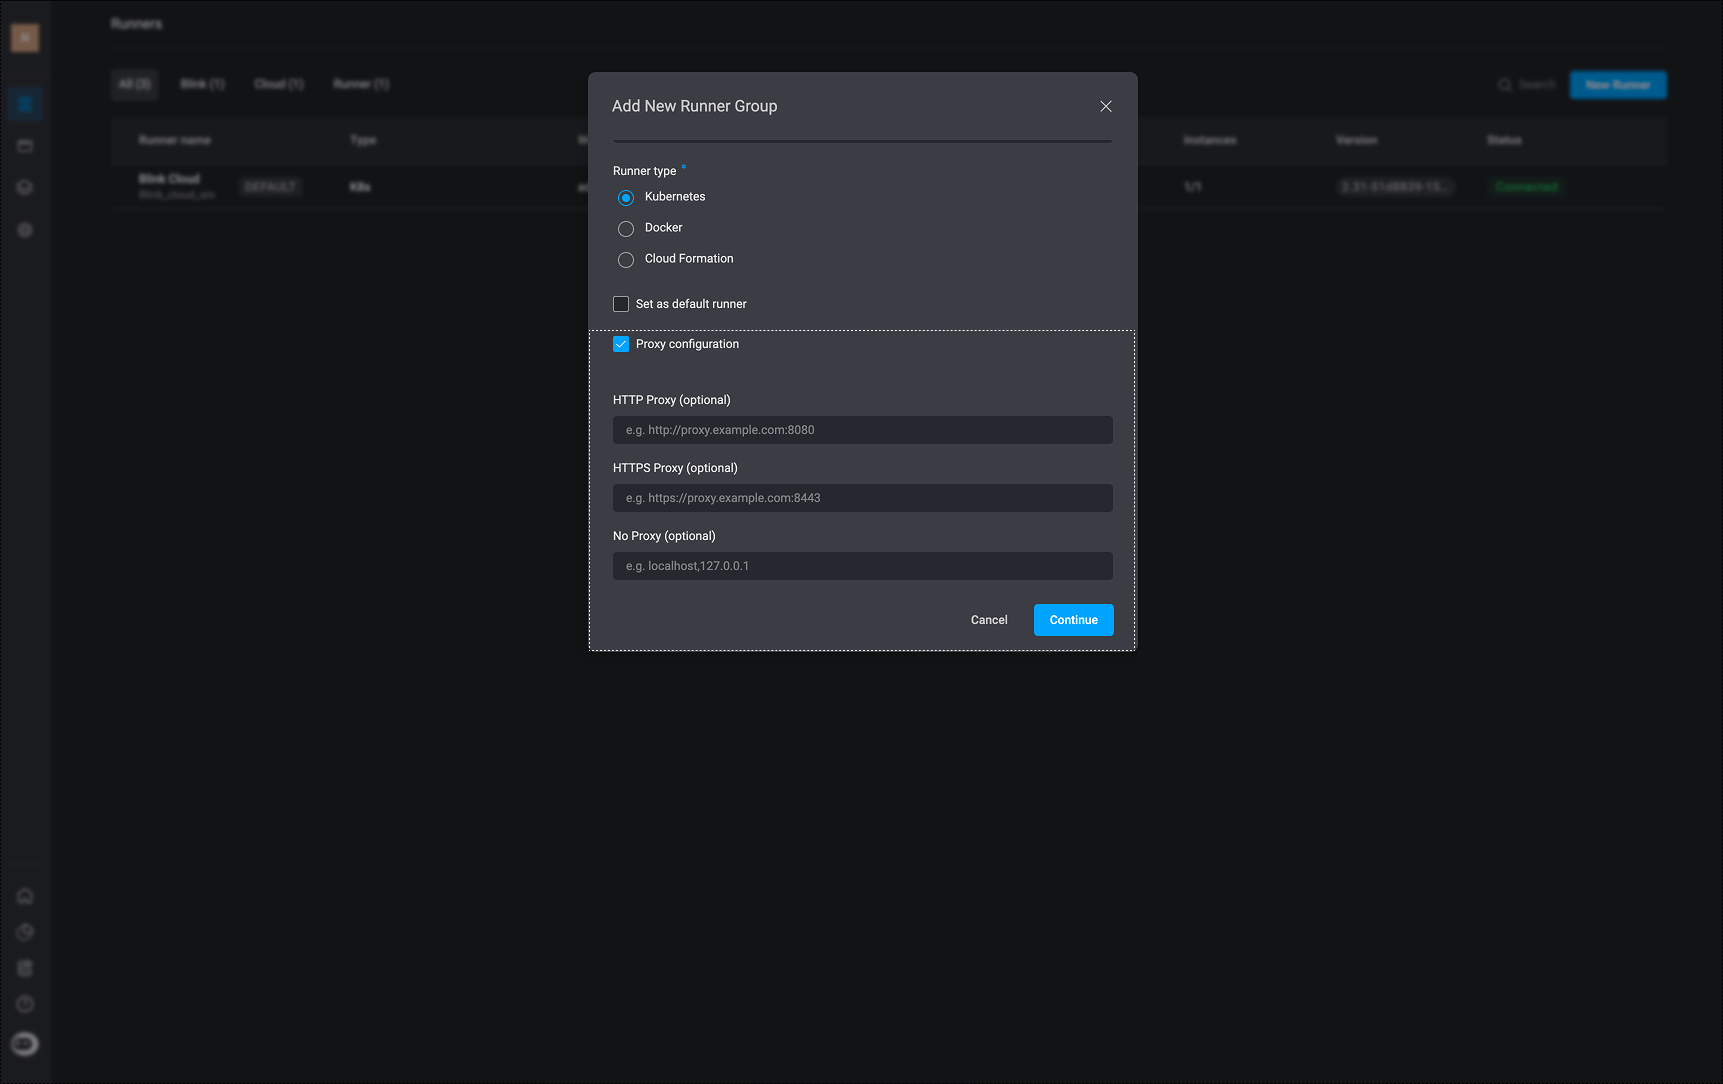
Proxy Configuration: When enabled, it allows you to configure a proxy server that all runners in the runner group will use for outbound network traffic. This enables secure, controlled access to external resources through your organization’s network.
- HTTP Proxy (optional)- eg.
http://proxy.company.com:8443 - HTTPS Proxy (optional)- eg.
https://proxy.company.com:8443 - No Proxy (optional)- eg.
localhost,127.0.0.1Note: If you enable ‘Proxy Configuration’ and configure the proxy settings, they will automatically be included in the installation command shown in the next steps.
- HTTP Proxy (optional)- eg.
3
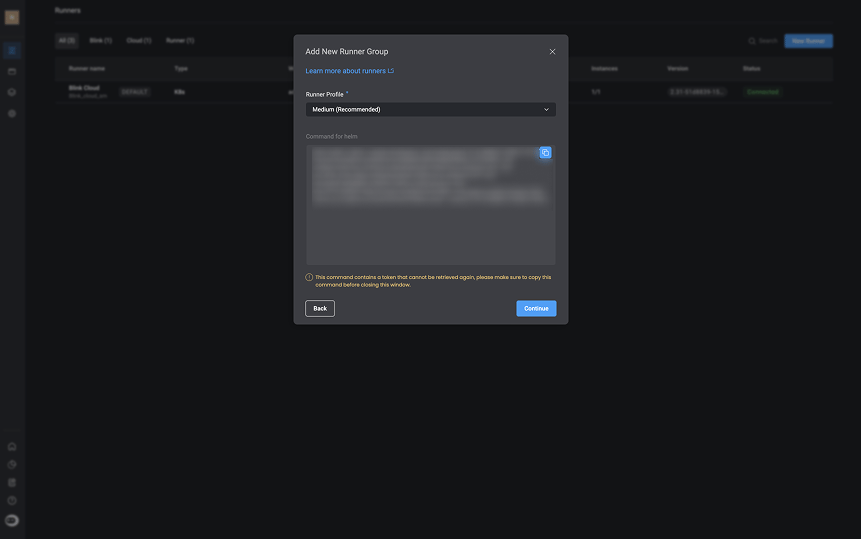
Choose a Runner Profile, Copy and Save the Command
- Runner Profile: Choose between the following runner profile options: Low, Medium, High or Custom. This allows you to better manage your resource containers and pods. To read more about it you can visit resource container links.
- Click the button in the top-right corner to copy command needed to install the Runner in your Kubernetes environment.
Plugin Resource Control
Low Runners Profile Request-Limit Table
Low Runners Profile Request-Limit Table
Medium Runners Profile Request-Limit Table
Medium Runners Profile Request-Limit Table
High Runners Profile Request-Limit Table
High Runners Profile Request-Limit Table
Custom Runners Profile Request-Limit Table
Custom Runners Profile Request-Limit Table
If you choose the ‘Custom Option’ as your Runners Profile, you will be able to enter your own Request Units and Limits Units. For Example: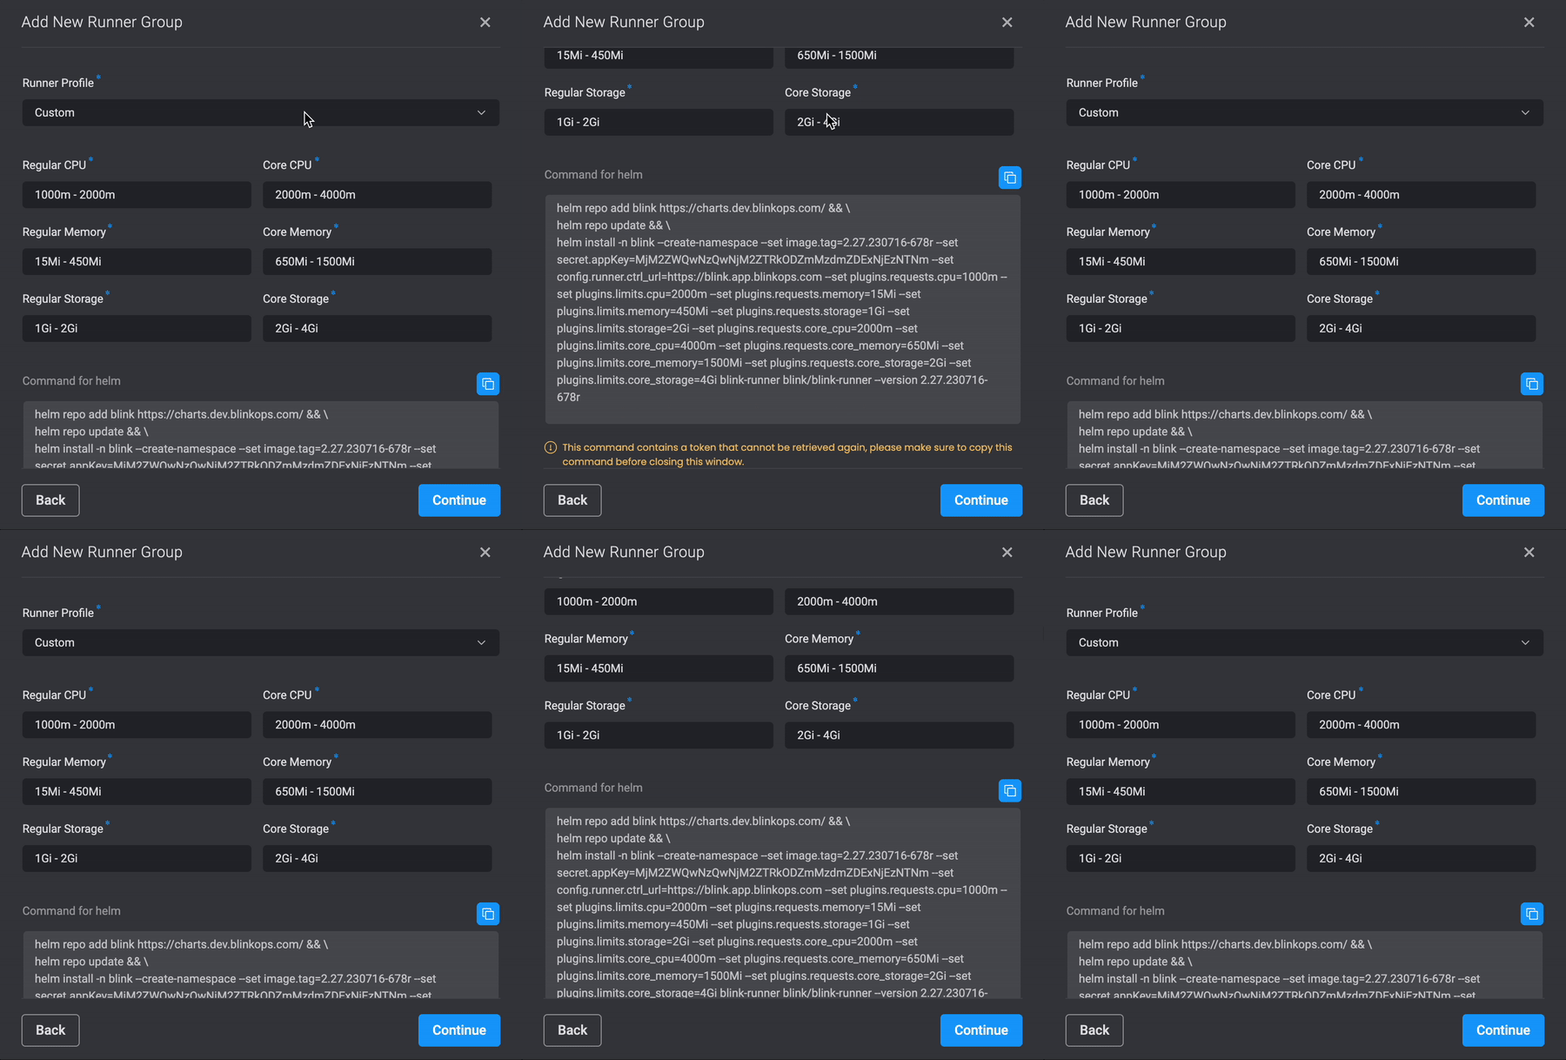
Configuring Runner Resource Limitations
Set Pod Request
Set Pod Request
Use the following flags when deploying the Runner to set pod requests:
Set Pod Limits
Set Pod Limits
Use the following flags when deploying the Runner to set pod limits:
Scale with Kubernetes Runner
In Kubernetes, you can take advantage of the built-in ‘Horizontal Pod Autoscaler’ (HPA) to automatically scale your workloads. Instead of manually specifying a fixed number of pods, you define the minimum and maximum pod count, and Kubernetes adjusts the number based on resource usage. This approach works seamlessly with both runners and plugins, allowing you to scale them dynamically based on demand.1
Enable Horizontal Pod Autoscaler (HPA) for the Kubernetes Runner deployment by including the following addition in the helm command:
--set hpa=true.2
Configure the Horizontal Pod Autoscaler (HPA) for the Kubernetes Runner deployment by including the following addition in the helm command:
Scale Plugins with Kubernetes Runner
Note: This configuration currently does not affect core plugins, but we are working on it and support will be available soon.
1
Enable Horizontal Pod Autoscaler (HPA) for the plugins deployed by the runner using the following addition to the helm command:
2
Configure the Horizontal Pod Autoscaler (HPA) for the plugins deployed by the runner using the following addition to the helm command:
Related Articles
Deploying a Runner
Learn how to deploy a Blink Runner to execute workflows securely within your environment.
Deploying a Runner with CloudFormation
Guide to installing, configuring and deploying a Runner using CloudFormation
Deploying a Runner with Docker
Guide to installing, configuring and deploying a Runner using Docker
Configuring a Runner Group
Deploy multiple on-prem Runners for high availability, parallel execution, or workload isolation.